Adding vlan properties – Brocade Network Advisor IP User Manual v12.1.0 User Manual
Page 927
Brocade Network Advisor IP User Manual
873
53-1002947-01
Port VLANs
29
Adding VLAN properties
The Add VLAN dialog box has two tabs: Ports and Properties. The VLAN properties vary for different
products, for example:
•
When an IOS VLAN is selected, the Name, QoS, Spanning Tree and Router Interface fields and
Transparent Flooding enable check box display.
•
When a DCB VLAN or product is selected and moved to the Products/VLAN list, the Name and
Admin Status fields and the FCoE check box display. All the fields displayed for DCB products
are read-only.
To add VLAN properties, complete the following steps.
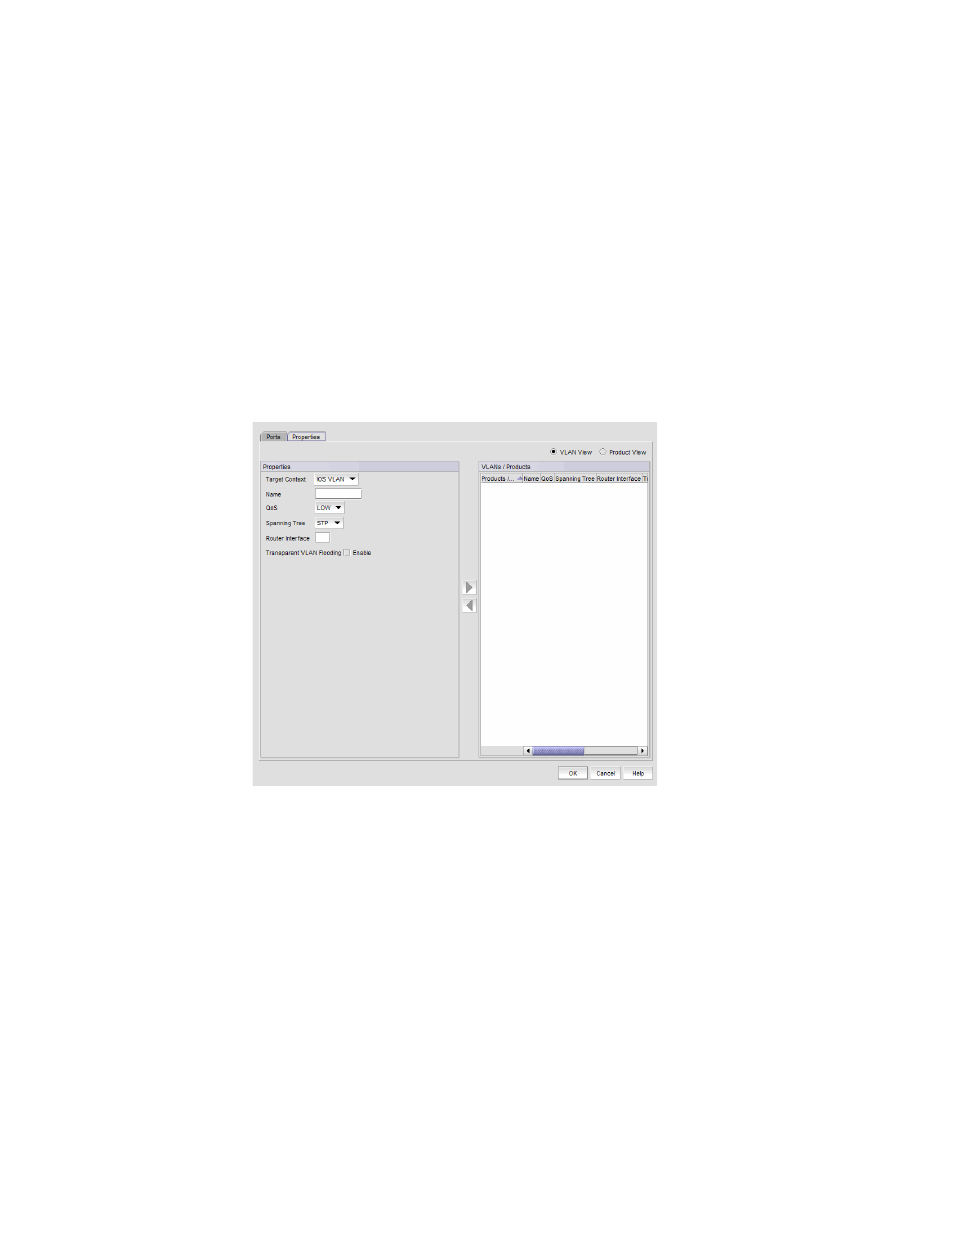
1. On the Add VLAN dialog box, click the Properties tab.
The Add VLAN dialog box — Properties tab, shown in
, displays.
FIGURE 316
Add VLAN dialog box — Properties tab
2. Click the VLAN View option to view the products to which the VLANs are to be deployed, or click
the Product View option to display the VLANs that are to be deployed to that product.
3. Select the Fabric OS (FOS) VLAN, IronWare (IOS) VLAN, or Network OS (NOS) VLAN type from
the Target Context list. You must select only one VLAN type. If multiple VLAN types are selected,
the target context becomes the default and an error message displays.
4. Enter the following information:
For IOS VLAN Properties:
-
Name — Displays the name of the VLAN, which is editable.
-
QoS — Select a QoS level from the list.
•
Select Low (None or 0) through High (7) for NetIron CES products. Select None for
NetIron CER and NetIron CES products if the product does not have VLAN priority
configured. (None applies only to NetIron CER and NetIron CES products.)