Set new pattern, Information, see – Ag Leader InSight Ver.8.0 Users Manual User Manual
Page 84
70
1. Choose a file selection option
From the GPS screen, select the Guidance tab, as shown at left.
Here you can select either Import, Export, or Remove All
Patterns. The import and procedures are explained below.
2. Select Guidance Pattern
To import a guidance line from your external storage card, press
the Import button. A window will pop up and display the guidance
patterns on the card. Highlight the pattern you wish to import and
press Accept.
3. Select Field
Choose the Grower and Field to import the pattern into and press
Accept.
4. Export Guidance Pattern
To export a pattern, either choose the grower and field you would like to export patterns from, or select the
Export All Field Patterns check box. This selection will export all patterns in the display. Press Accept.
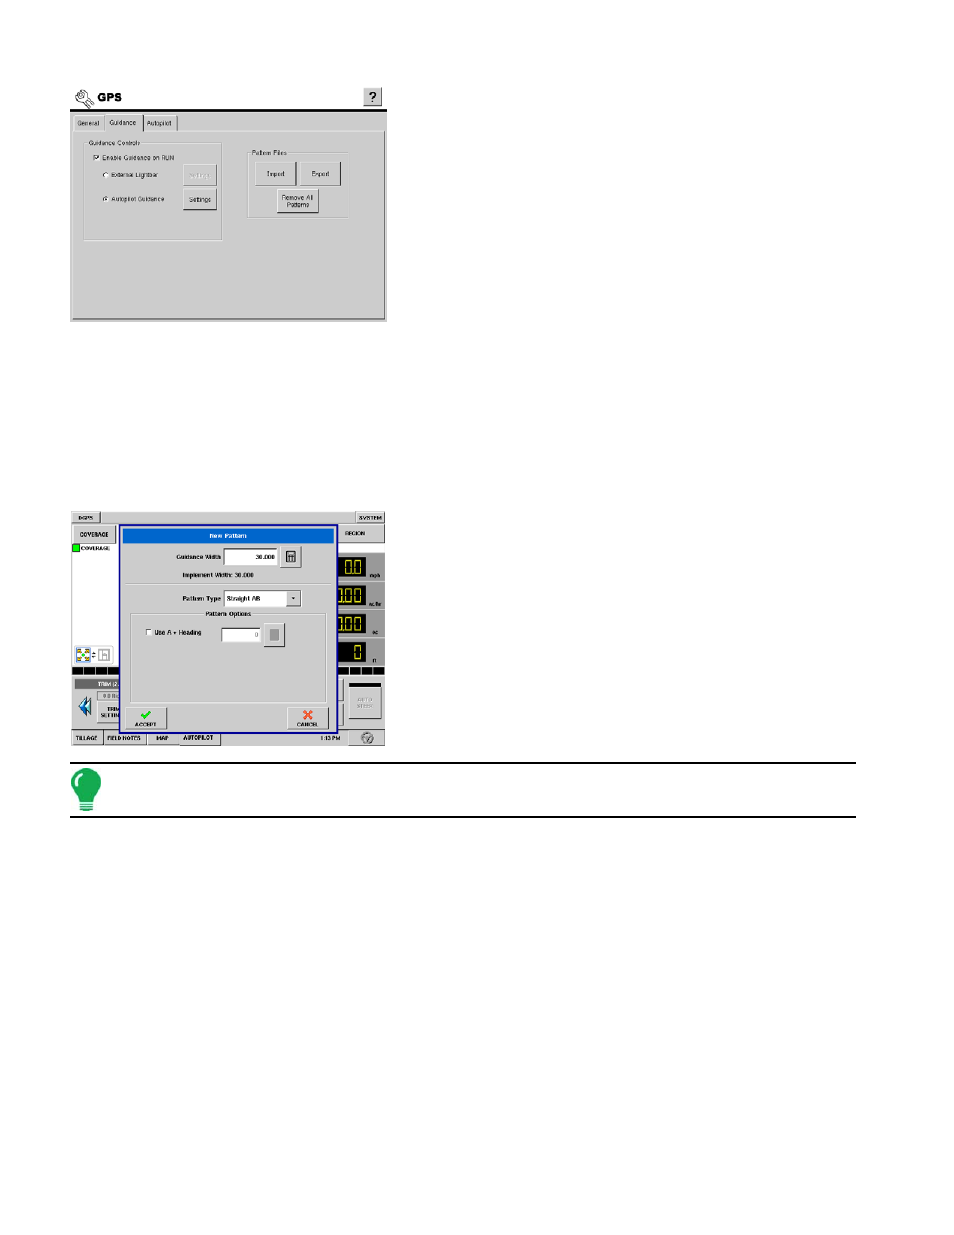
Set New Pattern
You can create a new pattern for a field by using the following procedure to set an AB pattern.
1. Choose new pattern
At the Autopilot tab on the Run screen, press the New Pattern
button. The New Pattern window appears, as shown at left. Select
the pattern type in the drop-down menu. Pattern types include:
• Straight AB Line
• A+ Pattern
• Pivot
• Adaptive Curve
• Identical Curve
Note: If you would like to use an A+ Heading, check the check box and use the number pad to enter in the
heading (in degrees). Then press Set A (you do not need to set the B point, as this is done automatically).
2. (Optional) Enter Guidance Width
At the top of the New Pattern window, a default Guidance Width is shown, based on the Implement Width that
you specified in Implement Configuration.
If you wish to change this Guidance Width, enter the new number using the numeric keypad.
When finished, press Accept.
3. Set the A point
To set the A point, press the Set A button on the Autopilot tab. You must now drive the vehicle for the distance of at
least 100 feet before you can set the B point. (The Set B button will not highlight until you have driven that distance).
4. Set the B point
After setting the A point, you will see a message flash at the center of the lightbar stating "Need B". You
must now set a B point.
After driving at least three swath widths, the Set B button appears, allowing you to Set the B point.
Set the B point by pressing the Set B button. You now have created an AB line.