Seed tube monitor module, Seed tube monitor module configuration, Should see – Ag Leader InSight Ver.8.0 Users Manual User Manual
Page 140: Seed tube monitor module configuration” on, Onitor, Odule
126
a. Here you must select either Single Variety or a split planter configuration based upon the number of drives
that you entered in Step 6. In that instance, we entered three drives, so here the display gives the option of
entering either a Single Variety or a Three-Variety Split.
b. Press Next to continue.
9. Add Additional Application Equipment (Optional)
a. This is an optional step. If you would like to apply another product with your selected implement, or add an
additional implement for the application of another product, press the Add button.
b. Press Next to continue.
Note: For help with adding or creating an additional equipment configuration see
Equipment Configuration” on page
.
10. Select Ground Speed Source
a. Select your ground speed source. If you will be using GPS as the primary you will need to select a
secondary source.
b. Press Next to continue.
11. Enter Suggested Name for Configuration
a. Use the keyboard button to edit the name of the configuration.
b. Press Finish to complete the setup process.
S
EED
T
UBE
M
ONITOR
M
ODULE
The Seed Tube Monitor Module provides population monitoring for DICKEY-john seed tube sensors
used on several different brands of planters. If you have purchased the Seed Tube Monitor Module, you
should configure it in the following order.
1. STMM Configuration procedure. See procedure below.
2. Press the Seed Monitor Setup button on Implement Tab. This summons the Seed Monitor Setup
window, where you may adjust Sensor Configuration and Alarms, if necessary). See
as well as
“Seed Tube Sensor Configuration” on page
and
3. Seed Monitor Options at Run Screen. See
“Seed Tube Monitor on Run Screen” on page
.
S
EED
T
UBE
M
ONITOR
M
ODULE
C
ONFIGURATION
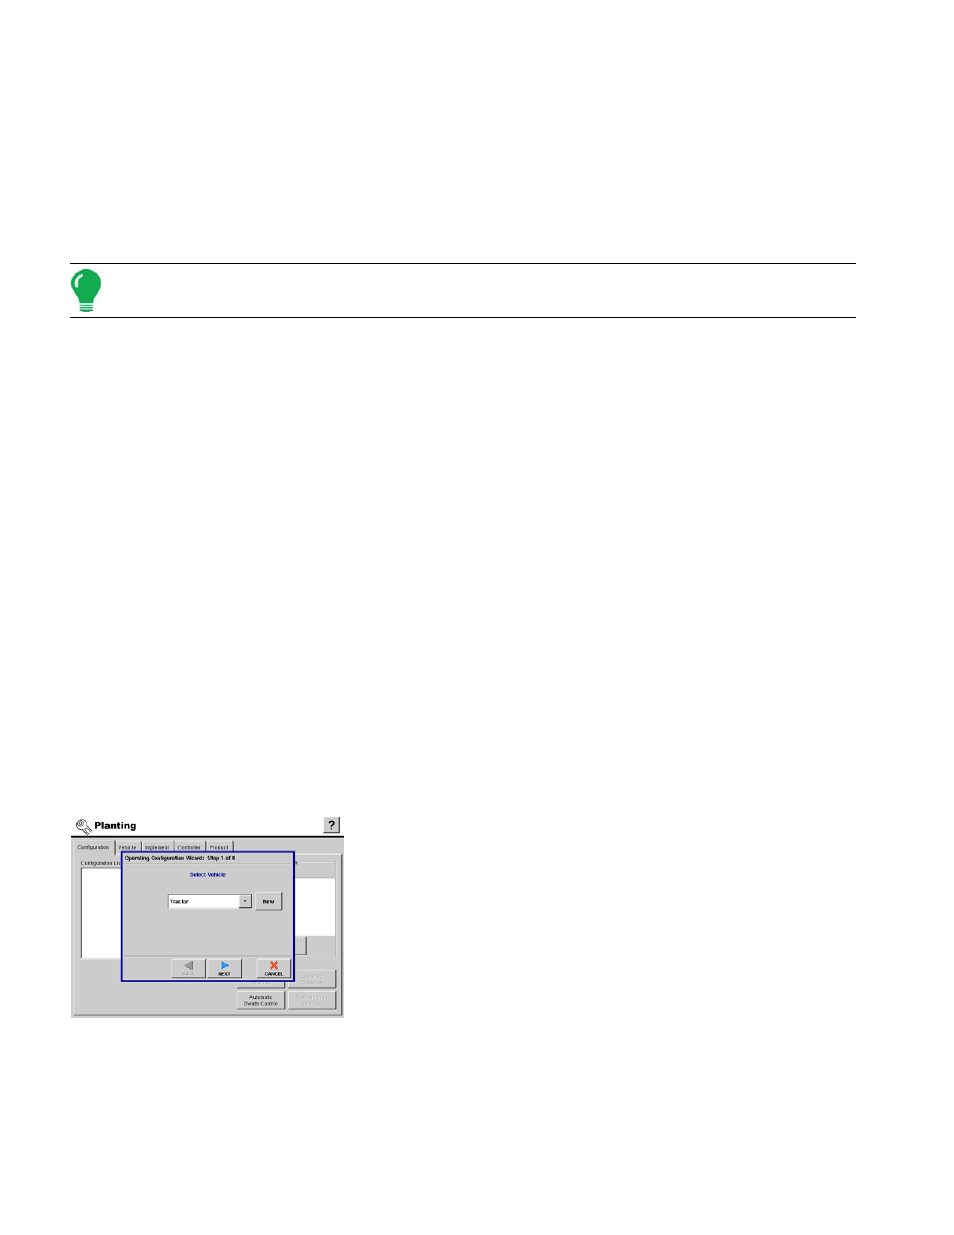
At the Configuration Tab, press the Add button and the Operating
Configuration Wizard appears.
1. Select Vehicle
a. Select an existing Vehicle from the drop-down menu, or press the Add
button and create a new vehicle with the Vehicle Setup Wizard.
b. Press Next to continue.
2. Select Implement
a. Using the drop-down box, select the implement you would like to use in this configuration. If there are no
implements in the list, press New.