Ag Leader InSight Ver.8.0 Users Manual User Manual
Page 169
155
P
LANTING
• Before beginning a calibration, make sure that you have primed the seed meter. For more information, see
“Priming the Stepper Seed Rate Meter” on page
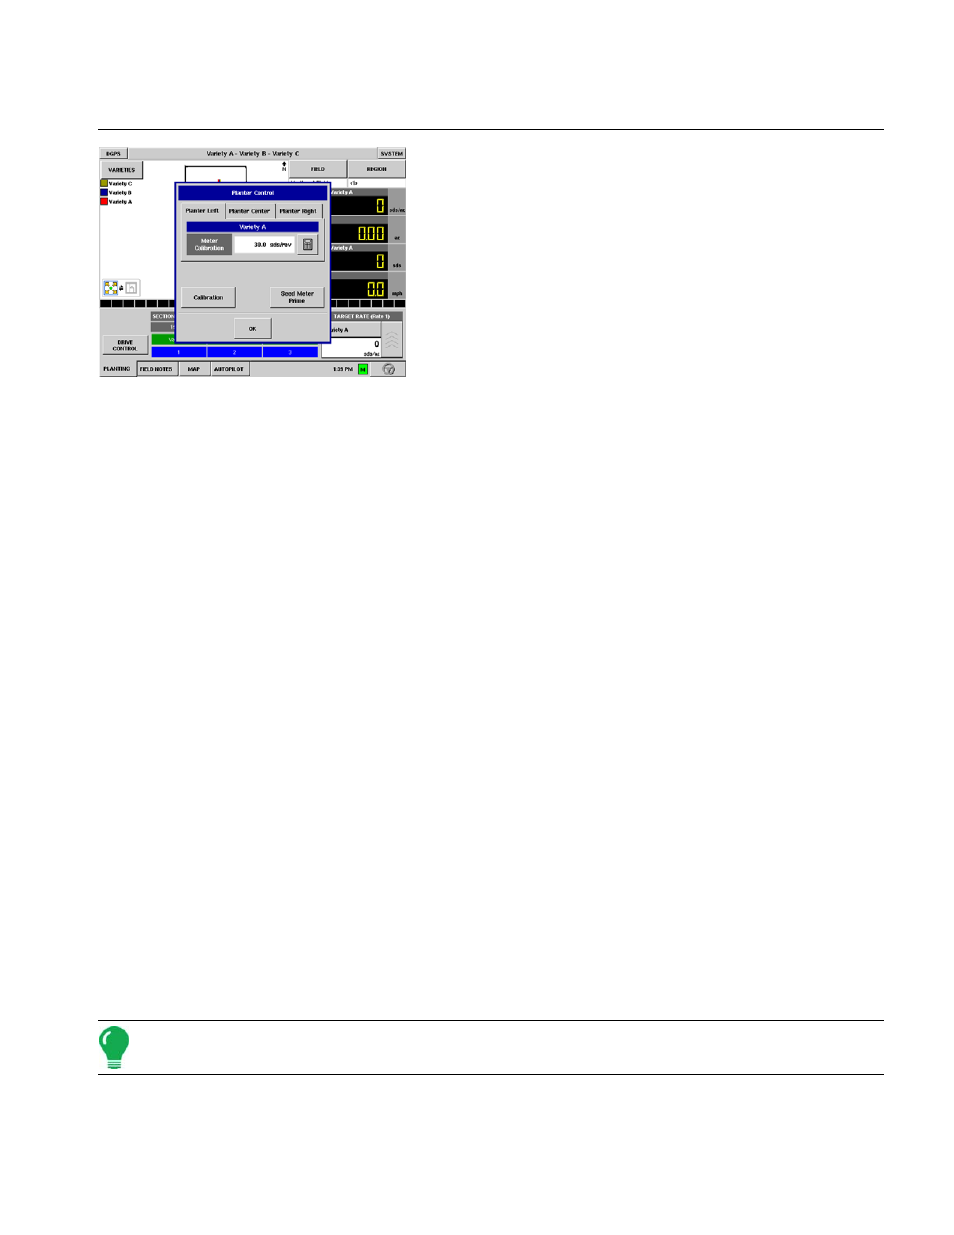
To begin, press the Drive Control button on the Run screen.
The Planter Control window appears.
1. Press the Calibration button.
a. Press the Calibration button.
2. Acknowledge the Warning
a. A warning appears, stating the following:
• “Maintain a safe distance from the planter during the calibration routine. The planter should be lowered
near the ground with the seed meter fully charged with seed and all necessary fans and/or auxiliary
metering devices on.”
b. Acknowledge this warning by pressing OK.
3. Select Drive to Calibrate
a. Select the drive that you wish to calibrate.
b. Press Next to continue.
4. Enter Simulated Ground Speed
a. Enter the simulated ground speed for the calibration procedure.
b. Press Next to continue.
5. Enter Simulated Target Rate
a. Enter the simulated target rate of the calibration procedure.
b. Press Next to continue.
6. Press Start
a. Press the green-colored Start button to begin dispensing the seed.
7. Dispensing Seed
a. The seed meter turns for five revolutions. As the seed meter dispenses seed, the button will change its color
to red, and a message informs you that the seed dispersion is in process.
8. Seed Dispensing Complete
a. When the meter is finished dispensing seed, the button will change back to its original green color, and will
once again display the word Start.
b. Press Next to continue.
9. Enter Number of Dispensed Seeds
a. Use the numeric keypad to enter the number of dispensed seeds that you counted in Step 7.
b. Press Next to continue.
Note: The meter calibration will be calculated from the actual seed amount dispensed.
10. Calibration Complete
a. The calibration is complete. The meter calibration number appears in seeds per revolution.