Seed tube monitor module setup, Onitor, Odule – Ag Leader InSight Ver.8.0 Users Manual User Manual
Page 142: Etup
128
Complete the configuration procedure by continuing through the wizard by making selections regarding
controllers, additional equipment, and Ground Speed Source that is particular to your planting operation.
Note: After completing this configuration, in order for it to become active, you must perform an AutoConfig
procedure, which assigns individual rows to the appropriate pins on the Seed Tube Monitor Module. To do
this, first go to the Implement Tab, press on the Seed Monitor Setup button, and the Seed Monitor Setup
screen appears, as shown at
“Seed Tube Monitor Module Setup” on page
. Press the Sensor Configuration
button and the Sensor Configuration screen appears, as shown at
“Seed Tube Sensor Configuration” on page
Press the AutoConfig button to perform this procedure.
S
EED
T
UBE
M
ONITOR
M
ODULE
S
ETUP
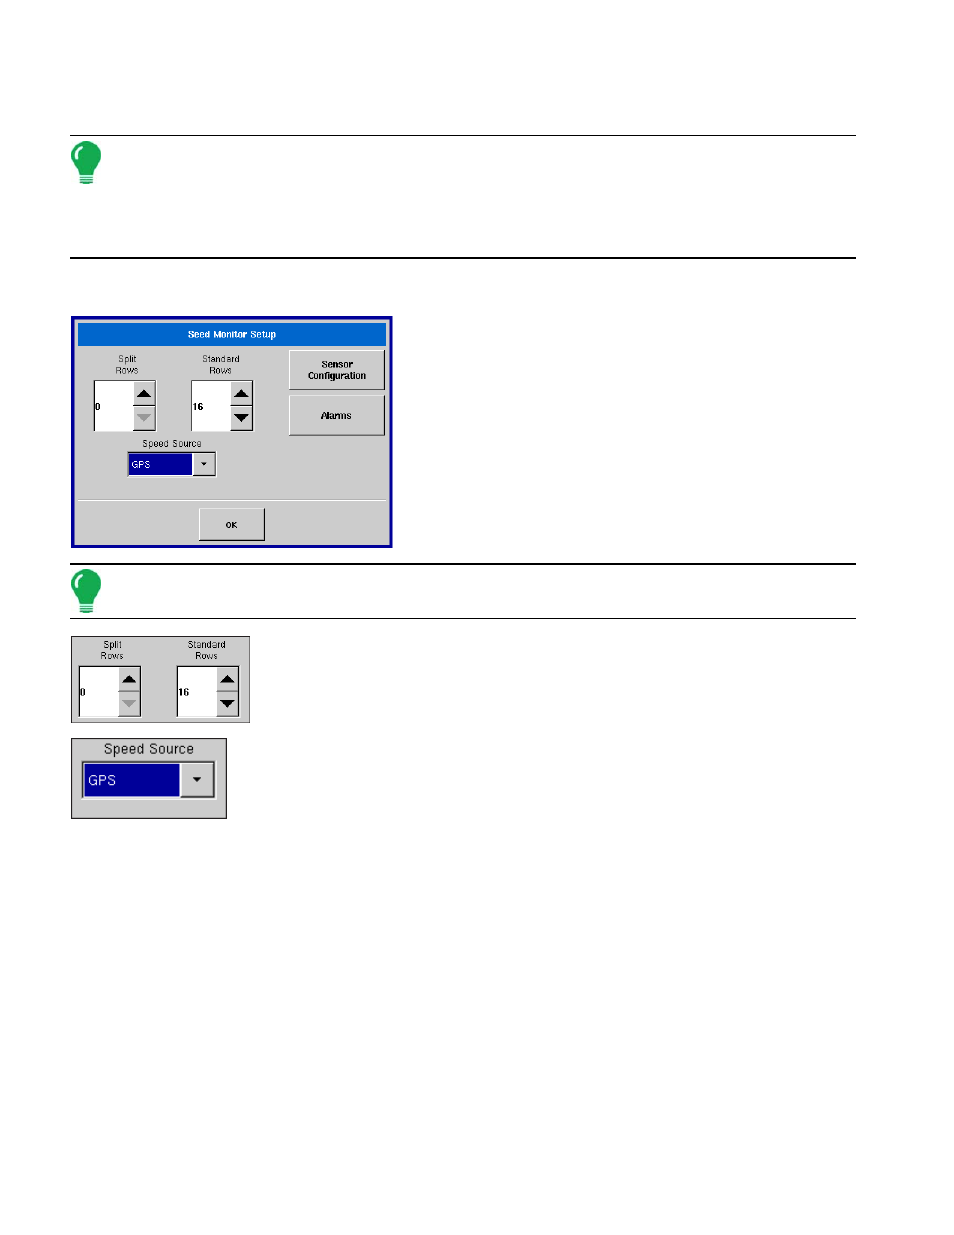
Press the Seed Monitor Setup button on the Implement
Tab to summon the Seed Monitor Setup window, as shown.
Here you may adjust row and ground speed source
settings, adjust sensor configuration and set alarm
thresholds.
Note: New settings entered at this screen are sent directly to the Seed Tube Monitor Module; thus you do not
need to enter new configuration settings for each planting implement unless the number of rows change.
Shows the number of rows found on the planter that the Seed Tube Monitor
Module supports. Use the up and down arrows to enter the total number of
rows found on the planter.
Shows the selected Ground Speed Source input for the Seed Tube Monitor
Module.
• Sensor Configuration button
Press to summon the Sensor Configuration window, which shows which rows are assigned to the individual
pins on the Seed Tube Monitor Module. For more information, see
“Seed Tube Sensor Configuration” on
“Seed Monitor Sensor Selection” on page
.
• Alarms button
Press to summon the Seed Monitor Alarms window, which shows each row and the alarm threshold for that
row. For more information, see