Ag Leader PFadvantage Advanced Light Bar Operators Manual User Manual
Product bulletin
Product Bulletin
Release Date: April 2002
Instructions for Initial Startup of Ag Leader Lightbar
Beginning April 1, 2002, the instructions for initial startup of the Ag Leader Lightbar
have changed slightly. These changes apply to all Lightbars with the model number of
21A that are used in conjunction with an PF Series monitor (PF3000, PF3000 PRO and
PFavantage) running version 4.20 and lower. This model number can be found on the
serial number tag on the bottom the Lightbar and should read AgGPS
21A Lightbar.
If the Ag Leader Lightbar does not have this model number, this product bulletin can be
disregarded and the instructions detailed in the Lightbar Manual should be followed as
usual.
1. Before hooking the Lightbar to the GPS unit, the Lightbar Status setting must be
turned ON in the PF monitor. To turn on the Lightbar, press the MENU button until
you see SETUP on the bottom of the screen and press this button. Locate and press
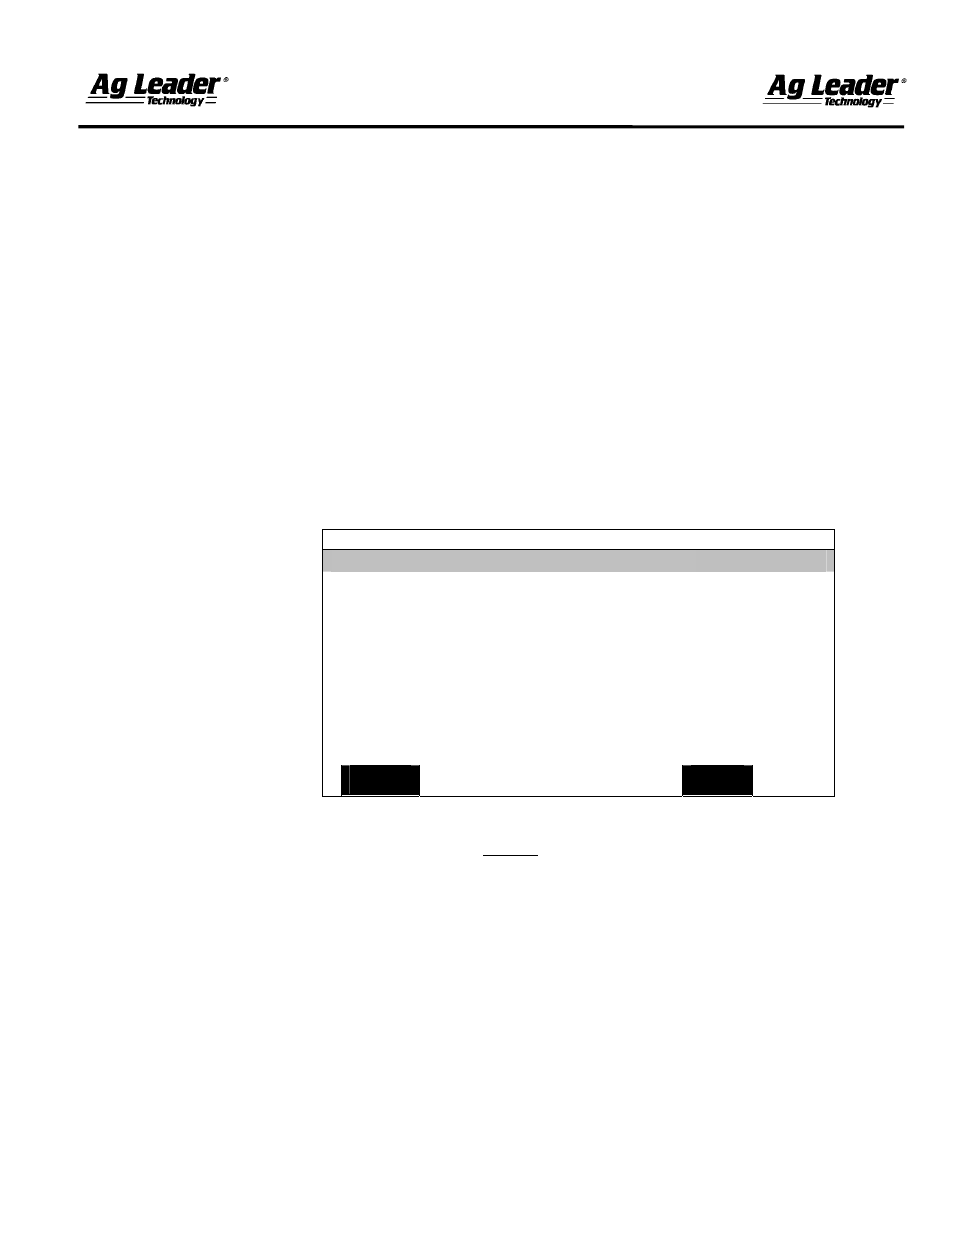
the GPS button (may need to scroll left or right) on the bottom of the screen. A
screen similar to the one pictured below should now be displayed.
GPS/LIGHTBAR
Lightbar
Status
ON
Mounting
Position
Dash
Brightness
(1-5)
5
Text Mode
PASS # & ERROR
Proximity Sensitivity
25 ft
LED Spacing Mode
LINEAR
LED Spacing
1.0 ft
End Distance
--- ft
EDIT
EXIT
2. Lightbar status should now be highlighted. Press the EDIT button and use the up or
down arrow to change this setting to ON (Do Not press the ACCEPT button at this
time).
3. Now plug the Lightbar into the GPS connection.
4. After plugging in the Lightbar, press ACCEPT on the PF monitor. The Lightbar
should now be ready for operation. Refer to the Lightbar Manual for additional setup
and operational instructions.
If you see EZ-Guide displayed on the Lightbar or it prompts you for a swath width, the
process was not completed correctly and should be tried again. It is important to plug the
Lightbar in first, before you press the Accept button. If you still encounter problems,
please contact your local Ag Leader dealer or our Tech Support department at (515) 232-
5363 ext. 1.
February 2003
Document Outline
- Instructions for Initial Startup of Ag Leader Lightbar
- EXIT
- Light Bar
- INSTALLATION
- AND
- IMPORTANT: The Light Bar must be mounted inside the cab
- of your vehicle. The Light Bar is not resistant to weather
- elements on the outside of the vehicle and could be damaged if
- mounted outside of the cab.
- NOTE: If you are attaching the Light Bar to a PF3000 Pro or PFadvantage, attach the Light Bar cable to the AUX 1 port.
- Use the following information to determine your requirements to setup the PF Series monitor for your Light Bar.
- GPS/LIGHTBAR
- Pass # - Displays the current pass number
- for that field
- GPS Status – Displays GPS and Differential
- information on the text screen
- LED Spacing Mode: Use the Linear or Scaled settings to set the
- spacing interval of the lightbar LED’s.
- GPS/GUIDANCE
- Basic A-B Parallel Swathing with Auto or Snap to swath increment.
- Basic Straight Parallel Swathing with A-B Endzones as the headland type
- Basic Straight Parallel Swathing with a single Closed Circuit Headland
- Straight Parallel swathing with Curved Headlands
- Figure 20. Curve Pattern
- Figure 23. Curved Spiral Pattern
- GPS SETUP
- GPS/LIGHTBAR
- GPS/LIGHTBAR
- GPS/LIGHTBAR
- GPS/LIGHTBAR
- GPS/LIGHTBAR
- GPS/LIGHTBAR
- GPS/LIGHTBAR
- GPS/LIGHTBAR
- GPS/LIGHTBAR
- GPS/LIGHTBAR
- GPS/LIGHTBAR
- GPS/LIGHTBAR
- GPS/LIGHTBAR
- GPS/LIGHTBAR
- GPS/LIGHTBAR
- GPS/LIGHTBAR
- GPS SETUP
- GPS/GUIDANCE
- GPS/GUIDANCE
- GPS/GUIDANCE
- GPS/GUIDANCE
- GPS/GUIDANCE
- GPS/GUIDANCE
- GPS/GUIDANCE
- GPS/GUIDANCE
- GPS/GUIDANCE
- GPS/GUIDANCE
- GPS/GUIDANCE
- GPS/GUIDANCE
- GPS/GUIDANCE
- GPS/GUIDANCE
- GPS/GUIDANCE
- GPS/GUIDANCE
- GPS/GUIDANCE
- GPS/GUIDANCE
- GPS/GUIDANCE
- GPS/GUIDANCE