Calibrating an injection pump, Alibrating an, Njection – Ag Leader InSight Ver.8.0 Users Manual User Manual
Page 221
207
A
PPLICATION
Use the up and down arrows to manually increase or decrease the pump speed.
Note: The recommended priming time is three minutes (3:00) but the routine can be ended at any time by
pressing Exit.
5. Acknowledge the Warning
Press OK to continue.
WARNING: Circulate the product back to a field-ready condition.
6. Press OK.
Press OK to return to the Run screen.
C
ALIBRATING AN
I
NJECTION
P
UMP
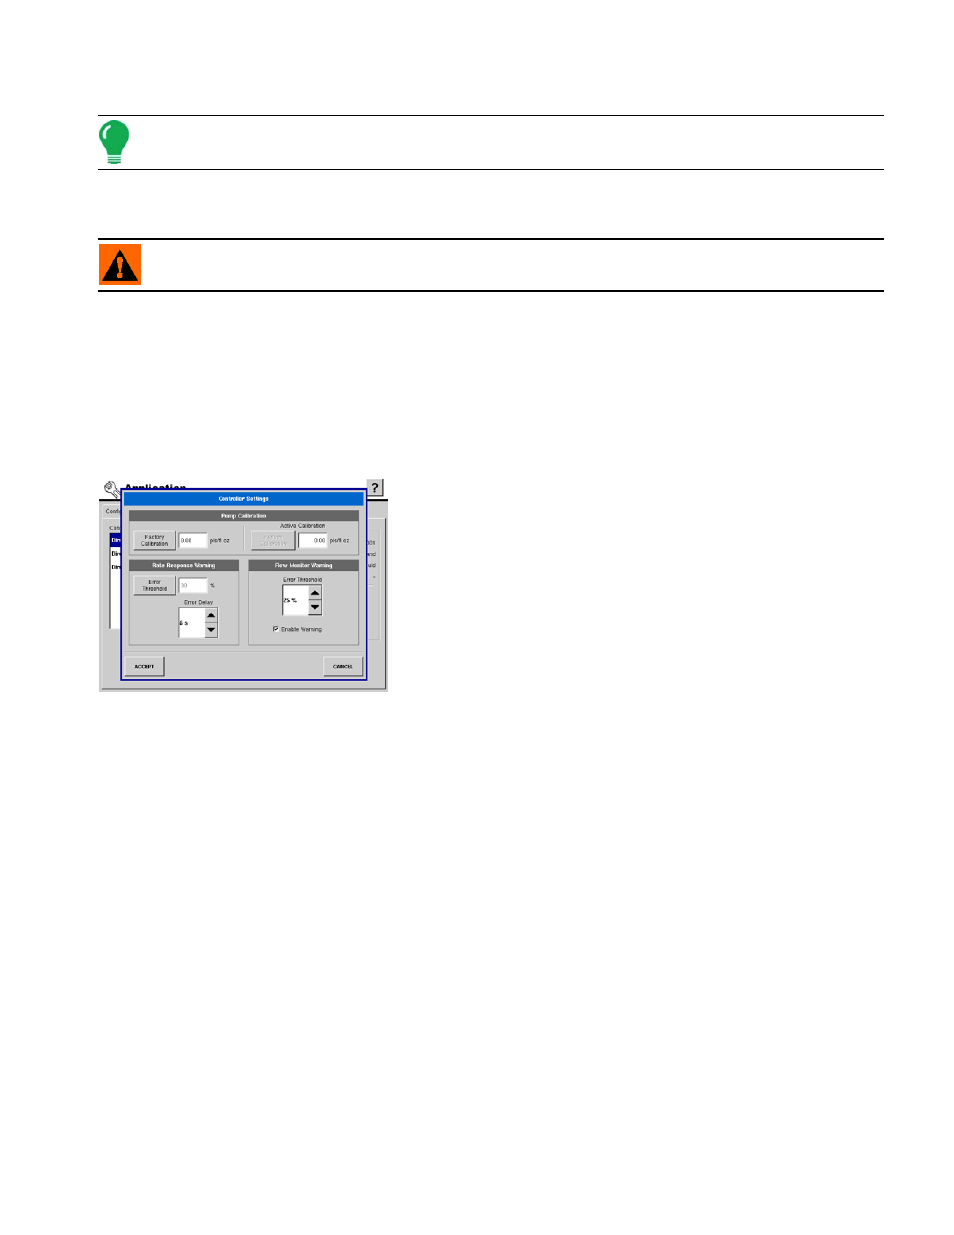
Direct Injection users should calibrate the Injection Pump at the beginning of each season, and any time
that repairs are made. To begin, go to the Controller Tab, highlight the desired controller in the Controller
List, then press the Controller Settings button. The Controller Settings window appears, as shown.
1. Enter Factory Calibration
Before entering a Direct Injection Calibration, a Factory
Calibration must be entered. If you have not already done so,
enter the Factory Calibration Number by pressing the Factory
Calibration button.
This number is found on the tag of the Digital Pump Speed
Sensor. This tag number represents pulses per 10 fluid ounces.
Divide the tag number by 10 and enter this number. Once
entered, this number should not be changed.
2. Press Perform Calibration
Underneath Pump Calibration, press the Perform Calibration button.
3. Prime the Direct Injection Pump
The Pump Calibration Wizard appears, as shown at left. Before beginning this calibration procedure, it is
recommended that you first prime the Injection pump. Press the Prime button and continue along with
the priming procedure as described in the preceding section, beginning with
After the priming procedure is finished, you will return to this Pump Calibration Wizard window. Press
NEXT to continue.
4. Enter Dispense Amount
Enter the amount that you want dispensed. Press NEXT to continue.
5. Acknowledge the Warning
Prepare to catch any product dispensed in an appropriate container.
Press OK to continue.
6. Start Calibration
Press the green-colored Start button to begin the calibration procedure.