Zodiak production switcher, Configuring the zodiak switcher – Grass Valley Kaleido-X v.7.80 User Manual
Page 455
447
Kaleido-X
User’s Manual
Zodiak Production Switcher
A multiviewer can receive dynamic source names and tally information from a Grass Valley
Zodiak Digital Production Switcher. The procedures below describe how to set up a
multiviewer to interface with this family of production switchers.
Configuring the Zodiak Switcher
To establish a serial connection between the switcher and your multiviewer, you need to
identify the serial port you wish to use for tally contribution in the switcher’s Engineering
Setups, by using the Zodiak touch screen menu panel or the Zodiak Menu application. You
also need to configure or take note of the communications settings and use the same
values on the multiviewer’s side. The procedure below is an example using the default
values typically used on Grass Valley production switchers.
To set up the Zodiak switcher
1 Physically connect one end of an RJ-45 straight cable to the multiviewer’s RS-422 port.
2 Using a DE-9S-to-RJ-45 crossover adapter (Grass Valley part no. 1792-3700-100),
connect the other end of the cable to one of the 4 RS-422 control ports on the Zodiak
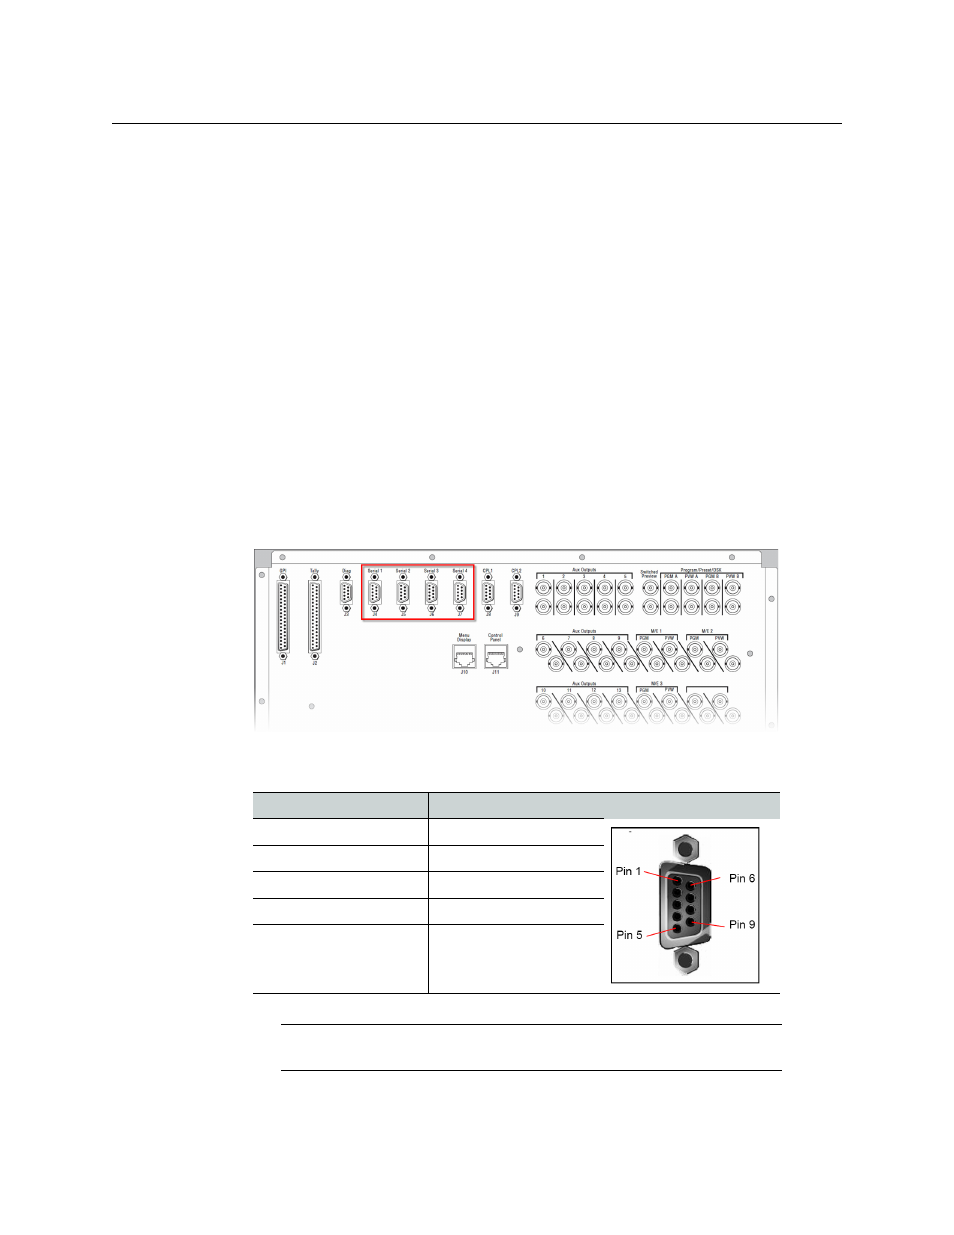
Video Processor Frame. The illustration below shows the location of the RS-422 ports
on a Zodiak frame. The RS-422 ports (highlighted) are labeled Serial 1 – 4 (J4 – J7).
The 4 RS-422 control ports at the back of a Zodiak Video Processor frame have DE-9
female connectors with the following pinout:
Pin
Signal
1, 4, 6, and 9
Chassis ground
2
RX-
3
TX+
7
RX+
8
TX-
Note:
on page 26 for pinouts on the
multiviewer’s side.