Configuring umds – Grass Valley Kaleido-X v.7.80 User Manual
Page 294
286
Creating Layouts
Configuring UMDs
For more information on creating actions, refer to
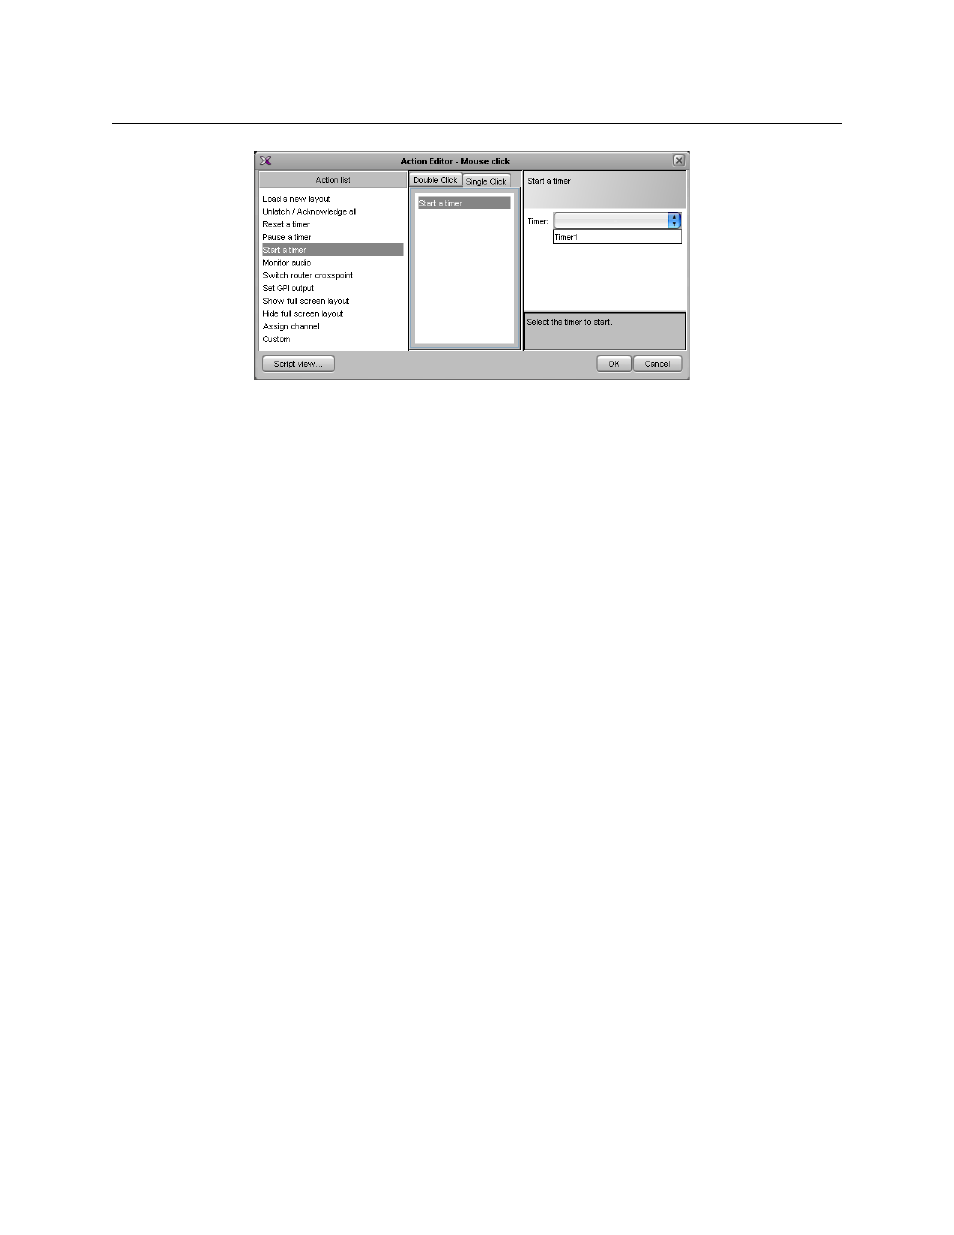
11 Click OK to save the action assignment and close the Action Editor window.
12 Click Save to save the layout with the new timer monitor.
13 Export the database to a Kaleido-X, and load the layout.
The interactive timer monitor appears on the monitor wall. See
, on page 340, for more information.
Configuring UMDs
UMDs can serve various purposes: in addition to displaying the name of the video source
seen in a video monitor, they can report operational status and error conditions in real time,
by showing dynamic alarm and text attributes associated with a source.
To configure a UMD
1 In XEdit, click the Layouts tab, and then open the desired layout.
2 Unlock the appropriate composite monitor if applicable (see
3 Click the UMD you wish to configure.
4 To pre-assign a logical source to be monitored by default, to configure the selected
UMD as a monitor wall destination, or to configure its reporting behaviors, see:
•
Assigning Logical Sources or Monitor Wall Destinations to Monitors
•
Setting Monitored Alarm and Text Levels for a UMD
•
Configuring a UMD’s Alarm Reporting Behavior
•
Configuring a UMD’s Source Reporting Behavior
5 To configure UMD text properties, see:
•
•
•
6 Click outside the composite monitor to lock it, if applicable.
7 On the File menu, click Save.