Move the current-time indicator to a keyframe, Select keyframes – Adobe After Effects CS3 User Manual
Page 193
AFTER EFFECTS CS3
User Guide
188
“Shortcuts for keyframes” on page 650
“Shortcuts for showing properties in the Timeline panel” on page 647
Move the current-time indicator to a keyframe
After you set the initial keyframe for a property, After Effects displays the keyframe navigator, which you can use to
move from keyframe to keyframe or to set or remove keyframes. When the keyframe navigator box is filled with a
yellow diamond
, the current-time indicator lies precisely at a keyframe for that layer property. When the
keyframe navigator box is not filled
, the current-time indicator lies between keyframes.
To detach the keyframe navigator from the A/V Features column to function as its own column, choose Column >
Keys from the Timeline panel menu.
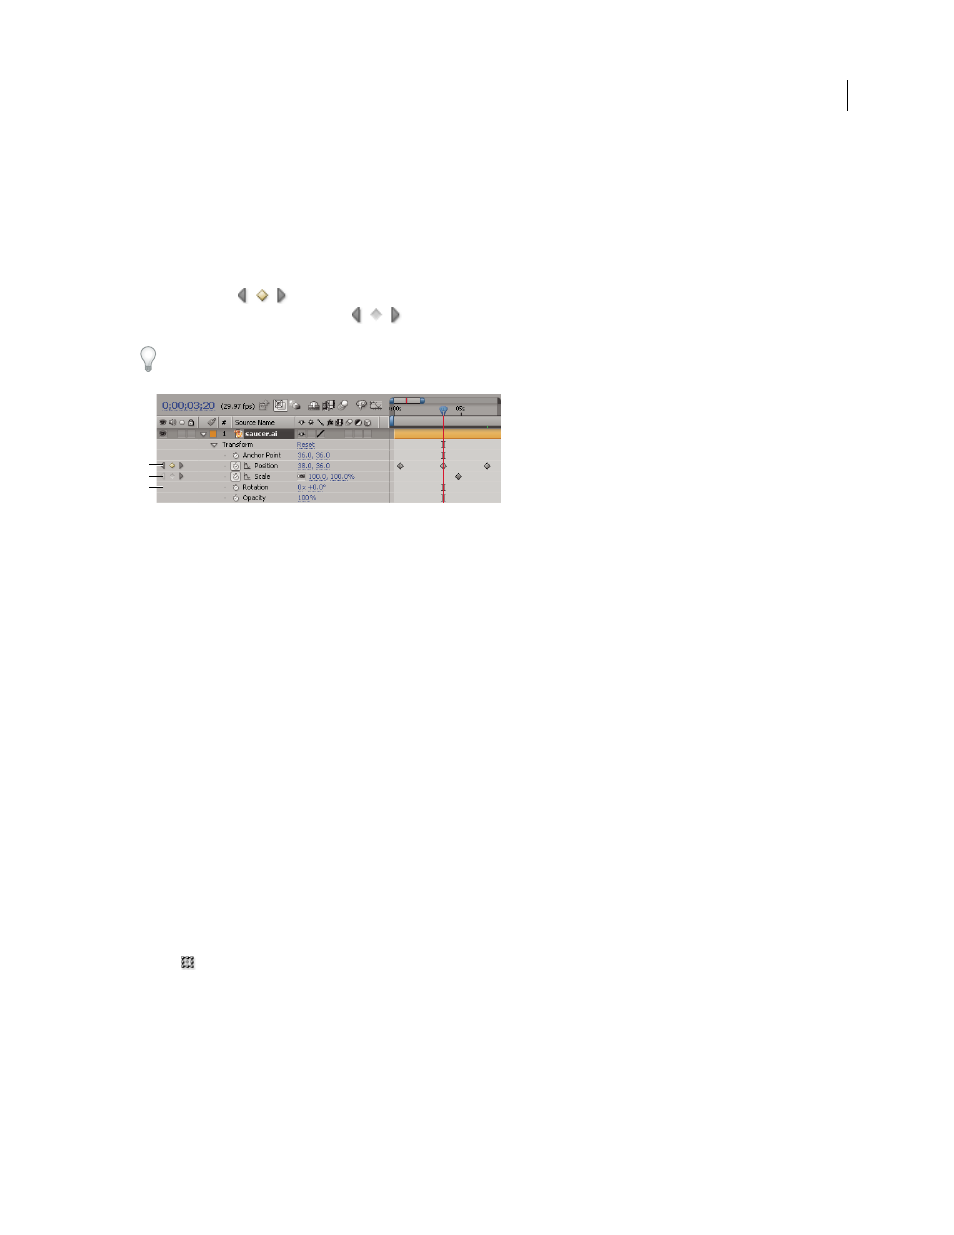
Keyframe navigator in Timeline panel
A. Keyframe at current time B. No keyframe at current time C. No keyframes for layer property
•
To move to the next or previous keyframe, click a keyframe navigator arrow.
•
To snap to a keyframe or marker, Shift-drag the current-time indicator.
•
To move to the next or previous visible item in the time ruler (keyframe, marker, or work area end), press K or J.
See also
“About animation, keyframes, and expressions” on page 183
“Work with the Graph Editor” on page 184
Select keyframes
In layer bar mode, selected keyframes are yellow. Unselected keyframes are gray.
In Graph Editor mode, the appearance of a keyframe icon depends on whether the keyframe is selected, unselected, or
semi-selected (another keyframe in the same property is selected). Selected keyframes are solid yellow. Unselected
keyframes retain the color of their corresponding graph. Semi-selected keyframes are represented by a hollow yellow box.
•
To select a keyframe, click the keyframe icon.
•
To select multiple keyframes, Shift-click the keyframes or drag a marquee around the keyframes.
Note: To toggle viewing of the free-transform bounding box in the Graph Editor, click the Show Transform Box
button
at the bottom of the Graph Editor.
•
To select all keyframes for a layer property, Alt-click (Windows) or Option-click (Mac OS) a segment between two
keyframes in the Graph Editor, or click the layer property name in the layer outline.
•
To select all keyframes for a property that have the same value, right-click (Windows) or Control-click (Mac OS)
a keyframe, and choose Select Equal Keyframes.
A
B
C