Compensate for chromatic aberration in camera raw – Adobe After Effects CS3 User Manual
Page 105
AFTER EFFECTS CS3
User Guide
100
Embedded
Use the profile embedded in the current file. TIFF, JPEG, and DNG files can have embedded profiles.
2
Adjust the Shadow Tint property to remove a color cast in the shadows. Usually, decreasing Shadow Tint adds
green to the shadow areas, and increasing Shadow Tint adds magenta.
3
Use the Hue and Saturation controls to adjust the red, green, and blue in the image. Look at the preview image as
you make adjustments until the image looks correct to you. In general, adjust the hue first, and then adjust its
saturation.
4
Adjustments made in the Calibrate tab affect the selected image in the Camera Raw dialog box. If you want to save
the adjustments and make them the default image settings for the files from a specific camera, choose Save New
Camera Raw Defaults from the Camera Raw Settings menu
.
Note: To save settings as defaults for a specific camera (by serial number) or for a specific lighting condition (by ISO
number), you can also modify the Default Image Settings preferences in the Camera Raw preferences. (See “Save, reset,
and load Camera Raw settings” on page 104.)
Compensate for chromatic aberration in Camera Raw
Chromatic aberration is a common defect caused by the failure of the lens to focus different frequencies (colors) to
the same spot. In one type of chromatic aberration, the image from each color of light is in focus, but each image is
a slightly different size. This type of aberration is seen as a complementary color fringing in areas away from the
center of the image. For example, you may see a red fringe on the side of an object toward the center of the image,
and cyan fringe on the side of the object away from the center of the image.
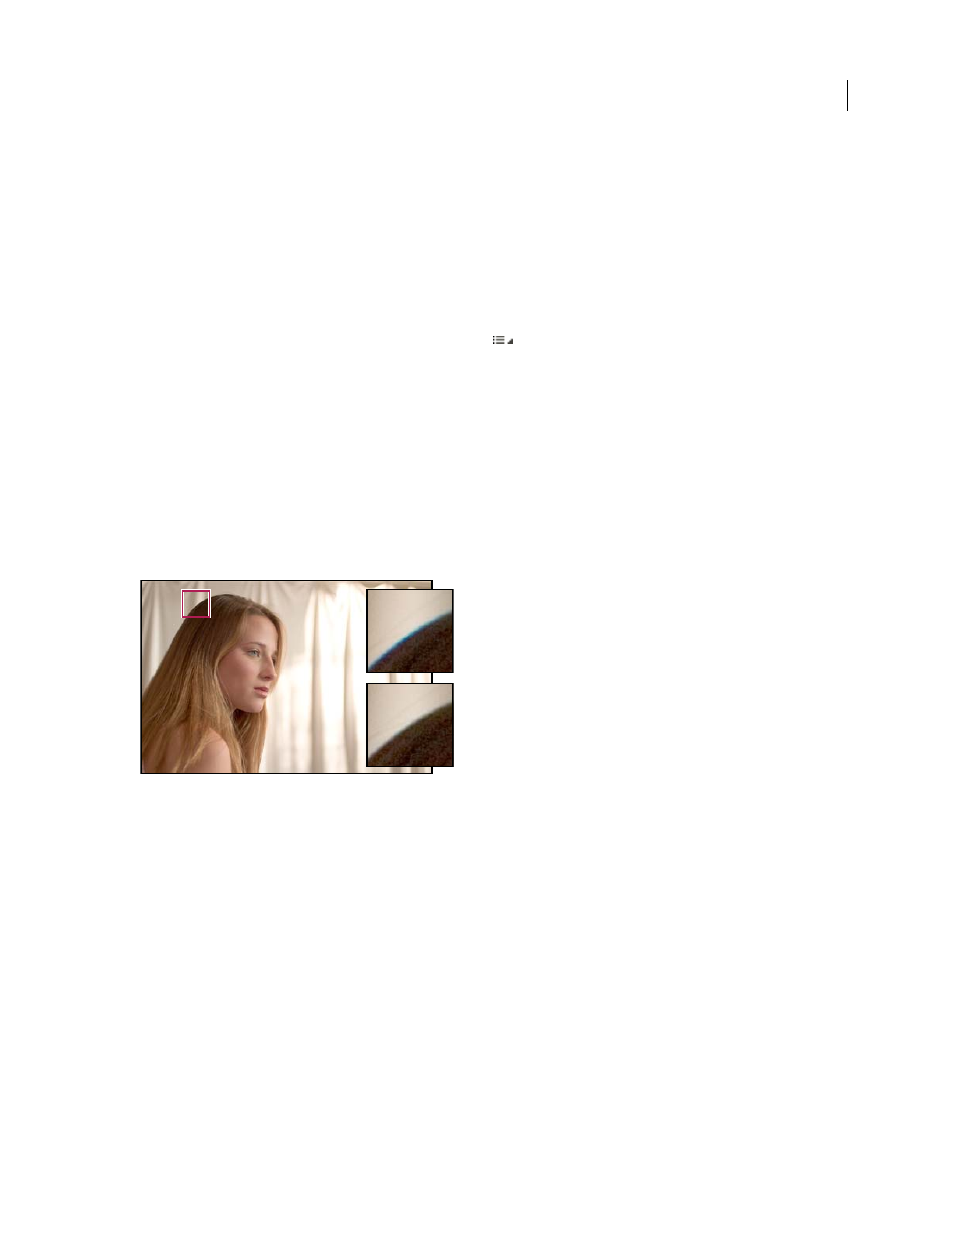
Original image (top), and after fixing chromatic aberration (bottom)
Another type of chromatic artifact affects the edges of specular highlights, such as those found when light is reflected
off of the surface of rippled water or edges of polished metal. This situation usually results in a purple fringe around
each specular highlight. Similar-colored fringing can occur along edges between dark objects and very bright
objects.
1
Zoom into an area near the corner of the preview image. For the best results, the area should contain very dark or
black detail against a very light or white background. Look for the color fringing.
2
In the Lens Corrections tab, adjust any of these controls:
Fix Red/Cyan Fringe
Adjusts the size of the red channel relative to the green channel. This compensates for red/cyan
color fringing.
Fix Blue/Yellow Fringe
Adjusts the size of the blue channel relative to the green channel. This compensates for
blue/yellow color fringing.
Defringe
Desaturates colored fringing around specular highlights. Choose All Edges to correct color fringing for all
edges, including any sharp change in color values. If choosing All Edges results in thin grey lines near edges or other