Log clips interactively – Adobe Premiere Pro CS4 User Manual
Page 76

70
USING ADOBE PREMIERE PRO CS4
Capturing, digitizing, transferring, and importing
Last updated 11/6/2011
If you have a list of In and Out points, you can log them manually without a device online; simply enter each shot’s In
and Out points and click the Log Clip button. You can also log frame numbers using a separate logging or spreadsheet
program and then import the spreadsheet into Premiere Pro as a list of offline clips.
You can also log clips interactively: you can set In points and Out points while the source tape is playing.
1
In the Capture panel, make sure that your device is online, as indicated above the preview.
2
Insert a tape into your device. Premiere Pro prompts you to name the tape. Be sure not to give any two tapes you
log the same name.
3
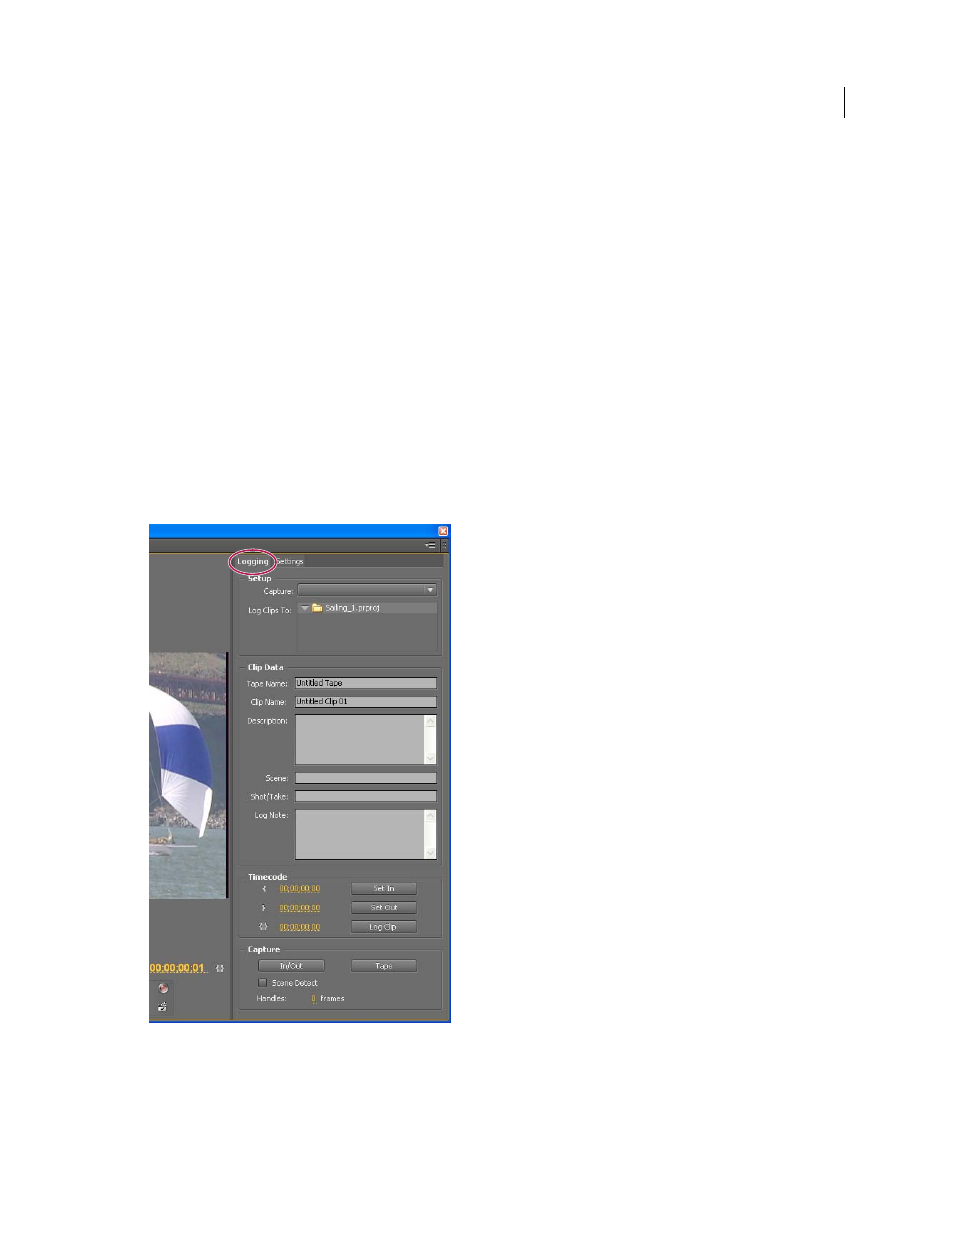
Use the controls in the Capture panel to move to the first frame in your first shot, and click the Set In button. Then
move to the last frame in the shot and click the Set Out button.
4
In the Setup area of the Logging pane, choose your media type from the Capture menu.
5
If you want to capture some frames extending beyond the In and Out points of each clip, enter the number of frames
for these handles in the Handles setting of the Capture section.
6
Click the Log Clip button in the Timecode area of the Logging pane to log the clip you identified. Name the clip
when prompted. Premiere Pro logs the clip by placing an offline clip for it in the Project panel.
7
Repeat steps 2 through 6 to log each shot you want to batch capture.
Capture panel with Logging active
Log clips interactively
1
Make sure that your device is connected and in VTR or VCR (not Camera) mode, and then choose File > Capture.
2
In the Logging pane, enter the settings you want to use as the defaults for Setup and Clip Data.
