Setting up your system, About setting up your system, Supported hardware – Adobe Premiere Pro CS4 User Manual
Page 46: Set up a dv or hdv system
40
USING ADOBE PREMIERE PRO CS4
Workflows and system setup
Last updated 11/6/2011
Setting up your system
For Premiere Pro system requirements, see the
For lists of various categories of hardware compatible with Adobe Premiere Pro, see the
About setting up your system
To use the full range of features in Premiere Pro, you’ll probably need to connect additional equipment to your
computer. Most editing workflows, for example, require connections with a camcorder or VTR, a television monitor,
and sometimes a device controller.
Supported hardware
.
More Help topics
Set up a DV or HDV system
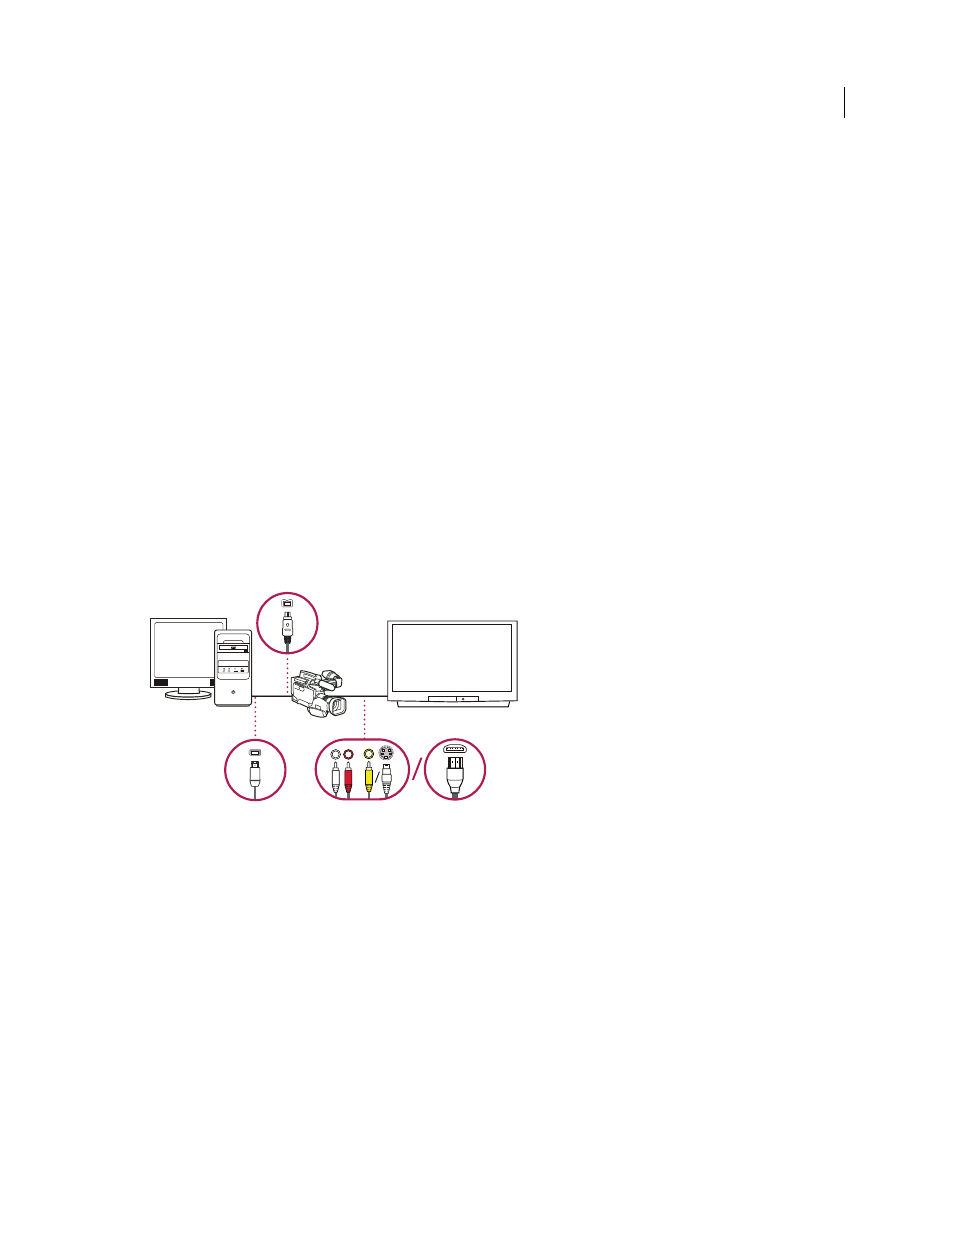
DV/HDV setup
A. Computer and computer monitor B. 6-pin FireWire port and connector C. 4-pin FireWire port and connector D. DV/HDV camcorder
E. RCA jacks and plugs for L (white) audio, R (red) audio, composite video (yellow); jack and plug for S-Video (y/c) F. HDMI port and
connector
G. Television monitor
With this setup you can capture audio and video from a DV or HDV source, monitor the signal on a TV monitor while
editing, and export any sequence back to videotape.
1
Connect the DV or HDV camcorder or VTR to the computer using a FireWire cable.
2
Connect the camcorder or VTR to the television monitor with an S-Video or RCA video cable and RCA audio
cables, or an HDMI cable.
3
Set the camcorder or VTR to VTR or Play mode.
4
(For HDV camcorders or VTRs only) Make sure the device is in DV playback mode for DV projects, or HDV
playback mode for HDV projects. See the user manual for your device for details.
5
In Premiere Pro, select File >New > Sequence.
C
B
A
D
G
F
E