Adobe Premiere Pro CS4 User Manual
Page 219
213
USING ADOBE PREMIERE PRO CS4
Editing Audio
Last updated 11/6/2011
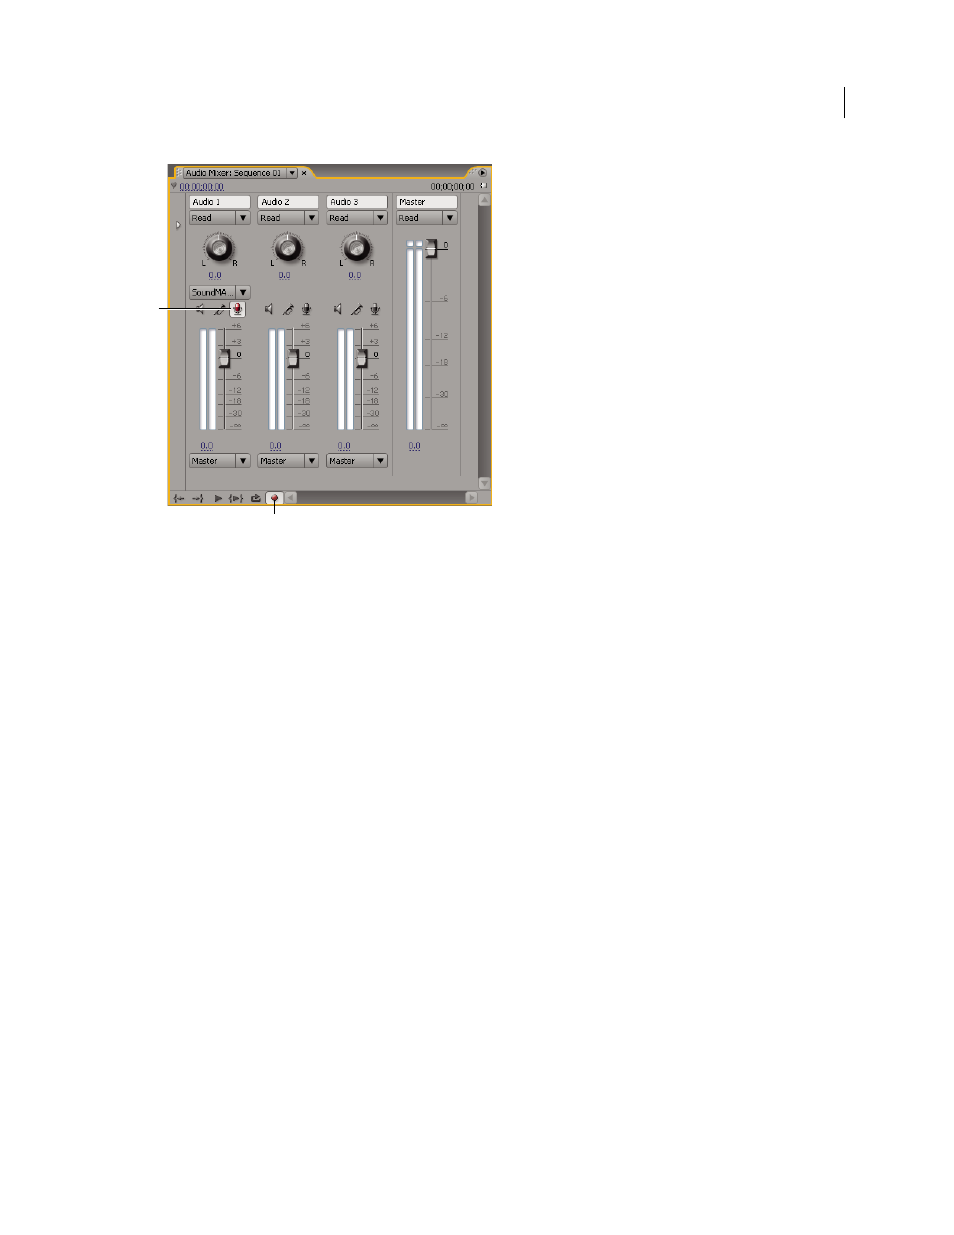
Audio Mixer recording controls
A. Record Enable button for track B. Record button for Audio Mixer
5
In the Audio Mixer, click the Record button for the sequence. Premiere Pro prepares the sequence for recording
but moves the playhead only when you press the Play button.
6
Select Meter Input(s) Only in the Audio Mixer menu to meter only the sound card’s inputs.
7
Test the input levels by speaking into the microphone.
8
When you finish testing, deselect Meter Input(s) Only to meter the project’s audio tracks also.
9
Speak into the microphone again. Watch the Audio Mixer level meters to ensure that the input levels for record-
enabled tracks are high but not clipping.
10
Click the Play button in the Audio Mixer, and then start speaking the voice-over.
The Play button changes to the Stop button.
11
When you are done speaking, press Stop.
Premiere Pro records the voice-over to a WAV file located on the scratch disk specified by the Captured Audio setting
in Preferences.
More Help topics
Specify scratch disks to improve system performance
A
B