Define the work area for rendering, Render a preview file – Adobe Premiere Pro CS4 User Manual
Page 190
184
USING ADOBE PREMIERE PRO CS4
Editing sequences and clips
Last updated 11/6/2011
Define the work area for rendering
❖
Do any of the following:
•
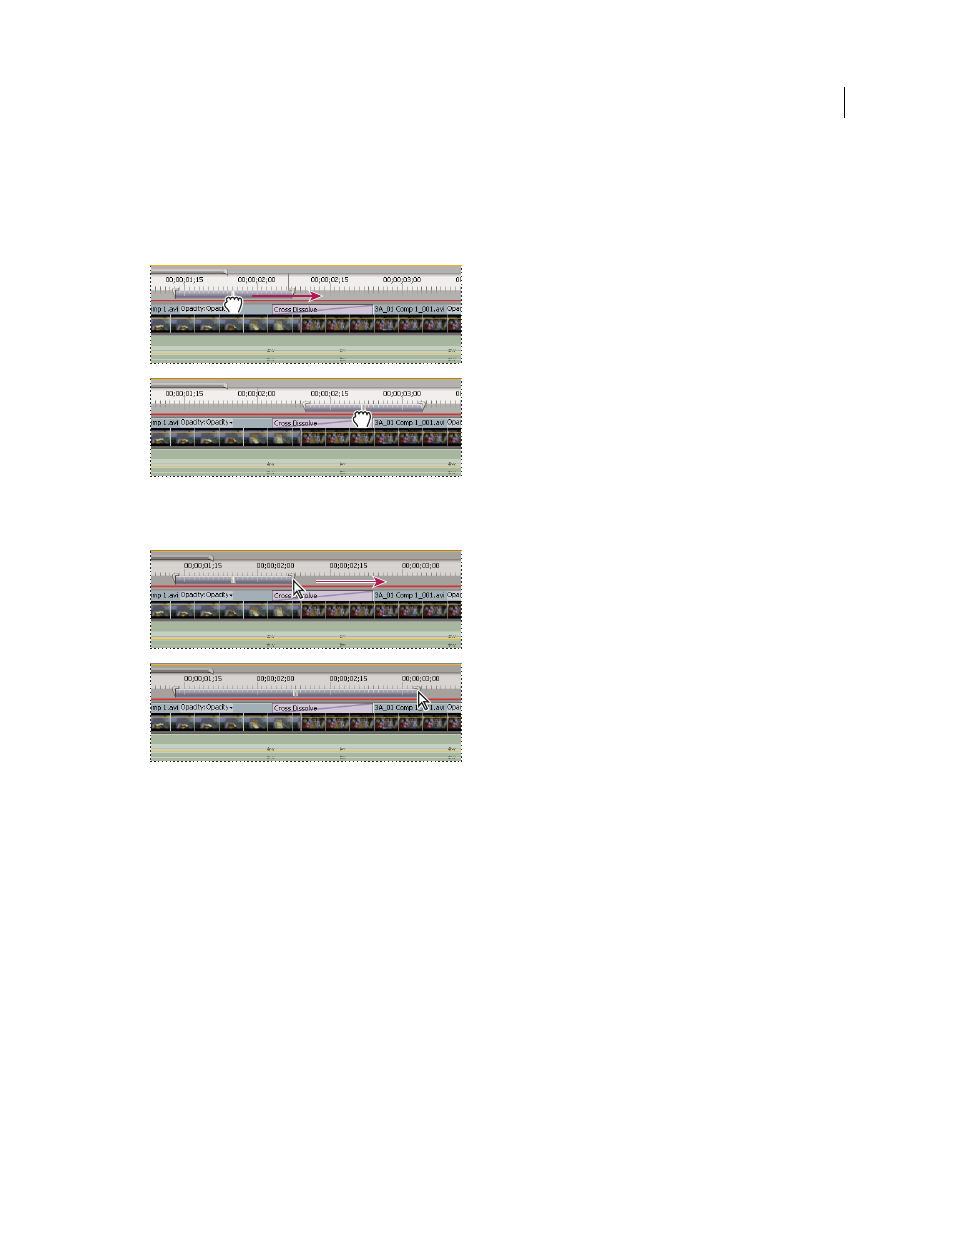
Drag the work area bar over the section you want to preview. Make sure that you drag the work area bar from its
textured center; otherwise you cue the current-time indicator instead.
Grabbing the work area bar (above) and dragging it over the section to preview (below)
•
Drag the work area markers (at either end of the work area bar) to specify the beginning and end of the work area.
Dragging the work area markers to expand the work area
•
Position the current-time indicator, and press Alt+[ (Windows) or Option+[ (Mac OS) to set the beginning of the
work area.
•
Position the current-time indicator, and press Alt+] (Windows) or Option+] (Mac OS) to set the end of the work area.
•
Double-click the work area bar to resize it to either the width of the time ruler, or the length of the entire sequence,
whichever is shorter. To define the whole sequence as the work area, the whole sequence must be visible in the
Timeline panel.
Note: Position the pointer over the work area bar to display a tool tip that shows the work area bar’s start timecode, end
timecode, and duration.
Render a preview file
1
Set the work area bar over the area you want to preview.
2
Choose Sequence, and select one of the following:
Render Effects In Work Area
Renders the sections of the video tracks lying within the work area containing a red
render bar.