Apple Final Cut Pro X (10.1.2) User Manual
Page 90
Chapter 7
Edit your project
90
5
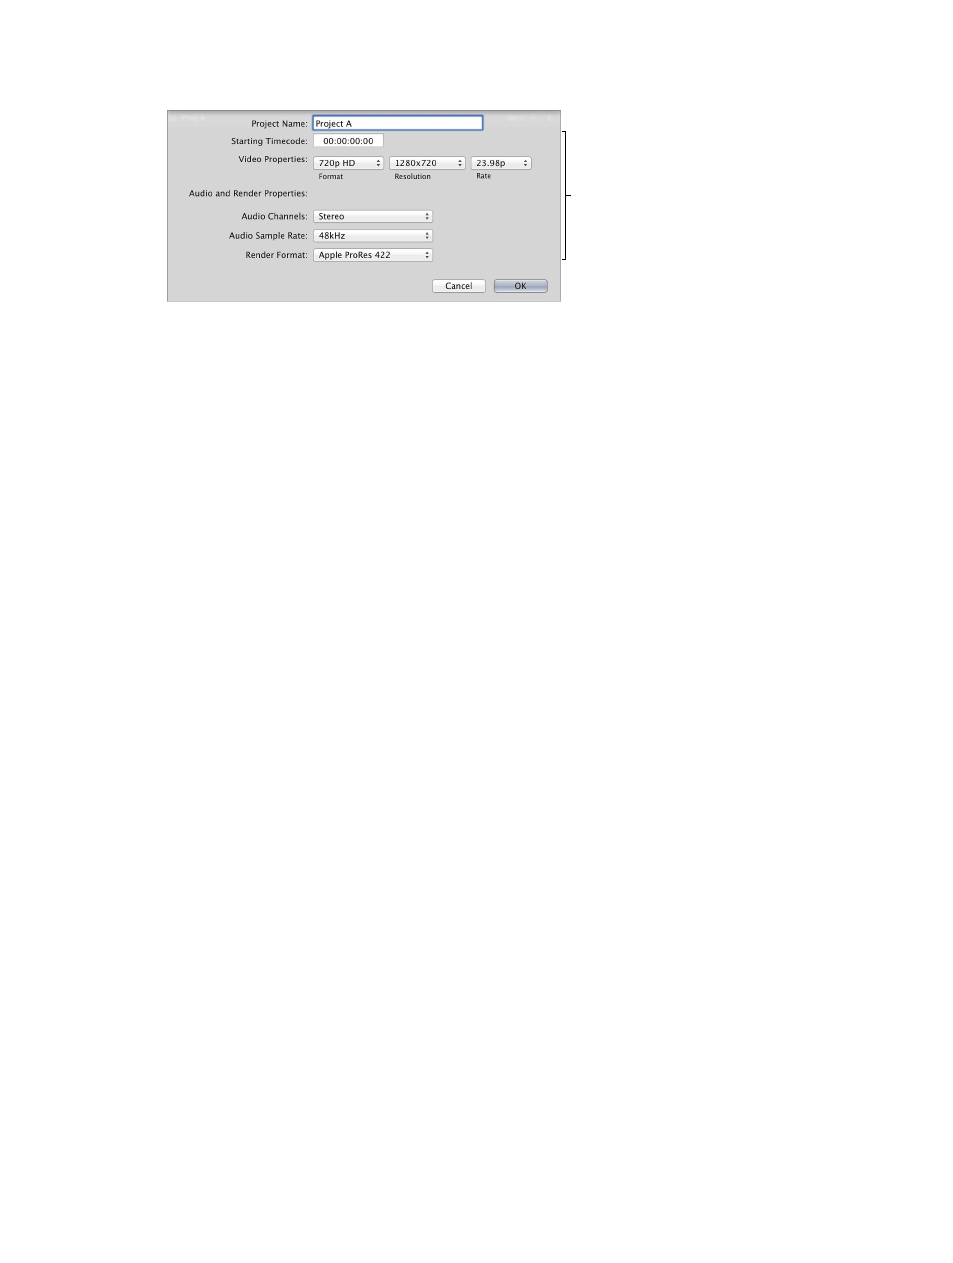
In the window that appears, change the settings as appropriate.
Change the project’s
video, audio, and
render properties.
Project Name
•
Project Name: Type a name for the project.
Starting Timecode
•
Starting Timecode: If you want your project’s timecode to start at a value other than
00:00:00:00, type a starting timecode value.
Drop Frame Timecode
•
Drop Frame: Select the checkbox to turn on drop frame timecode (this option appears only for
29.97 and 59.94 fps media).
In non-drop frame timecode, the timecode counter counts at a consistent rate without
dropping any numbers from the count. Non-drop frame timecode is available as a display
option for every frame rate.
In drop frame timecode, frames 0 and 1 are skipped the first second of every minute, unless
the minute number is exactly divisible by 10.
Video Properties
•
Format: Choose the video format (a specific method of encoding the video).
•
Resolution: Choose the frame size of the video. Available frame sizes are dependent on the
format. To enter an arbitrary frame size, choose Custom in the Format pop-up menu.
•
Rate: Choose the frames per second (fps).
Note: Unless the Timeline is completely empty, you cannot change the frame rate of an
existing project.
Audio and Render Properties
•
Audio Channels: Choose whether to present the audio as multichannel surround sound or
as stereo.
•
Audio Sample Rate: Choose the audio sample rate for your project (the number of times a
signal is measured—or sampled—per second). A higher sample rate produces higher-quality
audio and larger file sizes, and a lower sample rate produces lower-quality audio and smaller
file sizes. The sample rate you choose depends on the source material you’re working with and
the final destination of your audio.
•
Render Format: Choose the codec to use for your project’s background rendering.
6
Click OK.
67% resize factor