Chapter 12: color correction, Color correction overview, 376 color correction overview – Apple Final Cut Pro X (10.1.2) User Manual
Page 376: Color correction, Overview
376
Color correction overview
In any post-production workflow, color correction is generally one of the last steps in finishing an
edited program. There are a number of reasons to color correct your footage:
•
Make sure that key elements in your program, such as flesh tones, look the way they should
•
Balance all the shots in a scene to match
•
Correct errors in color balance and exposure
•
Achieve a look, such as making the scenes warmer or cooler
•
Create contrast or special effects by manipulating the colors and exposure
Final Cut Pro color correction tools give you precise control over the look of every clip in your
project, including still images, by letting you adjust each clip’s color balance, shadow levels,
midtone levels, and highlight levels.
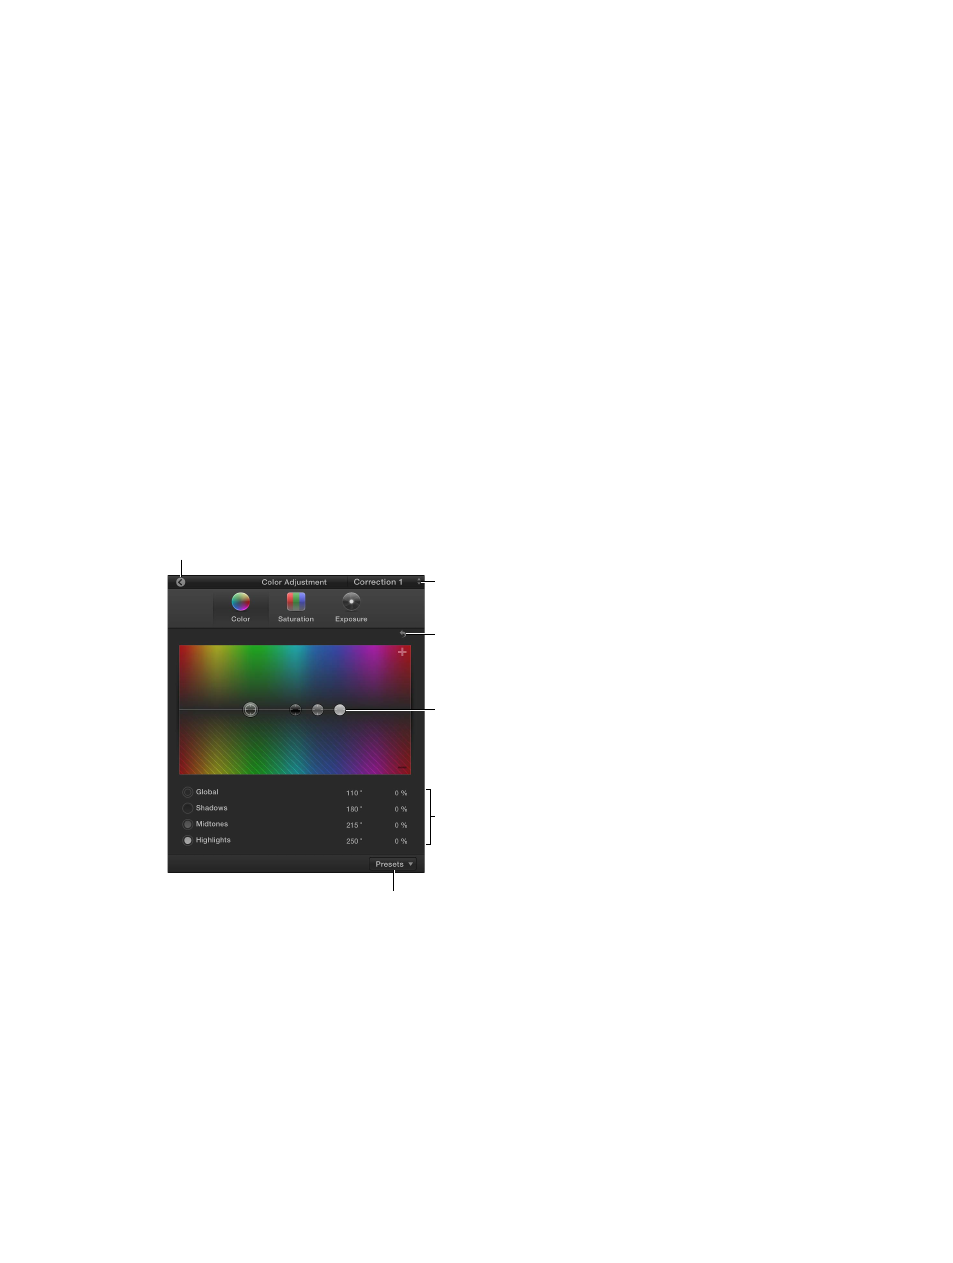
Click to return to the
Video inspector.
Click the Reset button to
remove the adjustments
in this pane.
Choose the correction
to work with.
Drag the controls to
change the values.
Use value sliders to
change the values.
Use the Action pop-up menu
to create or choose a color
correction preset.
Final Cut Pro also includes several automatic tools you can use to quickly balance and match the
color in clips. You can:
•
Automatically balance colors: With one click, neutralize any color casts and maximize image
contrast. See
on page 377.
•
Automatically match a clip’s color and look: With two clicks, make one or more clips match
the color look of any clip that you choose. See
Match color between clips automatically
on
page 379.
Color correction
67% resize factor
12