Trim clips – Apple Final Cut Pro X (10.1.2) User Manual
Page 230
Chapter 9
Add transitions, titles, effects, and generators
230
5
When you are finished adjusting the effect and no longer need the onscreen controls, click Done.
You can animate the effect and have it appear over a background. For details on working with
built-in effects, see
on page 235.
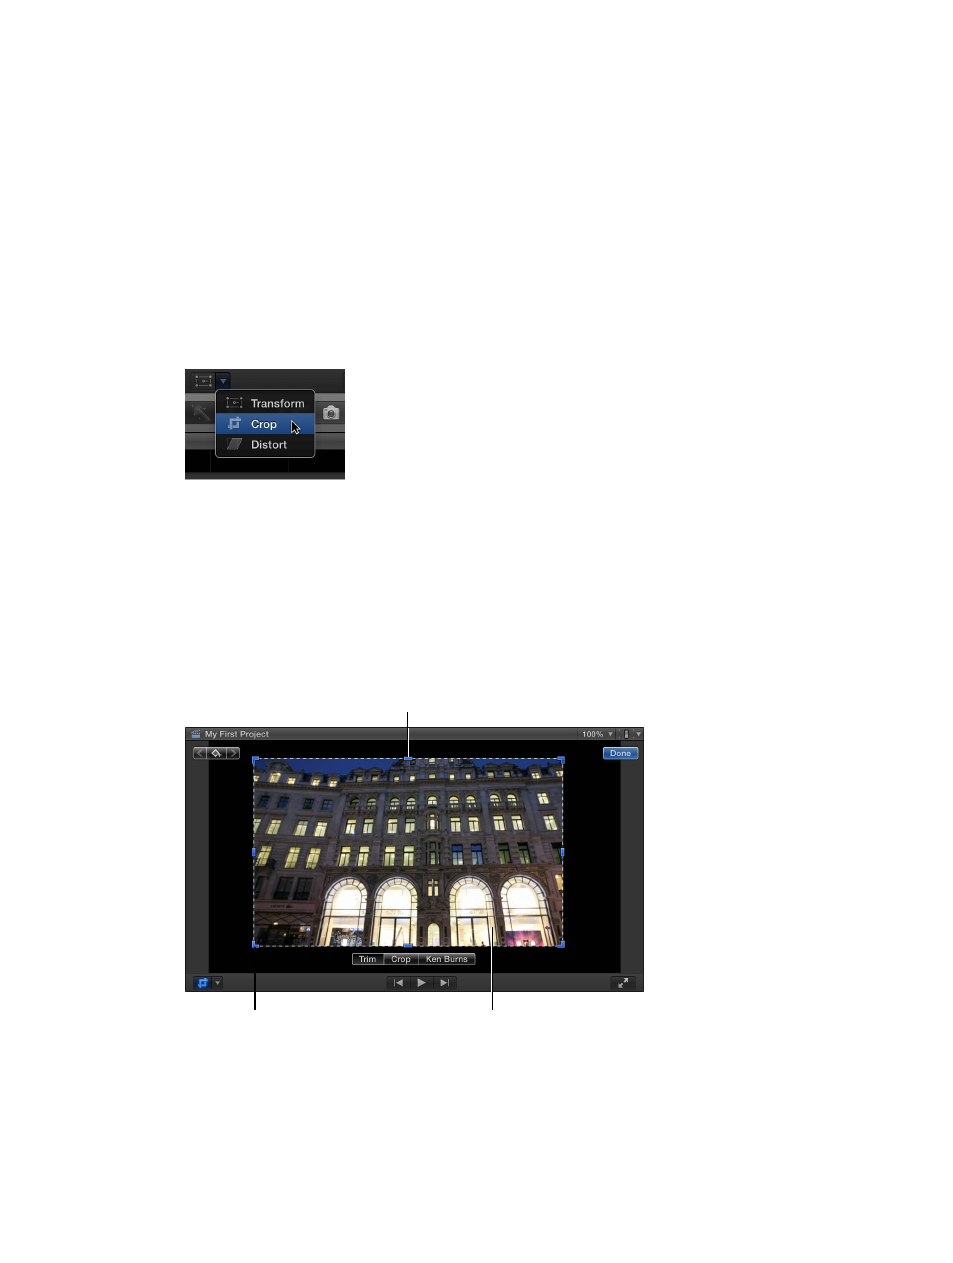
Trim clips
Trim controls allow you to independently trim each of the image edges, creating a window look.
This effect, often used along with the Transform effect, is commonly used on a clip placed over a
primary storyline clip, which becomes the background of the trimmed clip.
Adjust the Trim effect
1
Select a clip in the Timeline.
2
To access the Trim controls, do one of the following:
•
Choose Crop from the pop-up menu in the lower-left corner of the Viewer (or press Shift-C).
•
Control-click in the Viewer and choose Crop from the shortcut menu.
3
Click the Trim button at the bottom of the Viewer.
4
To adjust the effect using the onscreen controls:
•
Blue handles at each corner: Drag these to adjust the position of two trim window sides at the
same time.
•
Blue handles in the middle of each side: Drag these to independently adjust the position of
each side.
•
Anywhere inside the window: Drag anywhere inside the window to adjust its position.
Drag a handle in the middle of
a side to change only one side.
Drag a corner handle to
change two sides at once.
Drag anywhere in the image
to position the trim window.
5
To individually adjust each edge using the Crop area of the Video inspector, use the Trim controls.
6
When you are finished adjusting the effect and no longer need the onscreen controls, click Done.
You can animate the effect and have it appear over a background. For details on working with
built-in effects, see
on page 235.
67% resize factor