Apple Final Cut Pro X (10.1.2) User Manual
Page 168
Chapter 8
Edit audio
168
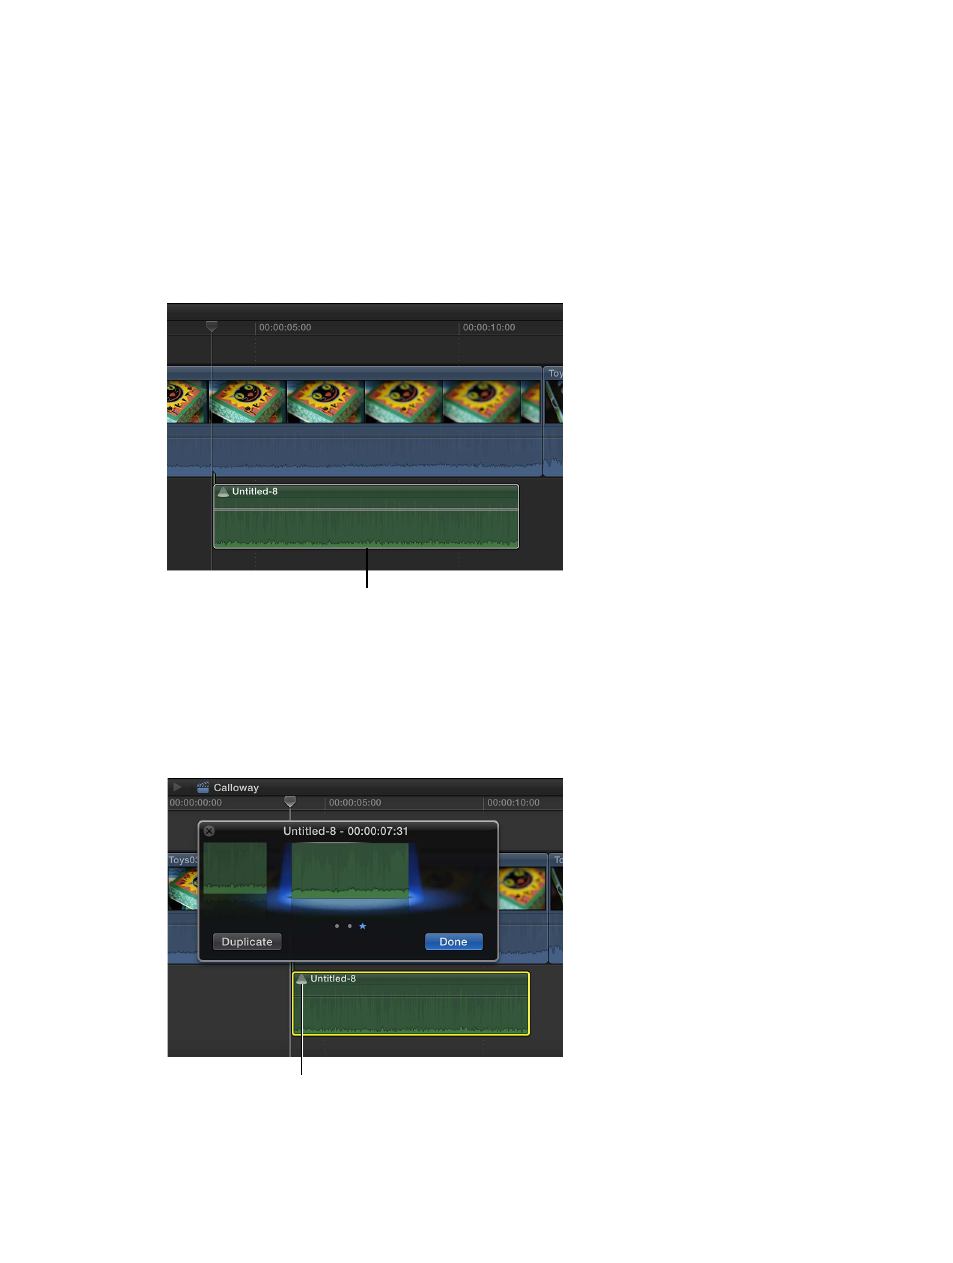
Record multiple voiceover takes
You can record multiple versions, or “takes,” of voiceover recordings for the same section of your
project. By default, Final Cut Pro creates an audition from all the takes you record. After you’ve finished
recording, you can review the different takes in the audition and choose the one you want to use.
1
To record your first voiceover take, follow the instructions above.
2
Without moving the playhead, click the Record button (or press Option-Shift-A) to record
another take for the same section of your project.
3
To stop recording, click the Record button again (or press the Space bar or Option-Shift-A).
By default, Final Cut Pro creates an audition containing both recordings.
Voiceover audition clip
To add another take to the audition, repeat steps 2 and 3. Each new take you record is added to
the audition.
To learn more about auditions, see
Add and remove clips in auditions
on page 295.
Preview and select a voiceover take
1
In the Timeline, select the audition containing the voiceover takes you want to review, and open
it by choosing Clip > Audition > Open (or pressing Y).
Click to preview different voiceover
takes, then select one to use.
2
In the audition window, select the take and press the Space bar (or press Control-Command-Y)
to play it.
67% resize factor