Apple Final Cut Pro X (10.1.2) User Manual
Page 112
Chapter 7
Edit your project
112
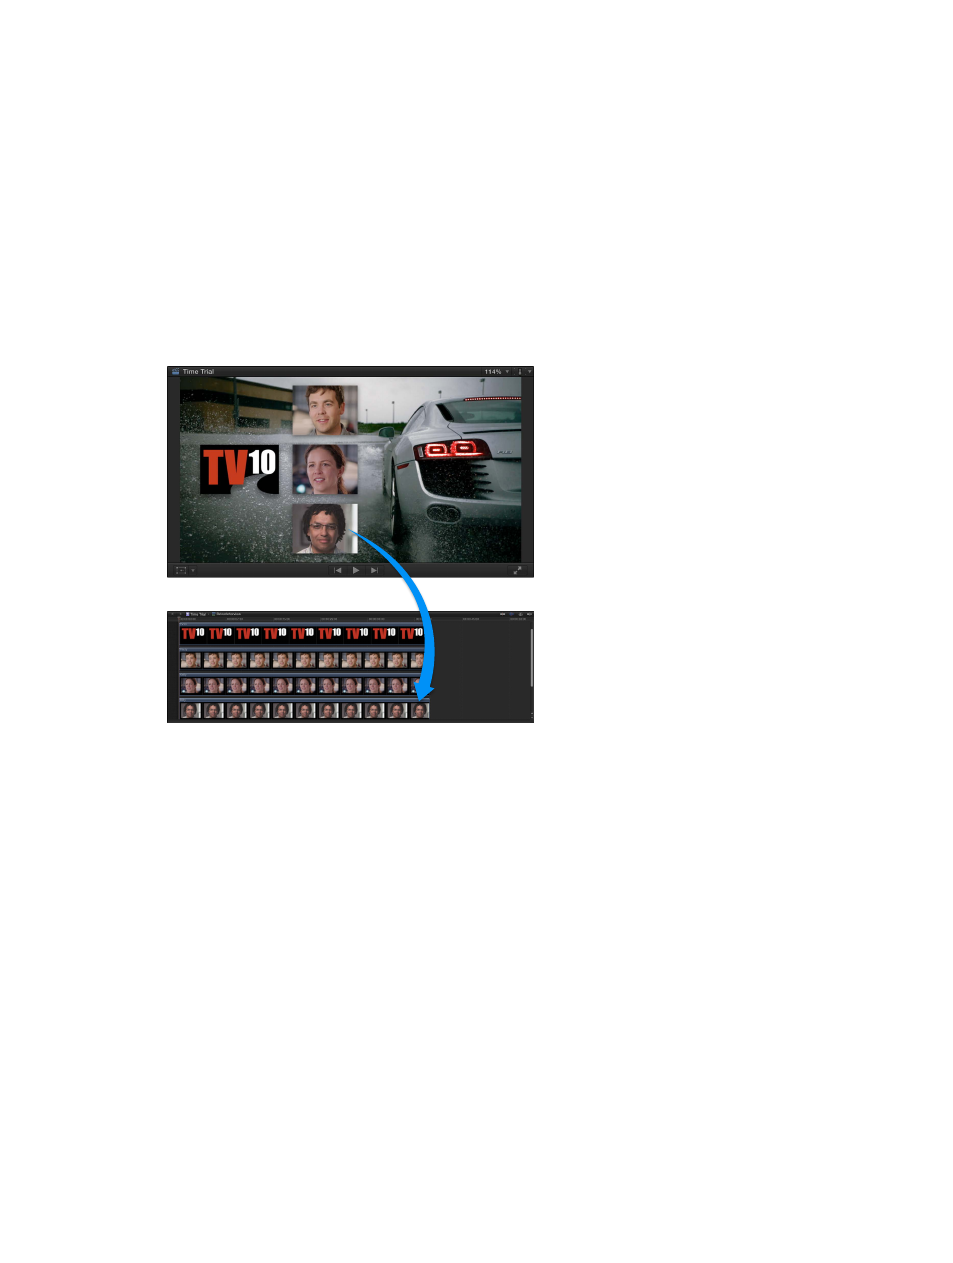
Add layered graphics files to the Timeline
You can add layered graphics files, such as Adobe Photoshop (PSD) files, created with another
image editing application to the Timeline.
1
Import the layered graphics file into an event.
Important:
If the layered graphics file has a transparent background, make sure your project’s
render format is set to Apple ProRes 4444 to preserve the transparency when rendering. See
on page 89.
2
In the Browser, Control-click the layered graphics image and choose Open in Timeline from the
shortcut menu.
Each layer appears in the Timeline as a connected clip that you can edit as you would any other
clip. For example, you can animate layers by fading them in or out.
Layered graphics image in the Viewer
Clips representing individual layers
The default duration for a layered graphics file is one minute. To adjust the duration of one of the
layers in the Timeline, use any of the trimming techniques described in this chapter. To adjust the
duration of all the layers, select them and choose Modify > Change Duration (or press Control-D).
For more information on creating layered graphics files for Final Cut Pro, go to
Edit a still image with an external image editing application
You can modify a still image with an external image editing application, and the changes appear
automatically in the clip in Final Cut Pro.
1
To add a still-image clip to the Timeline, follow the steps above.
2
To locate the clip’s source media file in the Finder, press Shift-Command-R.
3
Open the source media file in the external image editing application.
4
In the image editing application, modify the image and save the changes.
5
Switch back to Final Cut Pro.
The changes appear automatically in the still-image clip in Final Cut Pro.
You can also create freeze frames from your video clips. For more information, see
on page 113.
67% resize factor