Edit, move, and navigate to markers – Apple Final Cut Pro X (10.1.2) User Manual
Page 150
Chapter 7
Edit your project
150
Remove a marker
Do one of the following:
m
Navigate to a marker and choose Mark > Markers > Delete Marker (or press Control-M).
m
Select one or more clips, and choose Mark > Markers > Delete Markers in Selection.
m
Double-click a marker to open the Marker window, and click the Delete button.
m
Control-click the marker you want to remove, and choose Delete Marker from the shortcut menu.
Edit, move, and navigate to markers
You can view and edit marker information, and you can move markers within a clip or to
different clips.
Edit marker information and change marker types
By default, new markers are blue standard markers with placeholder text. You can change the
text at any time, and you can change the marker type to other marker types, including chapter
markers, to-do items, and completed to-do items.
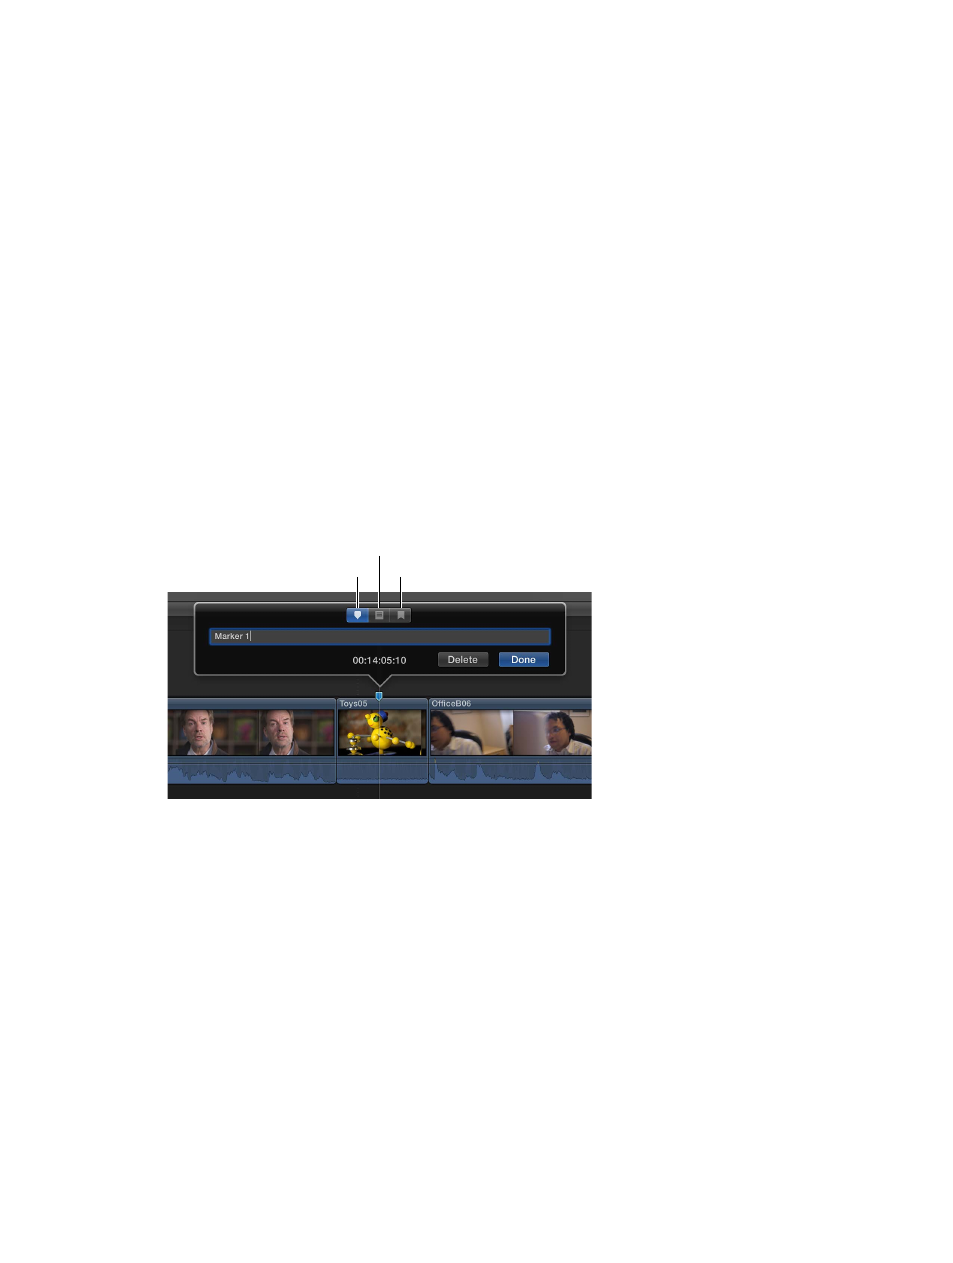
1
To view a marker’s information, do one of the following:
•
Select the marker and choose Mark > Markers > Modify Marker (or press Shift-M).
•
Control-click the marker and choose Modify Marker from the shortcut menu.
•
Double-click the marker.
The marker’s information appears above the marker.
Standard Marker button
Chapter Marker button
To-Do Item button
2
To modify the marker, do any of the following:
•
To change the descriptive text for the marker: Type the new text in the text field. (The text is
automatically selected when the marker information appears, so you don’t need to select it.)
•
To make the marker a chapter marker: Click the Chapter Marker button.
The marker turns into an orange chapter marker. For more information, see
markers and their thumbnail images
on page 152.
•
To make the marker a to-do item: Click the To-Do Item button.
The marker turns red.
67% resize factor