Add shape masks to a color mask, Add shape, Masks to a color mask – Apple Final Cut Pro X (10.1.2) User Manual
Page 387
Chapter 12
Color correction
387
3
Position the shape mask to its starting position in the Viewer.
4
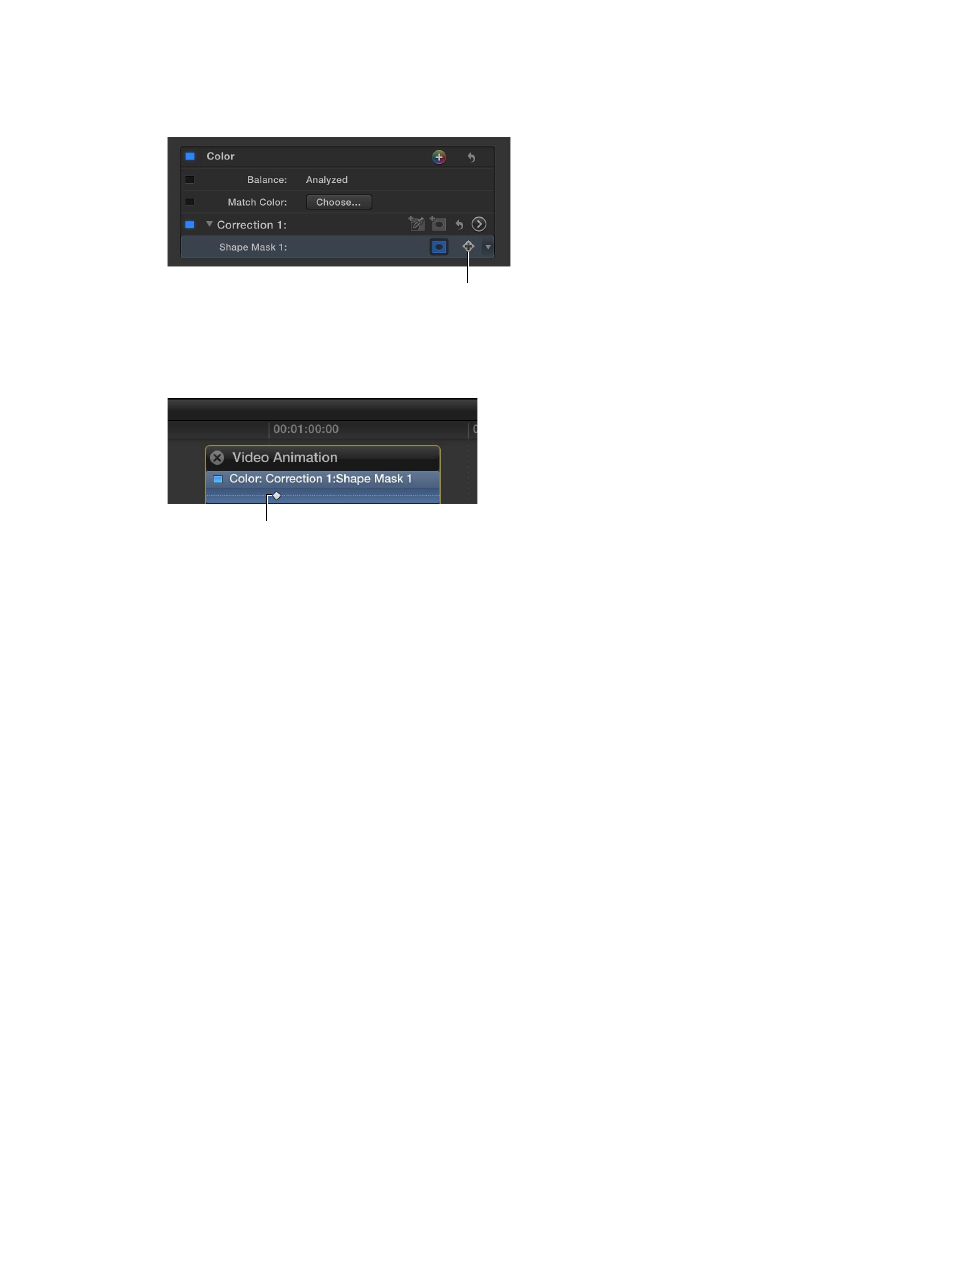
In the Video inspector, click the Keyframe button.
Click here to add
a keyframe.
A keyframe is added at the position of the playhead. You can see it in the Timeline by pressing
Control-V to open the Video Animation Editor. The keyframe appears in the Color section as a
diamond at the playhead position.
Keyframe indicator
5
Move the playhead to the next point in the clip where you want to define the shape mask’s
position, reposition the shape mask, and add the second keyframe.
6
To reposition the shape mask throughout the clip, continue adding keyframes until you’ve
defined the shape movement you want.
When you’ve added all the keyframes, you can play the clip to see the shape mask move
between them. For more information about working with keyframes, see
on page 258.
Add shape masks to a color mask
Often when you create a color mask, more areas of the video are affected by it than you would
like. For example, there might be a red car on the left side of the screen that you want to color
correct, and a red stop sign on the right that you don’t want to affect. In this situation, you can
add one or more shape masks to restrict the color mask to the areas defined by the shape masks.
Add a shape mask to a color mask
1
Select a clip in the Timeline, and use the Video inspector to add a color mask to it.
2
Apply a color correction using the Color Board, and note areas of the video that you don’t want
the color mask to affect.
For more information about working with the Color Board, see
on
page 381.
67% resize factor