Add a transition between color corrections – Apple Final Cut Pro X (10.1.2) User Manual
Page 389
Chapter 12
Color correction
389
Note: If you have applied multiple corrections to a clip, you can drag them in the Video inspector
to change their order. Rearranging the processing order can provide different results.
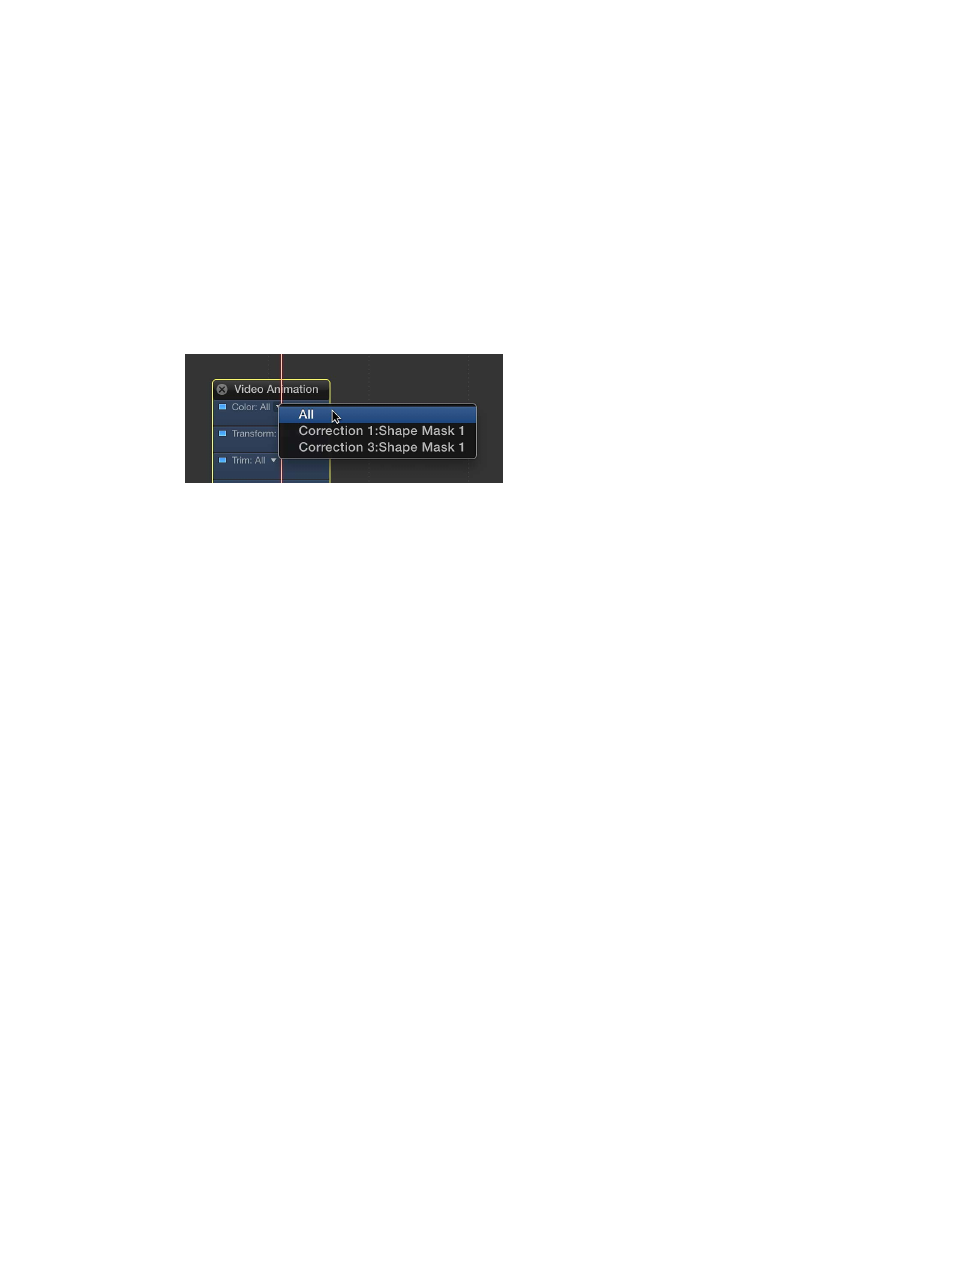
View color correction keyframes in the Timeline
If a clip has multiple corrections with animated shape masks, you can view a correction’s shape
mask keyframes in the Video Animation Editor above the clip in the Timeline.
1
In the Timeline, select a clip that has multiple color corrections with animated shape
masks applied.
2
Choose Clip > Show Video Animation (or press Control-V).
3
Choose the color correction you want to view from the Color pop-up menu:
•
To see a composite of keyframes from all corrections: Choose the correction, and if it contains
multiple shape masks, choose the one you want to see.
•
To see keyframes from a specific shape mask in a correction: Choose the correction, and if it
contains multiple shape masks, choose the one you want to see.
When you choose a specific correction, such as Correction 2, you see its keyframes in white
and the keyframes of other corrections in dark gray.
Add a transition between color corrections
You can have a video clip change from one color correction to another using a transition.
For example, if you want a scene to gradually highlight the two main characters, you can use
a transition to dissolve between the normal clip and the clip with shape masks and a color
correction applied that darkens the image outside of the masks.
Important:
Make sure that Available Media is chosen from the “Apply transitions using” pop-up
menu in the Editing pane of Final Cut Pro preferences. For more information about this setting,
see
on page 212.
Configure a clip to change transitions
1
Temporarily switch to the Blade tool by holding down the B key.
2
In the Timeline, click a video clip at the point where you want to change between
color corrections.
The clip splits into two clips.
3
Apply a different color correction to each clip.
You can also leave one clip uncorrected and apply a color correction to the other.
The color correction could be an exaggerated tint, an exposure change, or any other
noticeable adjustment.
4
Select the edit point between the two clips, and press Command-T to insert a cross dissolve.
When you play the clip, one color correction dissolves into the other as the edit point is passed.
67% resize factor