Color correct the whole image – Apple Final Cut Pro X (10.1.2) User Manual
Page 381
Chapter 12
Color correction
381
•
Choose an area of the image to correct: Draw one or more shape masks, and then choose
whether the correction applies inside or outside the masks. You can even have the position of
the masks change as the clip plays. See
Target specific areas using shape masks
on page 385.
You can also apply multiple color corrections to a single clip and use shape masks in
combination with a color mask. For example, you could use one correction to set the clip’s overall
color look, a second to target and alter a specific color, and a third to target a different color or an
area defined by a shape mask. See
Apply multiple color corrections
on page 388 and
on page 387.
You make manual color adjustments using the Color Board.
Color correct the whole image
You use the Color Board to manually adjust a clip’s color, saturation, and exposure.
Manually color correct the whole clip image
1
Select a clip in the Timeline, and do one of the following:
•
Choose Window > Go To > Color Board (or press Command-6).
•
Choose Show Color Board from the Enhancements pop-up menu in the toolbar.
•
Click the Color Board button in the Color section of the Video inspector. (After you make
any Color Board adjustments, the button changes color.)
•
Click the upper-left corner of a clip in the Timeline and choose Color Adjustment from the
pop-up menu.
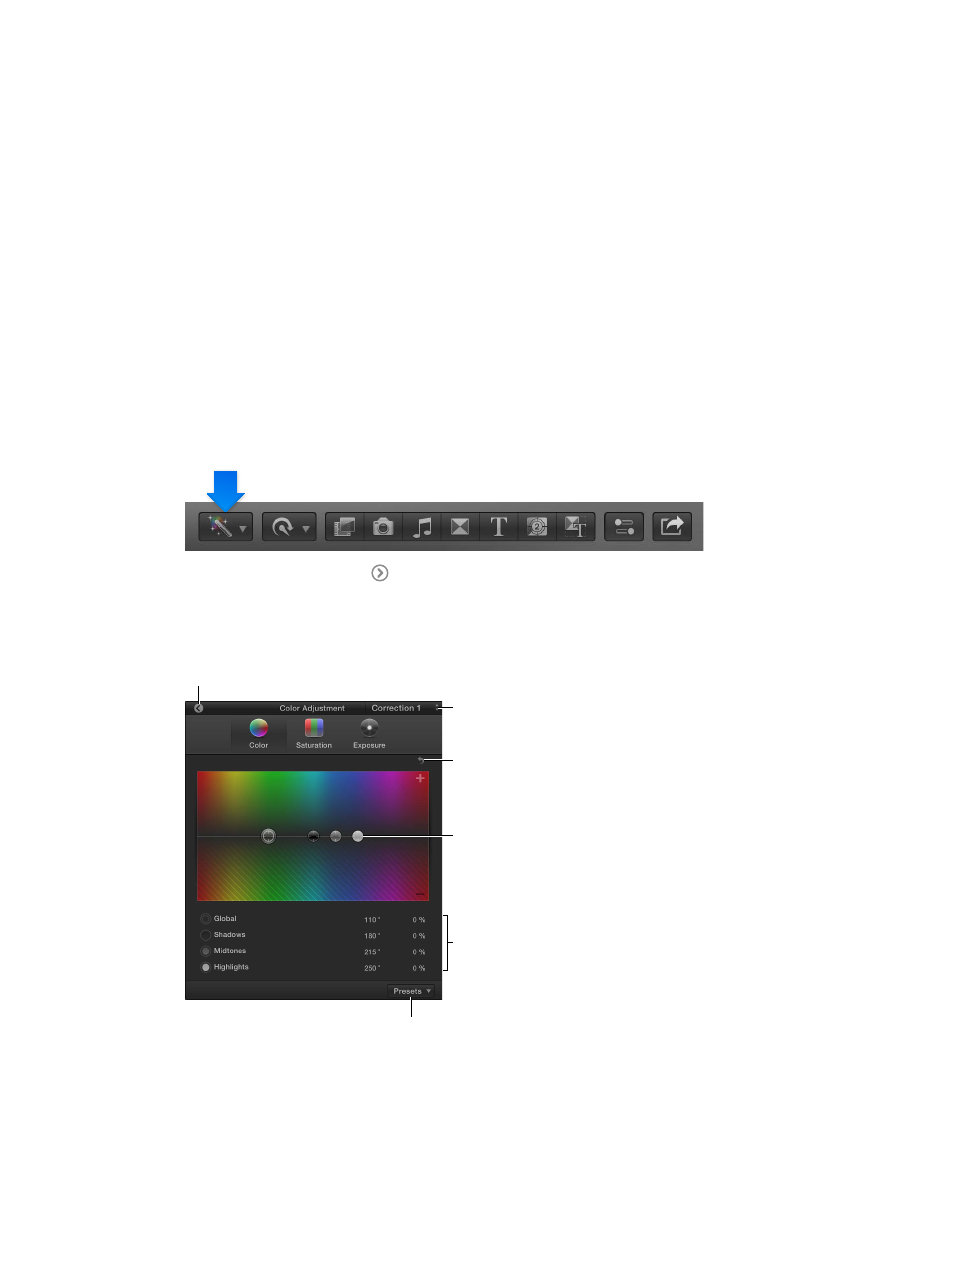
Click to return to the
Video inspector.
Click the Reset button to
remove the adjustments
in this pane.
Choose the correction
to work with.
Drag the controls to
change the values.
Use value sliders to
change the values.
Use the Action pop-up menu
to create or choose a color
correction preset.
2
If the clip has multiple corrections applied to it, choose the correction to adjust from the
Correction pop-up menu in the Color Board’s upper-right corner.
67% resize factor