Apple Final Cut Pro X (10.1.2) User Manual
Page 229
Chapter 9
Add transitions, titles, effects, and generators
229
2
To access the Transform controls, do one of the following:
•
Choose Transform from the pop-up menu in the lower-left corner of the Viewer (or press Shift-T).
•
Control-click in the Viewer and choose Transform from the shortcut menu.
3
To adjust the effect using the onscreen controls:
•
Blue handles at each corner: Drag these to adjust the image’s size while maintaining its current
aspect ratio.
•
Blue handles in the middle of each side: Drag these to independently adjust the vertical and
horizontal image size, changing the aspect ratio of the image.
Note: These controls aren’t available in the Video inspector.
•
White circle in the center: Shows the rotation anchor point. Drag anywhere inside the image to
adjust the image’s position.
•
Blue handle extending from the center circle: Drag this to rotate the image.
Tip: For finer precision when rotating the image, drag the rotation handle farther away from
the anchor point in the center.
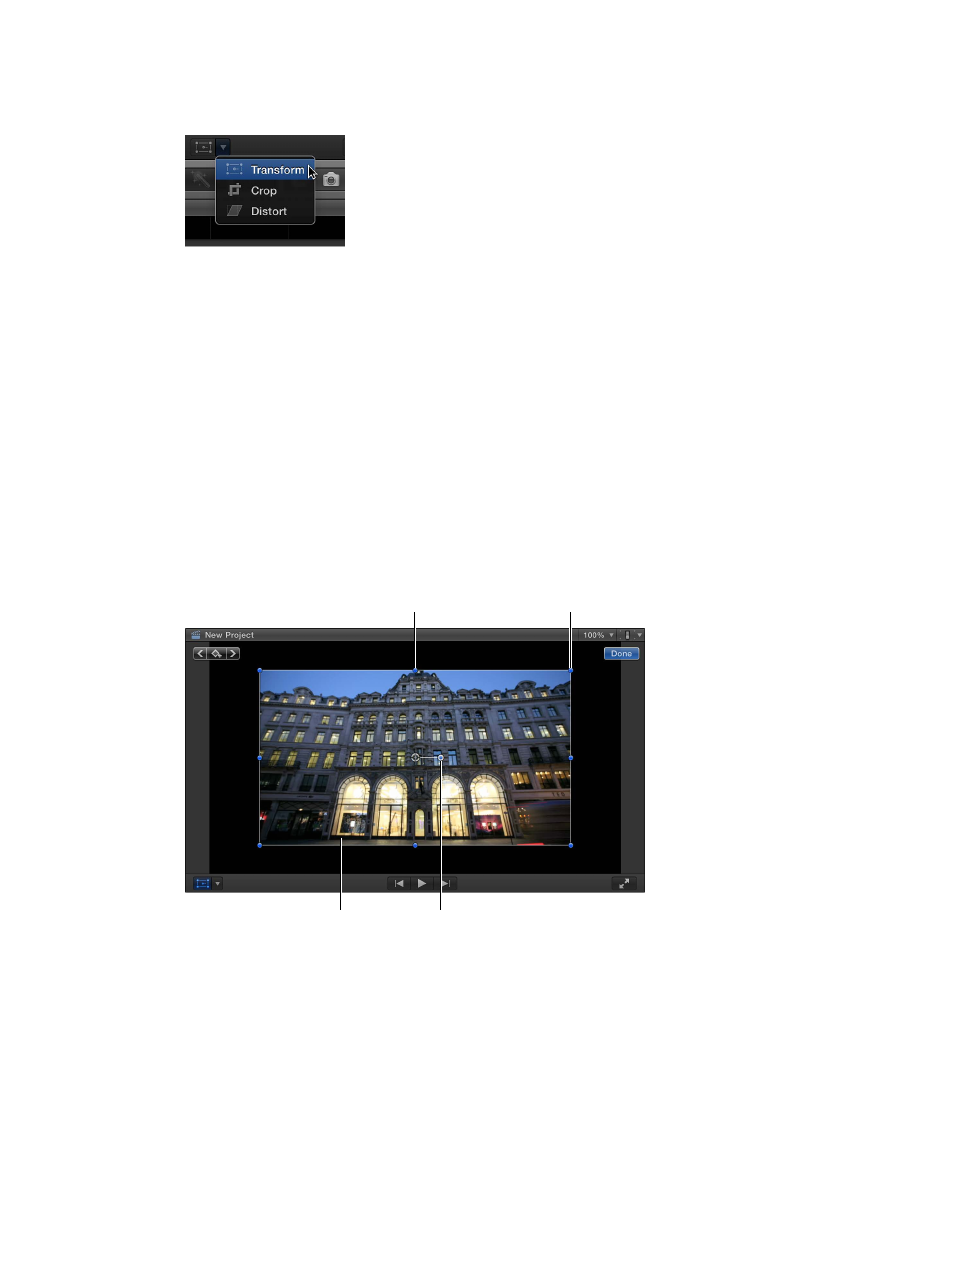
Drag a corner handle
to change the image’s
size without changing
its aspect ratio.
Drag a side’s handle
to change the aspect
ratio of the image.
Drag anywhere inside the
image to set its position.
Drag this handle
to rotate the image.
4
Use the Transform controls in the Video inspector as follows:
•
Position X and Y: Use these to move the image left and right (X) and up and down (Y).
•
Rotation: Use this to rotate the image around its anchor point.
•
Scale: Use this to change the image’s size.
•
Anchor X and Y: Use these to move the image’s center point. This defines the point that the
image rotates around.
Note: This control isn’t available in the onscreen controls.
67% resize factor