Pm designer operation manual – B&B Electronics WOP-2121V-N4AE - Manual User Manual
Page 104
4
3
PM Designer Operation Manual
3-43
CHAPTER 3 CREATING PANEL APPLICATIONS
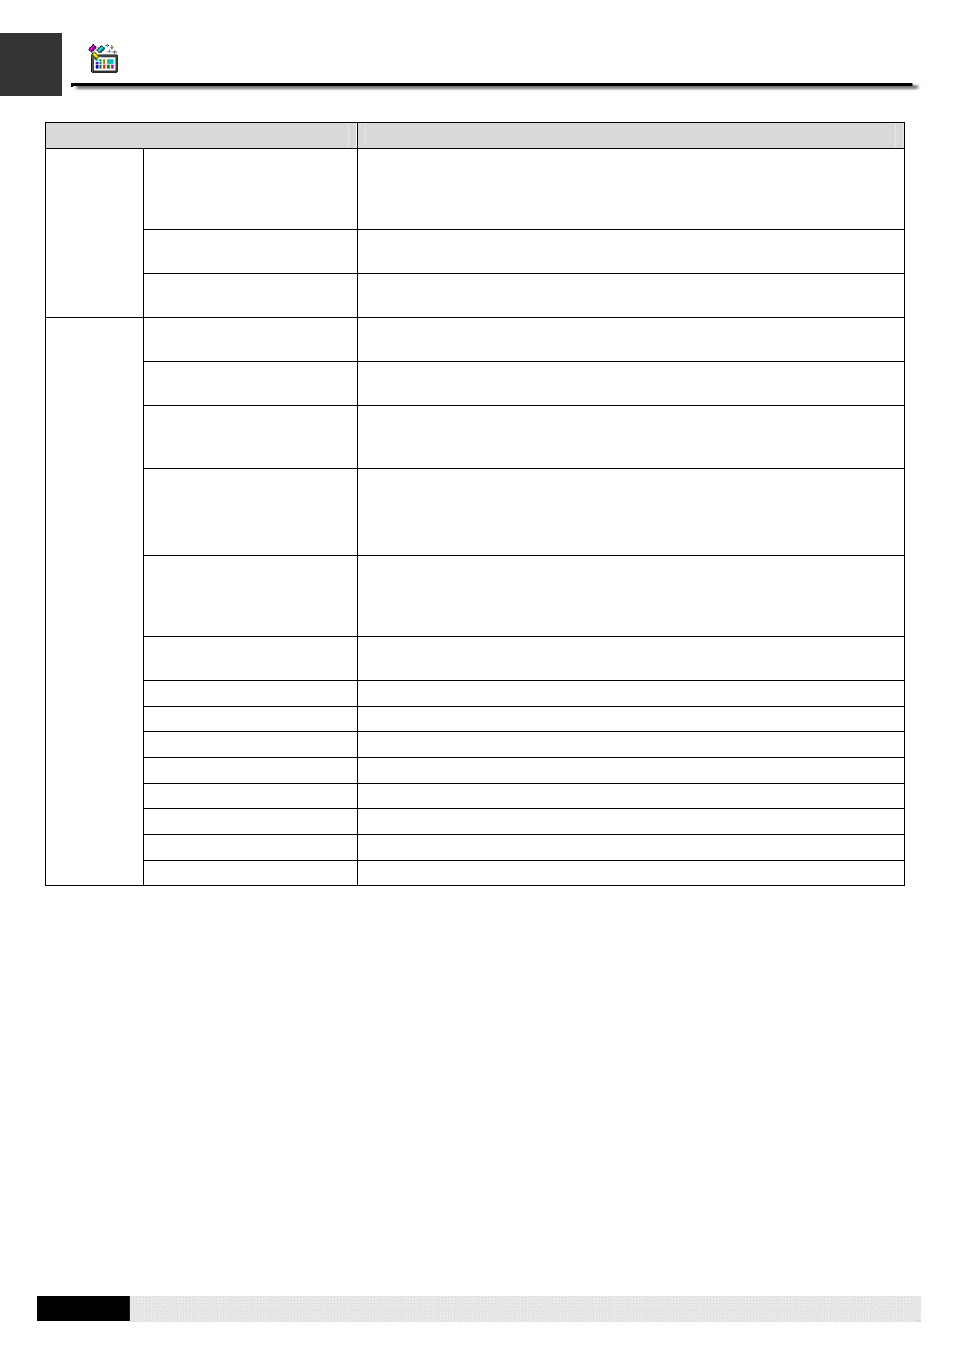
Property
Description
Reset SNR to Zero
If this option is selected, the panel always resets the Screen Number
Register to zero when it detects a nonzero value is in the word . If this
option is not selected, the panel resets the Screen Number Register to
zero only when the specified screen is valid and not displayed yet.
Command Flag Register
You can use the command flags to request the panel to do the specified
operations.
Recipe Number Register
When you use command flag #5 to set the current recipe number for
recipe block #0, you need to specify the recipe number in this word.
Clear Alarm History (#0)
Check this option so you can use command flag #0 to request the panel to
clear the alarm history.
Clear Alarm Counts (#1)
Check this option so you can use command flag #1 to request the panel to
clear the alarm counts.
Write Recipe To PLC (#4)
Check this option so you can use command flag #4 to request the panel to
write the current recipe of recipe block #0 to the specified address which is
defined in the Recipe Block dialog box.
Set Current Recipe
Number (#5)
Check this option so you can use command flag #5 to request the panel to
set the current recipe number for recipe block #0.
You need to specify the following:
1) Recipe Number Register: the recipe number
Read Recipe From PLC
(#6)
Check this option so you can use command flag #6 to request the panel to
read a recipe from the specified address which is defined in the Recipe
Block dialog box and use that recipe to replace the current recipe of recipe
block #0.
Sound Buzzer (#7)
Check this option so you can use command flag #7 to request the panel to
sound its buzzer.
Trigger Bit #4 (#8)
Check this option so command flag #8 will be used as trigger bit #4.
Trigger Bit #5 (#9)
Check this option so command flag #9 will be used as trigger bit #5.
Trigger Bit #6 (#10)
Check this option so command flag #10 will be used as trigger bit #6.
Trigger Bit #7 (#11)
Check this option so command flag #11 will be used as trigger bit #7.
Trigger Bit #0 (#12)
Check this option so command flag #12 will be used as trigger bit #0.
Trigger Bit #1 (#13)
Check this option so command flag #13 will be used as trigger bit #1.
Trigger Bit #2 (#14)
Check this option so command flag #14 will be used as trigger bit #2.
Command
Flag
Trigger Bit #3 (#15)
Check this option so command flag #15 will be used as trigger bit #3.