Adobe Flash Professional CC 2014 v.13.0 User Manual
Page 89

To add a property keyframe to a property curve, place the playhead in the desired frame and click the Add or Remove Keyframe button for
the property in the Motion Editor.
You can also Ctrl-click (Windows) or Option-click (Macintosh) the graph in the frame where you want to add the property keyframe.
You can also right-click (Windows) or Command-click (Macintosh) the property curve and choose Add Keyframe.
To remove a property keyframe from a property curve, Ctrl-click (Windows) or Option-click (Macintosh) the control point for the property
keyframe in the property curve.
You can also right-click (Windows) or Command-click (Macintosh) the control point and choose Remove Keyframe.
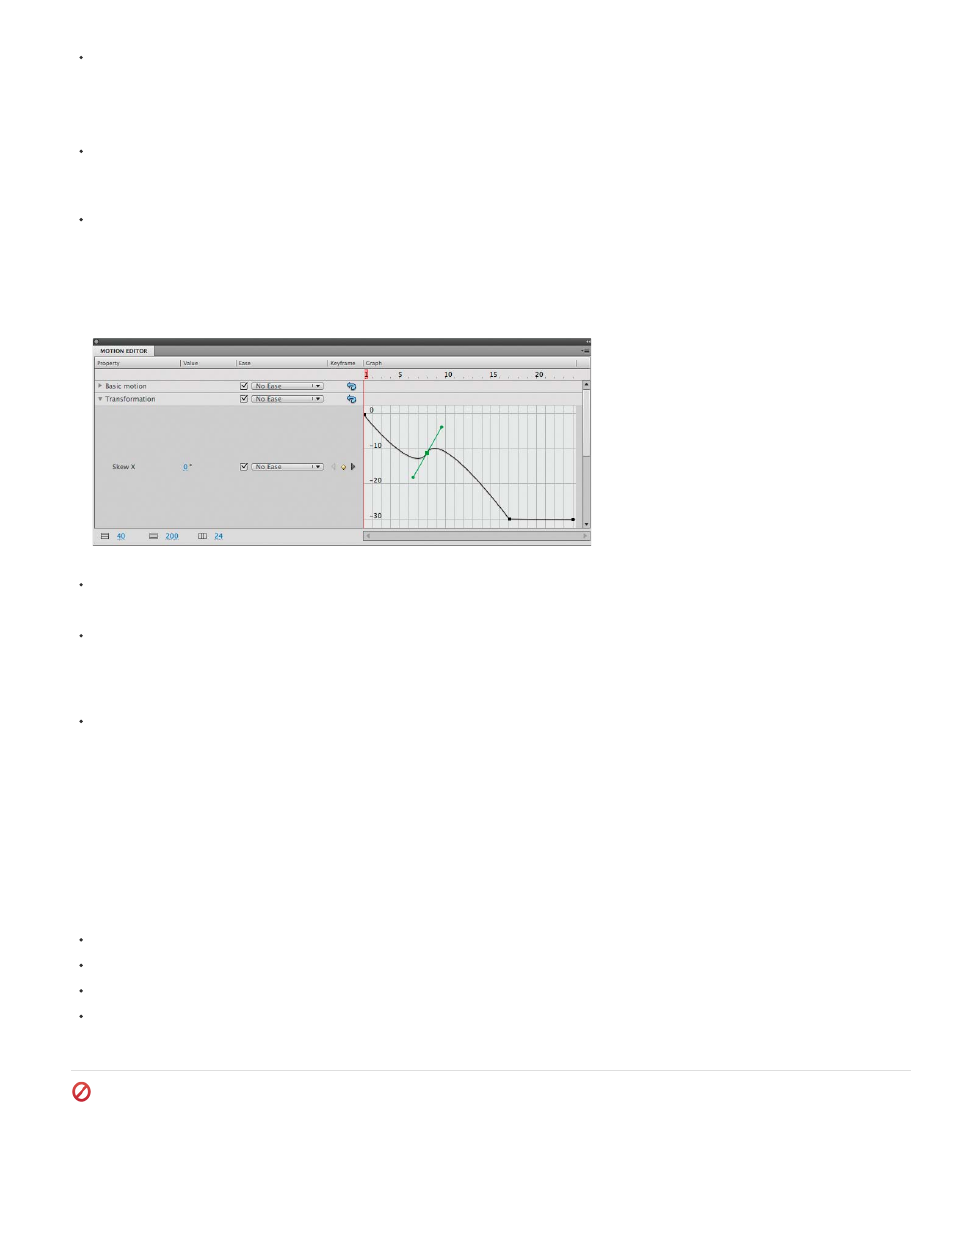
To toggle a control point between corner point and smooth point modes, Alt-click (Windows) or Command-click (Macintosh) the control point.
When a control point is in smooth point mode, its Bezier handles are exposed and the property curve passes through the point as a smooth
curve. When a control point is a corner point, the property curve forms an angle when it passes through the control point. Bezier handles are
not exposed for corner points.
To set the point to smooth point mode you can also right-click (Windows) or Command-click (Macintosh) the control point and choose
Smooth Point, Smooth Right, or Smooth Left. To set the point to corner point mode, choose Corner Point.
A property curve showing a smooth point (frame 8) and a corner point (frame 17).
To move a property keyframe to a different frame, drag its control point.
You cannot drag a property keyframe past the keyframes that follow or precede it.
To toggle a property keyframe for the spatial properties X, Y, and Z between roving and non-roving, right-click (Windows) or Command-click
(Macintosh) the property keyframe in the Motion Editor. For more information about roving keyframes, see
Edit the motion path of a tween
.
You can also turn off roving for an individual property keyframe in the Motion Editor by dragging the roving keyframe to a vertical frame
divider.
To link associated pairs of X and Y properties, click the Link X and Y Property Values button for either one of the properties you want to link.
When the properties are linked, their values are constrained so the ratio between them is preserved when you enter a value for either of the
linked properties. Examples of associated X and Y properties include the Scale X and Scale Y properties and the Blur X and Blur Y
properties of the Drop Shadow filter.
Tutorials and examples
The following videos and articles provide additional detailed information about working with the Motion Editor.
Video:
(5:08, Adobe TV)
Video:
(3:40, Adobe TV)
Video:
Adobe TV)
Video:
(4:17, Adobe TV)
(Deprecated with Flash Professional CC) Easing tween animations
Easing allows you to speed up or slow down the beginning or end of an animation for more realistic motion or more pleasing effects. It is a
technique for modifying the way that Flash calculates the property values in between property keyframes in a tween. Without easing, Flash
82
