Exporting hd video – Adobe Flash Professional CC 2014 v.13.0 User Manual
Page 508
Facebook posts are not covered under the terms of Creative Commons.
Exporting HD video
Before you begin exporting, do the following:
Install QuickTime
Set the frame-rate to a value equal to or less than 60 fps. For more information, see
1. Create or open an existing FLA.
2. Go to File > Export > Export Video.
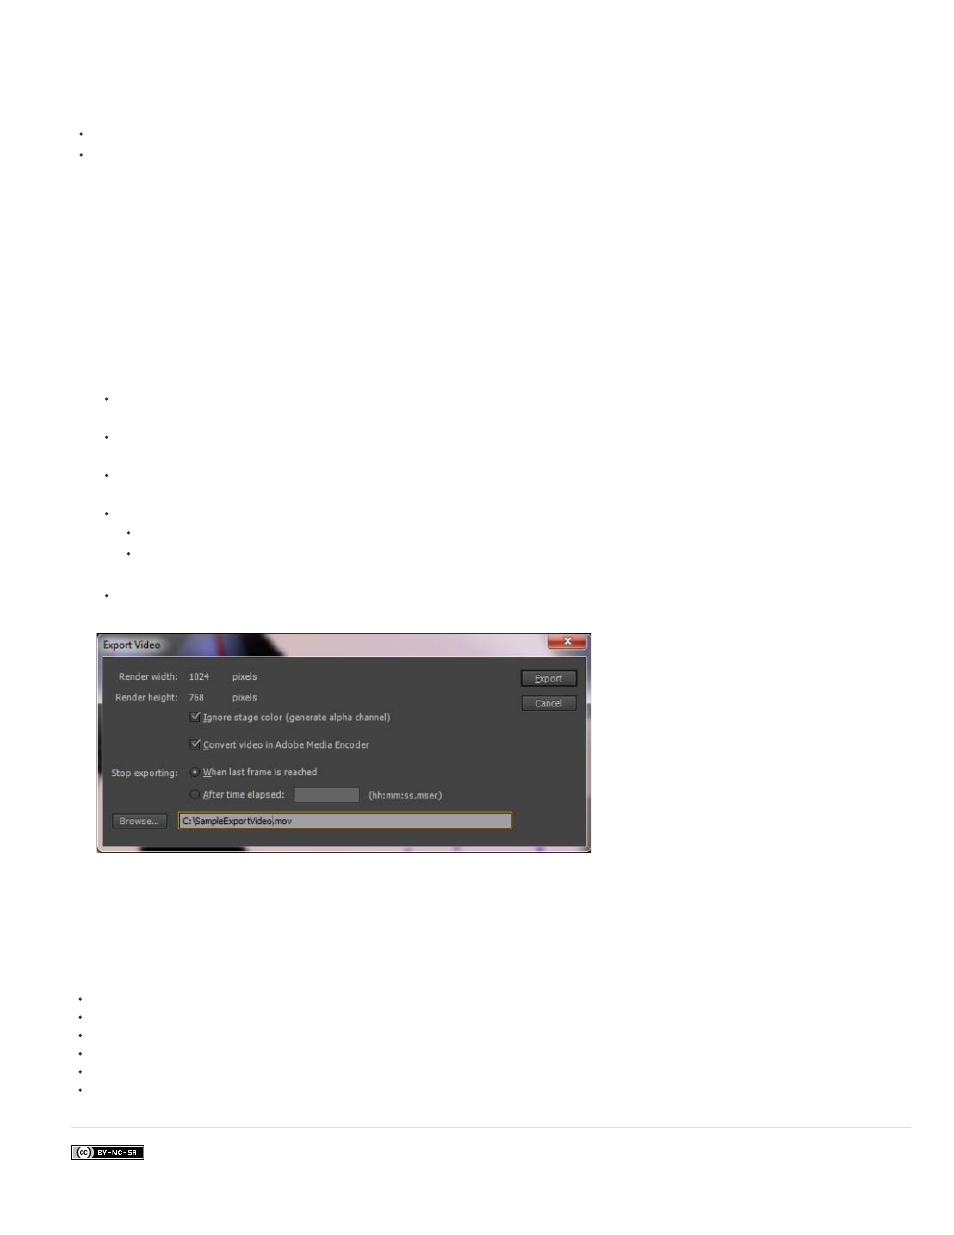
3. On the Export Video dialog, the Render Width and Render Height assume width and height values set for Stage size.
4. On the Export Video dialog:
Render Width and Render Height: Static values equal to the Width and Height of the Stage, respectively. If you want to change the
Render Width and Render Height values, then modify the Stage size accordingly.
Ignore Stage Color (generate alpha channel): Creates an alpha channel using the stage color. The alpha channel is encoded as a
transparent track. It lets you overlay the exported QuickTime movie on top of other content to alter the background color or scene.
Convert Video in Adobe Media Encoder: Select this option if you want to convert the exported MOV file to a different format using AME.
If selected, AME is launched after Flash completes exporting the video.
Stop Exporting: Specify when Flash Pro terminates exporting.
When The Last Frame is Reached: Select this option if you want to terminate at the last frame.
After Time Elapsed: Select this option and specify the time span after which you want to terminate exporting. The option allows you
to export sections of the video, separately.
Path for the Exported Video: Enter or browse to the path where you want to export the video.
5. Click Export. If you selected the Convert video in Adobe Media Encoder option, AME is launched and the exported MOV file is available in a
new queue. To know more about encoding and converting videos using AME, see
See also
501