Adobe Photoshop CS3 User Manual
Page 87
PHOTOSHOP CS3
User Guide
80
4
Click OK.
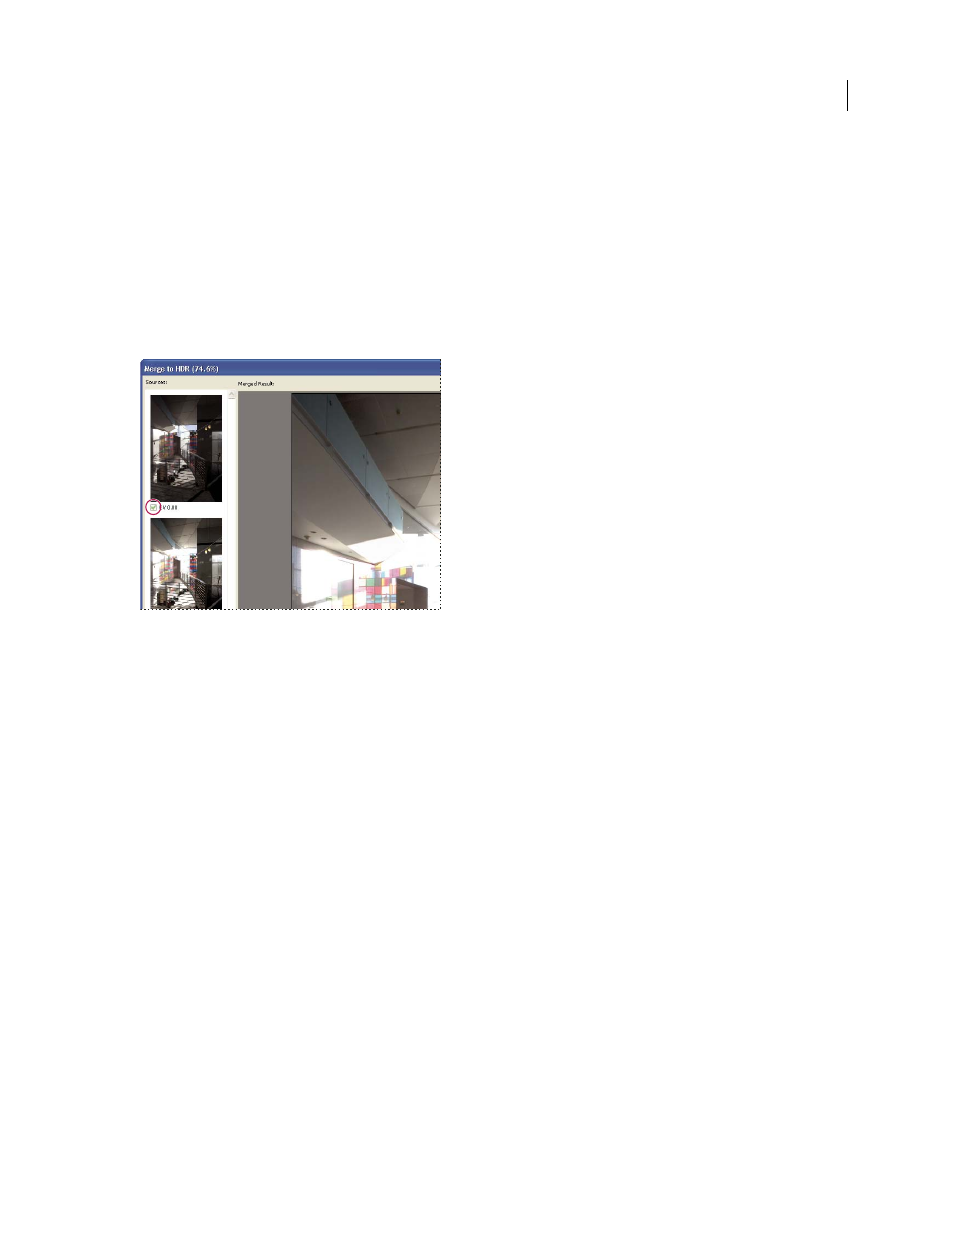
A second Merge To HDR dialog box displays thumbnails of the images being used in the merged result, a preview of
the merged result, a Bit Depth menu, and a slider for setting the white point preview.
5
If necessary, do one of the following to set the view options for the merged result preview:
•
Click the Minus or Plus buttons below the preview image to zoom out or zoom in.
•
Choose a view percentage or mode from the pop-up menu below the preview image.
6
(Optional) Deselect or select the thumbnails in the Sources filmstrip to specify which images to use in the merged
image.
Selecting the thumbnails in the Sources filmstrip
7
Choose a bit depth for the merged image from the Bit Depth menu.
Be sure to choose 32 Bits/Channel if you want the merged image to store the entire dynamic range data of the HDR
image. 8-bits and (non-floating point) 16-bpc images files cannot store the entire range of luminance values in an
HDR image.
8
Move the slider below the histogram to preview the merged image.
Moving the slider adjusts the image preview only. All the HDR image data remains intact in the merged image file.
If you’re saving the merged image as 32-bpc, the preview adjustment is stored in the HDR image file and applied
whenever the file is opened in Photoshop. The preview adjustment is always accessible and adjustable by choosing
View > 32-Bit Preview Options.
9
Click OK to create the merged image.
If you chose to save the merged image as an 8-bits or 16-bpc image, the HDR Conversion dialog box opens. Make
the exposure and contrast corrections to produce an image with the dynamic range (tonal range) you want. For more
information, see “Convert from 32 bits to 8 or 16 bpc” on page 81.
Take photos for merging to HDR
Keep the following tips in mind when you take photos to be combined with the Merge To HDR command:
•
Secure the camera to a tripod.
•
Take enough photos to cover the full dynamic range of the scene. You can try taking at least five to seven photos,
but you might need to take more exposures depending on the dynamic range of the scene. The minimum number
of photos should be three.