Transform perspective while cropping – Adobe Photoshop CS3 User Manual
Page 199
PHOTOSHOP CS3
User Guide
192
Transform perspective while cropping
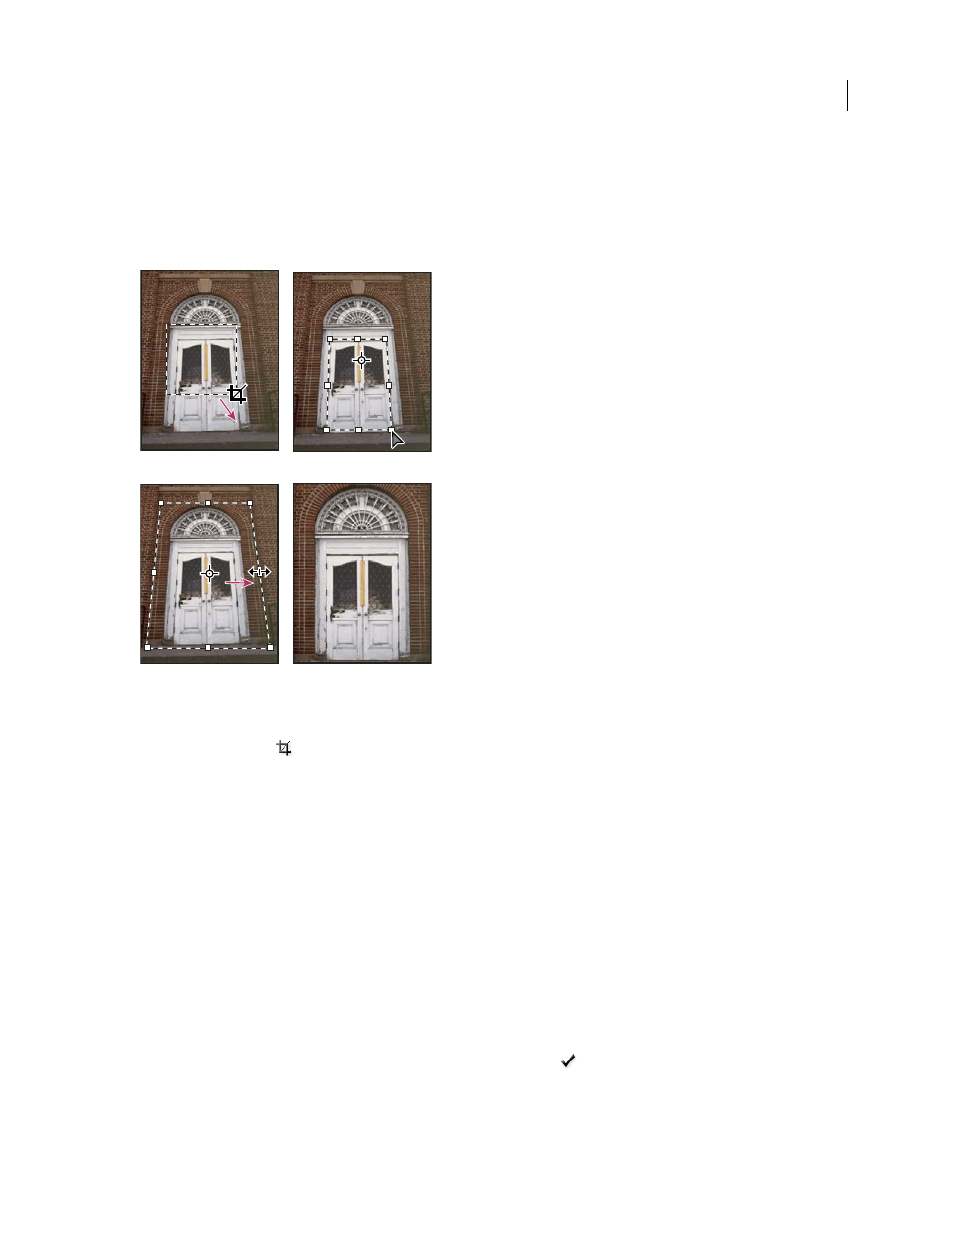
The Crop tool has an option that lets you transform the perspective in an image. This is very useful when working
with images that contain keystone distortion. Keystone distortion occurs when an object is photographed from an
angle rather than from a straight-on view. For example, if you take a picture of a tall building from ground level, the
edges of the building appear closer to each other at the top than they do at the bottom.
Steps to transform perspective
A. Draw initial cropping marquee B. Adjust cropping marquee to match the object’s edges C. Extend the cropping bounds D. Final image
1
Select the Crop tool
and set the crop mode.
2
Drag the cropping marquee around an object that was rectangular in the original scene (although it doesn’t appear
rectangular in the image). You’ll use the edges of this object to define the perspective in the image. The marquee
doesn’t have to be precise—you’ll adjust it later.
Important: You must select an object that was rectangular in the original scene or Photoshop might not produce the
perspective transformation you expected.
3
Select Perspective in the options bar, and set the other options as desired.
4
Move the corner handles of the cropping marquee to match the object’s edges. This defines the perspective in the
image, so it is important to precisely match the object’s edges.
5
Drag the side handles to extend the cropping bounds while preserving the perspective.
Do not move the center point of the cropping marquee. The center point needs to be in its original position in order
to perform perspective correction.
6
Do one of the following:
•
Press Enter (Windows) or Return (Mac OS), click the Commit button
in the options bar, or double-click inside
the cropping marquee.
A
C
D
B