Adobe Photoshop CS3 User Manual
Page 173
PHOTOSHOP CS3
User Guide
166
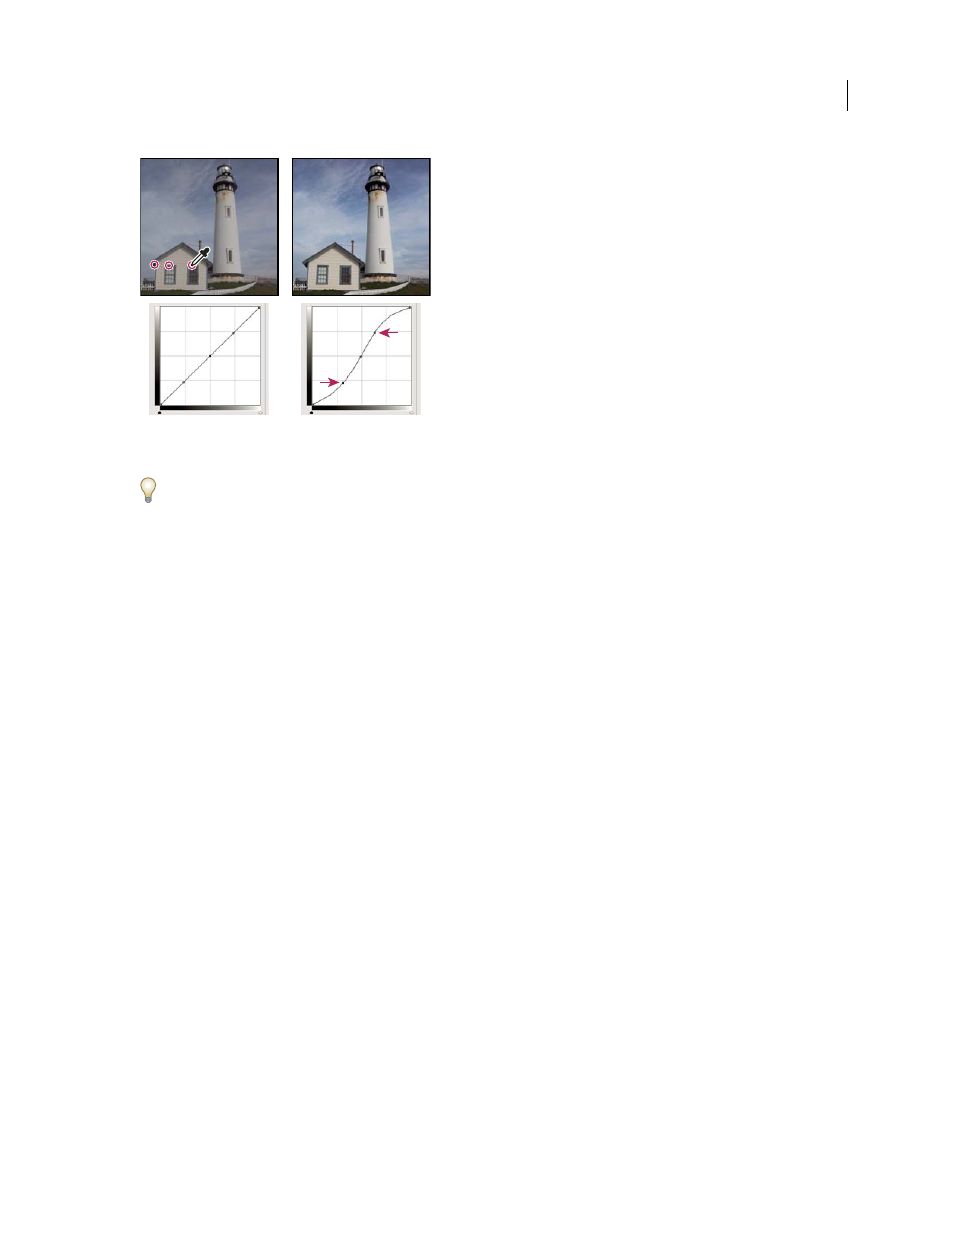
Ctrl-click (Windows) or Command-click (Mac OS) three areas of an image to add points to the curve. Lightening the highlights and darkening
the shadows is represented by an S-curve where the image contrast is increased.
To determine the lightest and darkest areas in an RGB image, drag across the image. The Curves dialog box displays
the intensity values of the area under the pointer, and the corresponding location on the curve. Dragging the pointer
across a CMYK image shows the percentages in the Color palette, if it’s set to display CMYK values.
4
Do one of the following to adjust the shape of the curve:
•
Click a point, and drag the curve until the tone and color look correct. Press Shift and drag to constrain the curve
horizontally and vertically.
•
Click a point on the curve, and enter values in the Input and Output text boxes.
•
Select the pencil at the top of the dialog box, and drag to draw a new curve. You can hold down Shift to constrain
the curve to a straight line, and click to define endpoints. When you are finished, click Smooth to smooth the
curve.
Points on the curve remain anchored until you move them. As a result, you can make an adjustment in one tonal
area while other areas remain unaffected.
Apply an Auto correction
You can apply an automatic color correction using options in the Auto Color Correction Options dialog box. You
can apply an Auto Color, Auto Contrast, or Auto Levels correction to an image. For more information on these
options, see “Set Auto adjustment options” on page 185.
Set black and white points
Use the Black and White sliders to quickly set black and white points. For example, if you move the black point slider
to the right at input 5, Photoshop maps all the pixels at input 5 and lower to level 0. Similarly, if you move the white
point slider to the left at level 243, Photoshop maps all pixels at level 243 and higher to level 255. The mapping affects
the darkest and lightest pixels in each channel. The corresponding pixels in the other channels are adjusted propor-
tionately to avoid altering the color balance.
❖
Drag the black and white point sliders to any point along the axis. As you drag, note that the input value changes.
To preview clipping as you adjust black and white points, select Show Clipping in the Curves dialog box, or hold
down Alt (Windows) or Option (Mac OS) as you drag the sliders.