Apple Final Cut Express 4 User Manual
Page 716
716
Part IX
5
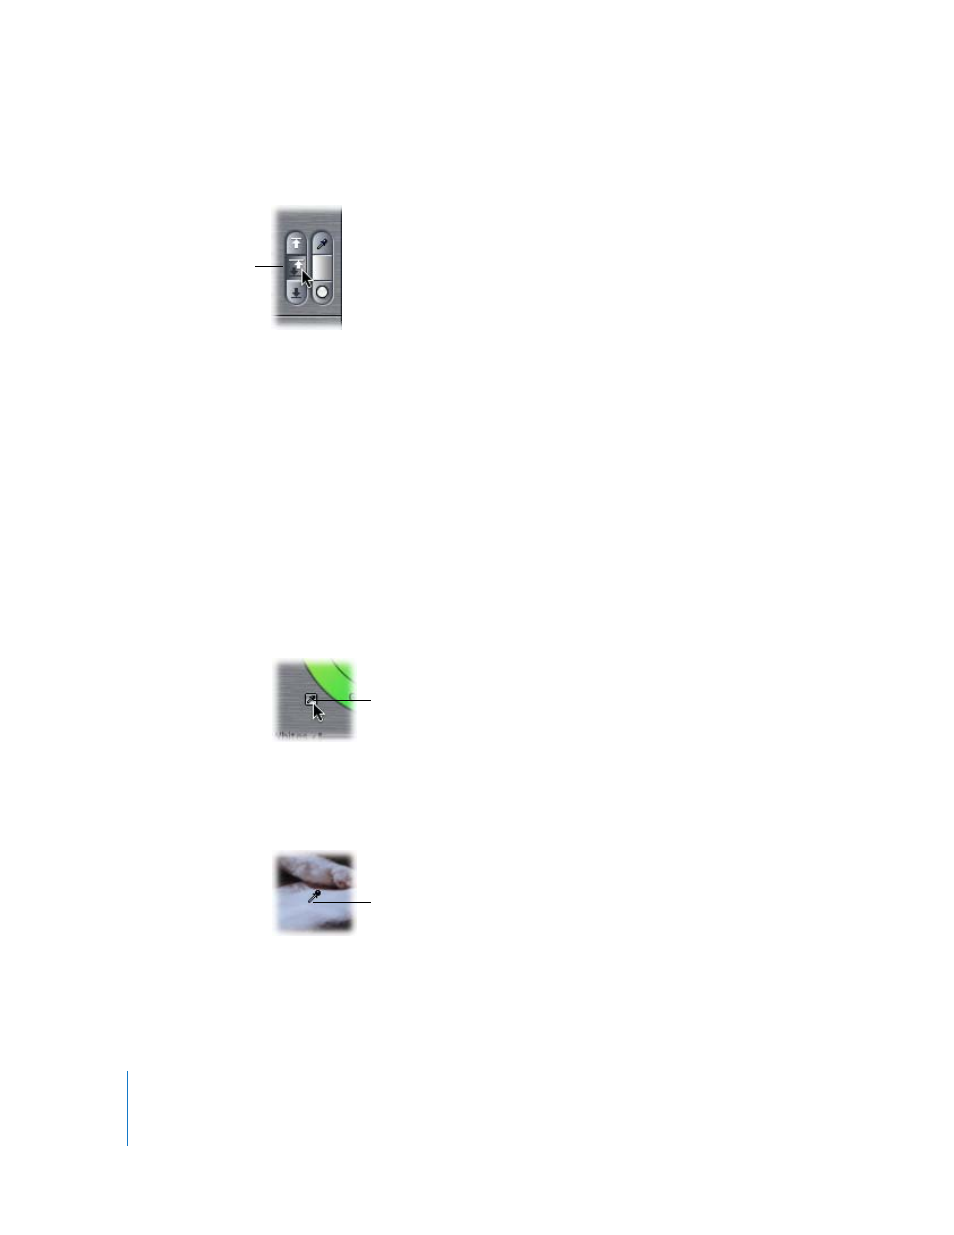
Click the Auto Contrast button to maximize the range from white to black in your clip.
The Whites and Blacks sliders automatically adjust themselves to achieve the best
numeric distribution based on the luma levels. This gives you a starting point from
which to proceed.
6
Because the image is underexposed, adjust the Mids slider to bring more detail out of
the shadows.
Moving the Mids slider to the right moves the distribution of midtones farther to the
right. Lightening this shot using the Mids slider, as opposed to readjusting the whites,
allows you to preserve the maximum amount of available detail in the image.
Otherwise, boosting the whites might result in the lighter areas of your clip being
blown out.
Now it’s time to address the color. In the example, the white cat is tinted green because
the video camera was white-balanced incorrectly.
7
To compensate for the green tint, click the Auto-Balance eyedropper.
Note: When this button is selected, your pointer turns into an eyedropper when you
move it into the Canvas.
8
Click the eyedropper in an area of the picture that’s supposed to be pure white.
The Color Corrector filter automatically adjusts the Balance control to compensate for
whatever tint exists in that area of the picture. In this example, click a highlight of the
white bedspread.
Auto Contrast button
Click the eyedropper
near the Balance control.
Click in a white area of
the image, such as the
bedspread.