Performing a slip edit using the slip tool – Apple Final Cut Express 4 User Manual
Page 488
488
Note: To slip a clip, it must have handles on both sides, meaning that there must be
additional media available on both the head and the tail of the clip. If you are having
trouble slipping a clip, check that the clip has handles on both sides.
You can perform slip edits by dragging with the Slip tool or, for greater precision, by
using timecode.
Performing a Slip Edit Using the Slip Tool
You can perform slip edits in the Viewer or the Timeline.
To perform a slip edit in the Viewer using the Slip tool:
1
Double-click a sequence clip to open it in the Viewer.
2
Select the Slip tool in the Tool palette (or press the S key).
3
Drag either the In or Out point along the Viewer’s scrubber bar.
4
Release the mouse button when the clip is positioned at a range of frames that
you like.
The In and Out points move together, maintaining the clip’s duration.
5
Click the Play In to Out button (or press Shift-\) to review the new section between
your sequence clip’s In and Out points.
The clip is automatically updated in the Timeline. The duration of the clip and the
sequence remain the same, and the surrounding clips are not affected.
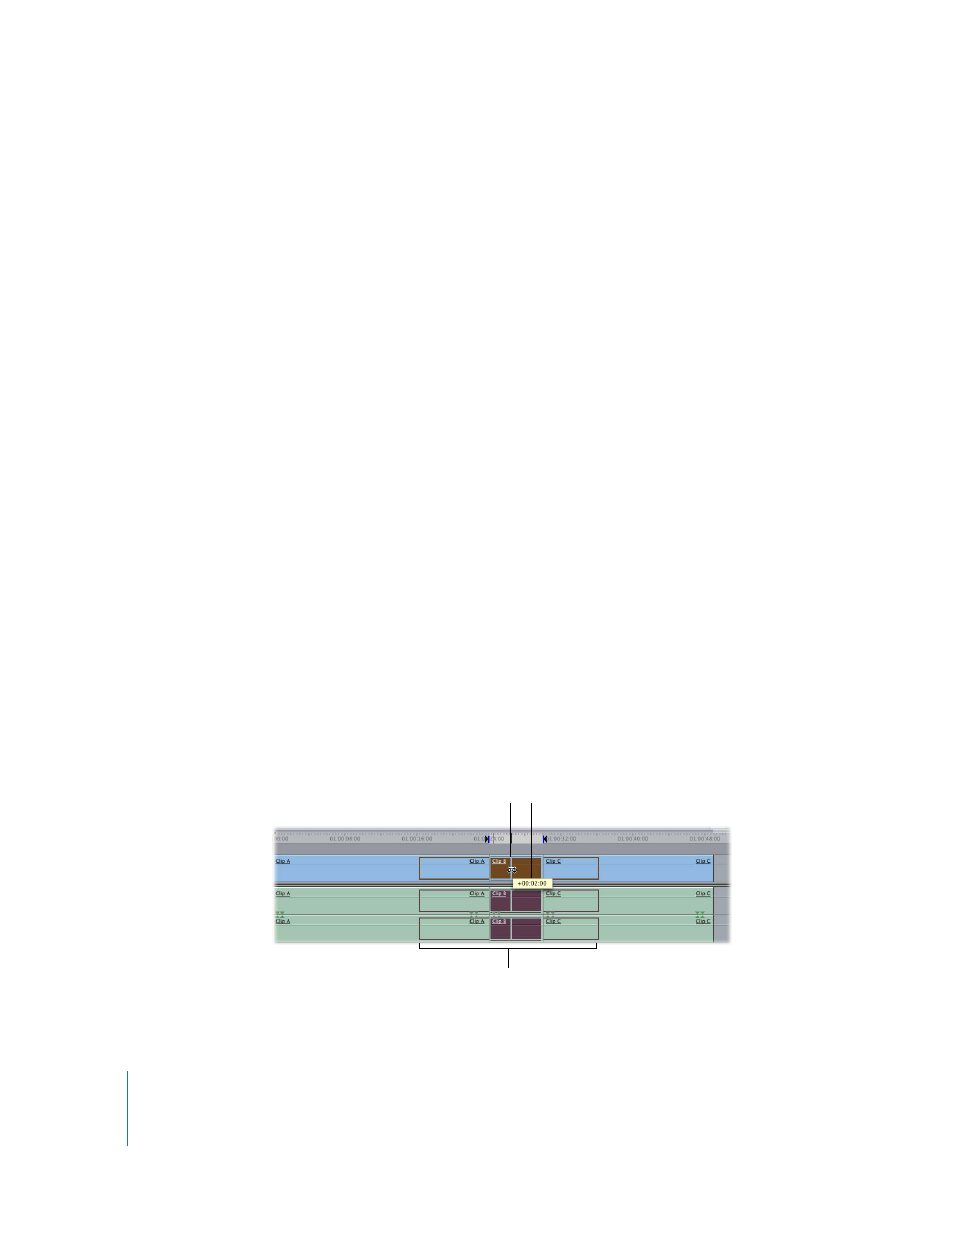
To slip a clip in the Timeline using the Slip tool:
1
Select the Slip tool in the Tool palette (or press the S key).
2
Click a clip, then drag it left or right.
As you drag, an outline of the entire range of that clip is shown, indicating the amount
of media available to the left and right of the current range selected in the clip.
This box shows how far the clip’s
In and Out points are slipping.
Drag point
Entire length of media
file shown during slip