Overview of the capture window, P. 177) – Apple Final Cut Express 4 User Manual
Page 177
Chapter 14
Capturing Your Footage to Disk
177
IV
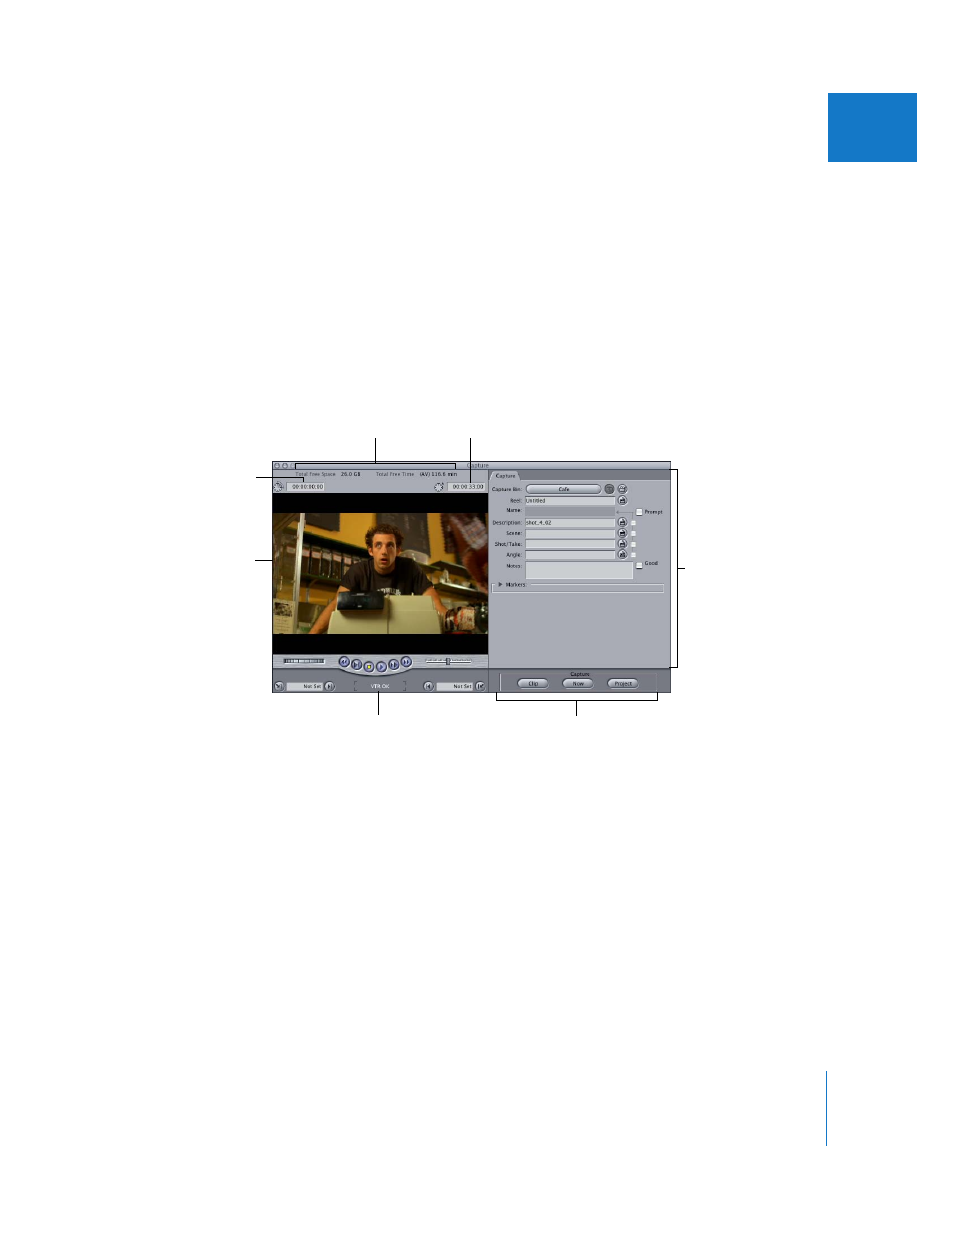
Overview of the Capture Window
When you want to transfer footage from your tapes to your Final Cut Express system,
you use the Capture window. The Capture window provides controls for controlling a
VTR or camcorder, previewing video from tape, setting In and Out points, adding
descriptive information to clips, and capturing media to your disk.
Note: Before you use the Capture window, make sure your camcorder or VTR is
properly connected and that you’ve chosen an appropriate Easy Setup. For more
information, see Chapter 11, “
To open the Capture window:
m
Choose File > Capture (or press Command-8).
 Preview area: This area (at the left of the window) is where you view video as you
capture it, and contains transport and marking controls and timecode fields. If your DV
camcorder or deck is not on or there is no tape inserted, you’ll see color bars or black.
 Available hard disk space and time: At the top of the window, Final Cut Express
displays the amount of available space on the current scratch disk and the amount of
capture time available. The time available depends on the data rate of the video
format of your current Easy Setup.
 Timecode Duration field: Displays the duration of the section of tape you’ve marked
for capture, based on the In and Out points you set.
Current Timecode field
Capture buttons
Preview area
Capture tab
Device status
Timecode Duration field
Available disk
space and time