Configuring the dhcp relay agent at the cli, Dhcp relay agent configuration task list – H3C Technologies H3C SecPath F1000-E User Manual
Page 219

194
c.
Enter 10.1.1.1 for IP Address.
d.
Click Apply.
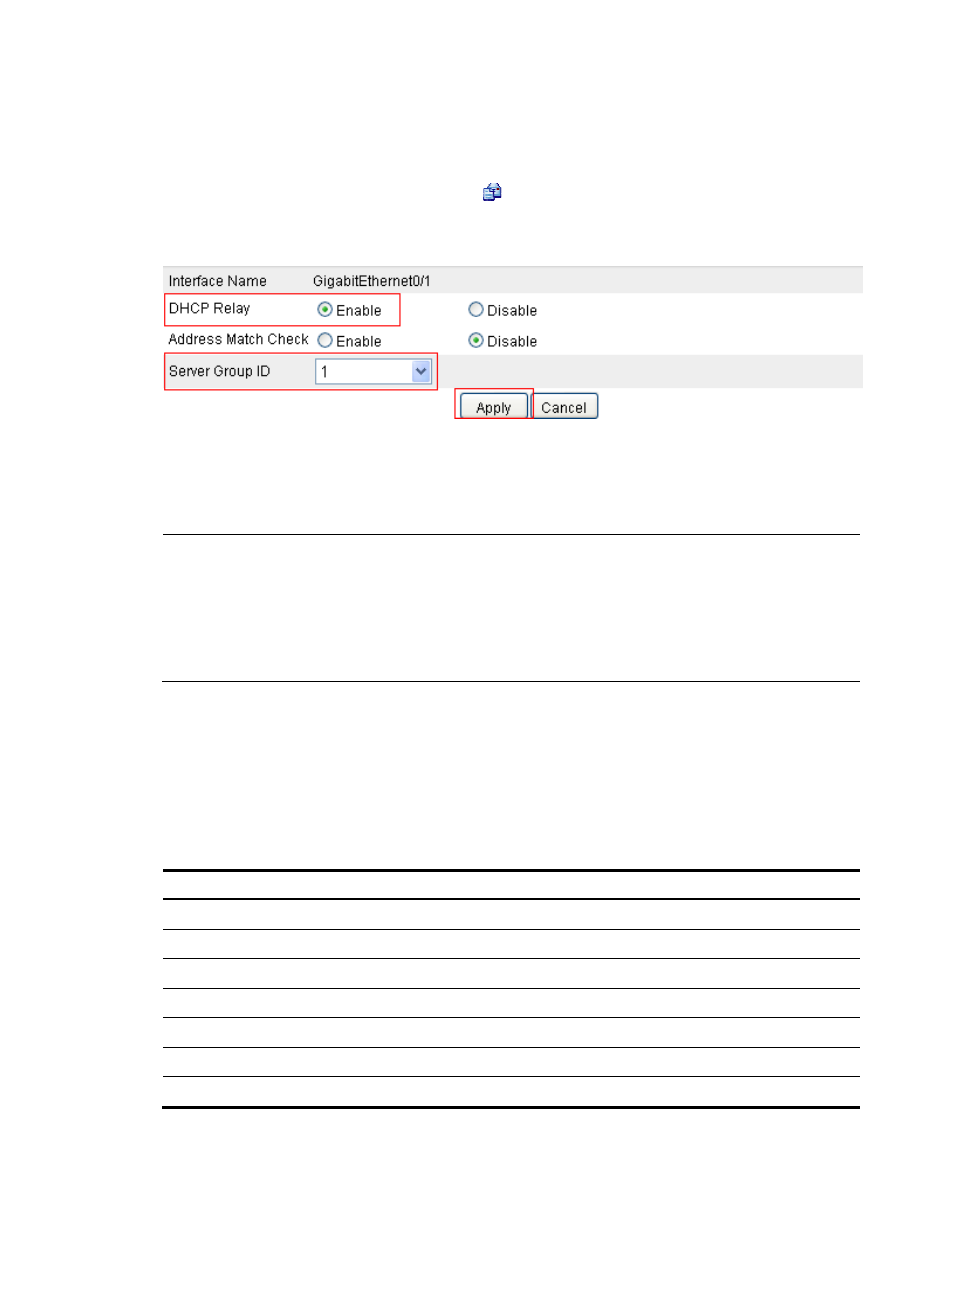
# Enable the DHCP relay agent on GigabitEthernet 0/1.
a.
In the Interface Config field, click the
icon of GigabitEthernet 0/1 and perform the
following configuration, as shown in
.
Figure 115 Enabling DHCP relay agent on interface GigabitEthernet 0/1
b.
Select the Enable option in the DHCP Relay field.
c.
Select 1 for Server Group ID.
d.
Click Apply.
NOTE:
•
Performing configuration on the DHCP server is also required to guarantee the client-server
communication via the DHCP relay agent. For the DHCP server configuration, see "Configuring DHCP
server."
•
Because the DHCP relay agent and server are on different subnets, you need to configure a static route
or dynamic routing protocol to make them reachable to each other.
Configuring the DHCP relay agent at the CLI
DHCP relay agent configuration task list
Complete the following tasks to configure the DHCP relay agent:
Task Remarks
Required
Enabling the DHCP relay agent on an interface
Required
Correlating a DHCP server group with a relay agent interface
Required
Configuring the DHCP relay agent security functions
Optional
Enabling client offline detection
Optional
Configuring the DHCP relay agent to release an IP address
Optional
Configuring the DHCP relay agent to support Option 82
Optional
- H3C SecPath F5000-A5 Firewall H3C SecPath F1000-A-EI H3C SecPath F1000-E-SI H3C SecPath F1000-S-AI H3C SecPath F5000-S Firewall H3C SecPath F5000-C Firewall H3C SecPath F100-C-SI H3C SecPath F1000-C-SI H3C SecPath F100-A-SI H3C SecBlade FW Cards H3C SecBlade FW Enhanced Cards H3C SecPath U200-A U200-M U200-S H3C SecPath U200-CA U200-CM U200-CS H3C SecBlade LB Cards H3C SecPath L1000-A Load Balancer
