Recording audio in the timeline, Enabling tracks for recording – Apple Soundtrack Pro 3 User Manual
Page 380
Recording Audio in the Timeline
You record in the Timeline by enabling a track for recording, setting the playhead, then
clicking Record. You can record a single take or record multiple takes by turning on cycling
before you start recording. When you finish recording, your recorded audio appears in a
track in the Timeline. If you record multiple takes, you can audition each take to choose
which one you want to use in your project. You can also assemble composite takes by
splitting and combining your recorded takes.
Enabling Tracks for Recording
Before you start recording, you enable the tracks you want to record to. You can record
audio only to tracks, not to busses or submixes. If no track is enabled for recording, a new
track is created below the existing tracks, and the take appears on the new track when
you click the Record button.
Note: For details on multitrack recording, see
.
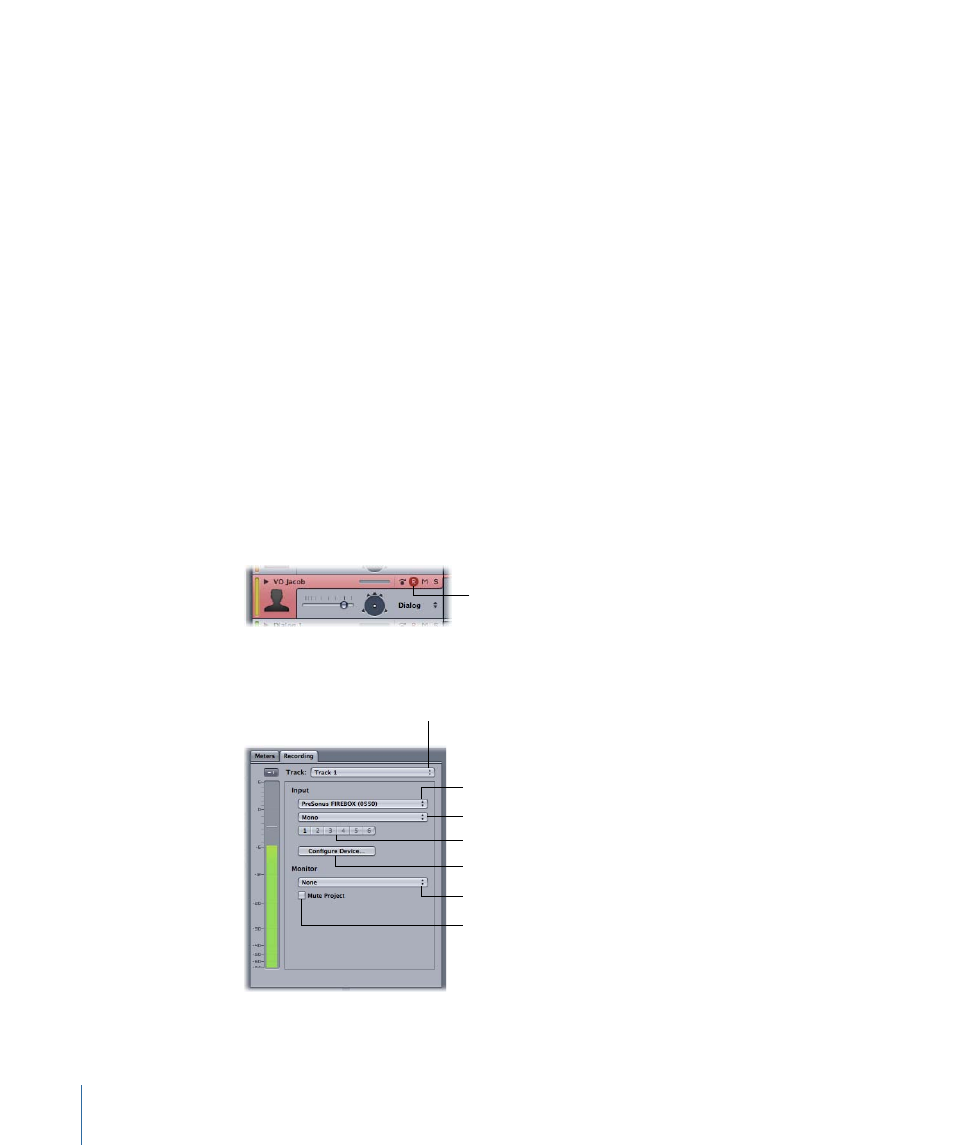
To enable a track for recording
Do one of the following:
µ
Choose Multitrack > Arm Selected Track for Recording (or press R).
µ
Click the Arm for Recording button (the red letter R) in the track’s header (or Mixer channel
strip).
Arm for Recording
button
The Recording tab becomes active and shows the current recording settings. You can
adjust recording settings before you start recording or between recordings.
Input routing buttons
Input Device pop-up menu
Configure Device button
Monitor pop-up menu
Mute Project checkbox
Track pop-up menu
Input Channel pop-up menu
380
Chapter 16
Recording Audio in Soundtrack Pro