Apple Soundtrack Pro 3 User Manual
Page 202
To lift properties from a clip in the Timeline
1
Click the Lift tool at the top of the Timeline (or press UU).
The Sound Palette appears. As you move the pointer over clips in the Timeline, it changes
into the Lift pointer.
2
If you want to limit the type of properties lifted, deselect any of the three checkboxes at
the top of the Sound Palette:
• Lift Equalization Print: When this checkbox is turned on, the Lift command copies the
average frequency spectrum of the selected clip.
• Lift Voice Level: When this checkbox is turned on, the Lift command copies the average
amplitude of the selected clip. The algorithm used when this option is turned on is
designed to focus on vocal qualities only; non-dialogue artifacts like loud crashes or
coughs are ignored when calculating the average amplitude.
• Lift Process Items: These include processing effects in these categories: Dynamics,
Distortion, EQ and Filter, Modulation, Reverb/Delay, Miscellaneous, and Mac OS.
3
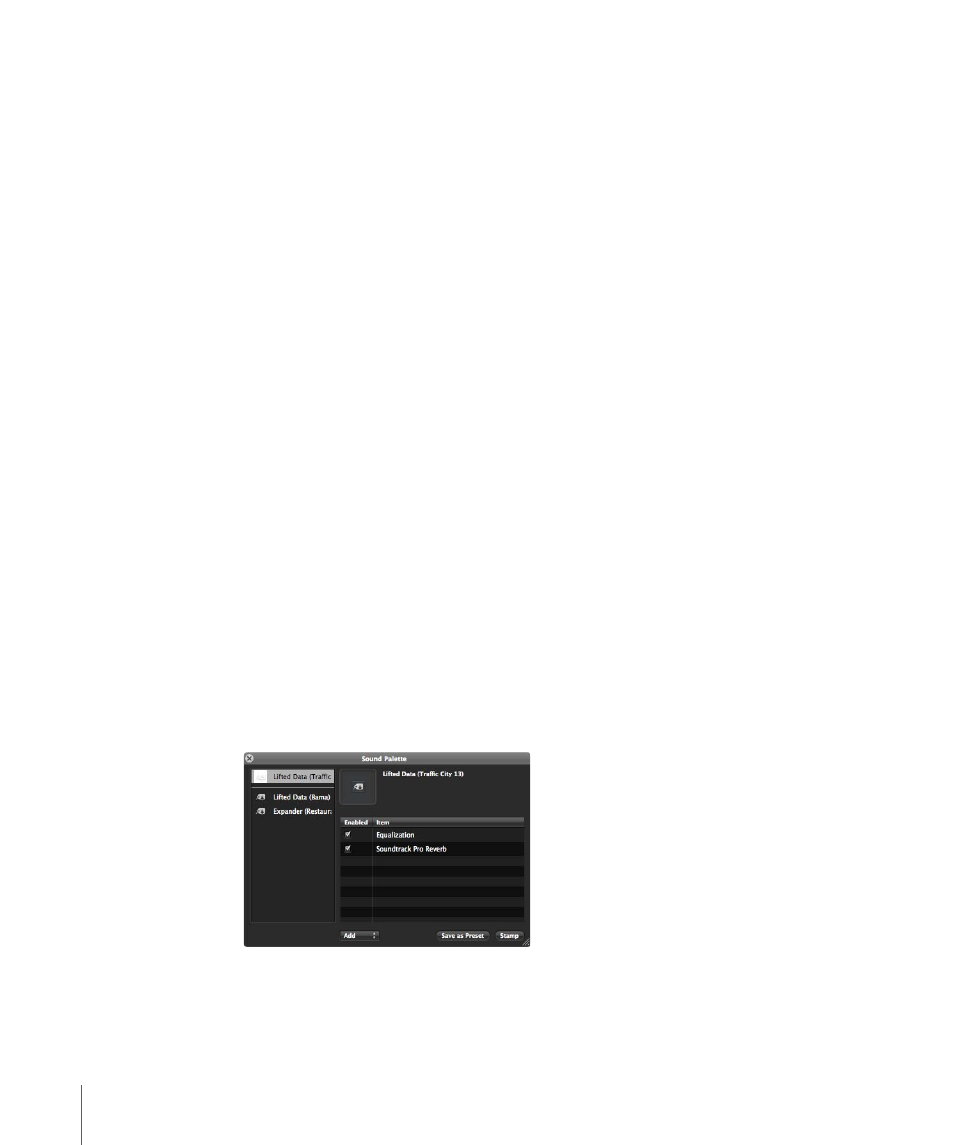
Click a clip in the Timeline whose properties you want to lift.
Soundtrack Pro creates a temporary template named Lifted Data (Track Name) with Track
Name being the track holding the source clip. The clip properties appear in the list on
the right of the Sound Palette HUD. The pointer immediately changes to the Stamp
pointer, ready for you to stamp the template of lifted properties to another clip. The
properties in the Sound Palette template appear in the same order they appear in the
Actions tab for the source clip.
To stamp properties on one or more clips in the Timeline
1
If you are stamping on more than one clip, select the target clips in the Timeline.
2
In the Sound Palette, select the template or preset containing the properties you want
to stamp. (This is only necessary if there are already presets on the left side of the Sound
Palette.)
202
Chapter 7
Editing Audio in the Multitrack Timeline