Slipping take regions, Adding and deleting takes – Apple Soundtrack Pro 3 User Manual
Page 300
µ
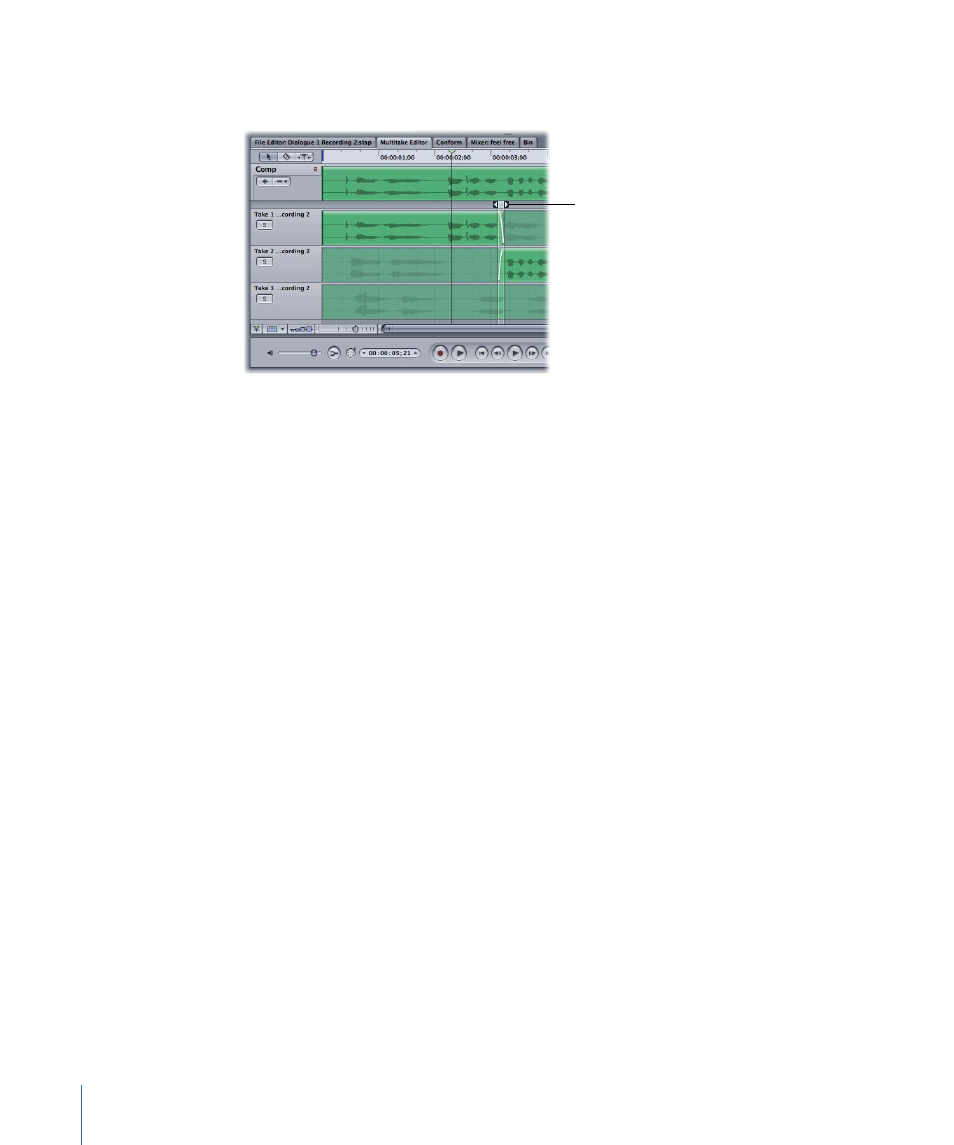
Drag the left or right arrow handle at the top of a transition point to create a crossfade
between two takes, then double-click the fades to use the Fade Selector.
Drag the transition point
handles to create a
crossfade between takes.
You can also adjust the fade type by double-clicking either part of the crossfade. For more
information on fade types, see
Creating Fade-Ins and Fade-Outs in the Timeline
To delete a transition point
1
Select the vertical transition point line.
2
Press Delete.
Slipping Take Regions
Because it’s common for a particular take to be good but out of sync, you can slip (offset)
an individual take region.
To slip a take region
1
Command-Option-click the take region.
2
Without releasing the mouse button, drag to the left or to the right.
For more information about slipping (the offset of ) a take region, see
.
Adding and Deleting Takes
You can easily add audio files to a multitake clip. Added takes can be any audio files that
Soundtrack Pro supports. The takes do not have to be from the same recording session.
It is just as easy to remove takes from a multitake clip. The sample rate and the channel
valence (mono, stereo, surround, and so on) of the files you want to add must match the
sample rate and the channel valence of the files already in the Multitake Editor.
300
Chapter 11
Using the Multitake Editor