Apple Soundtrack Pro 3 User Manual
Page 38
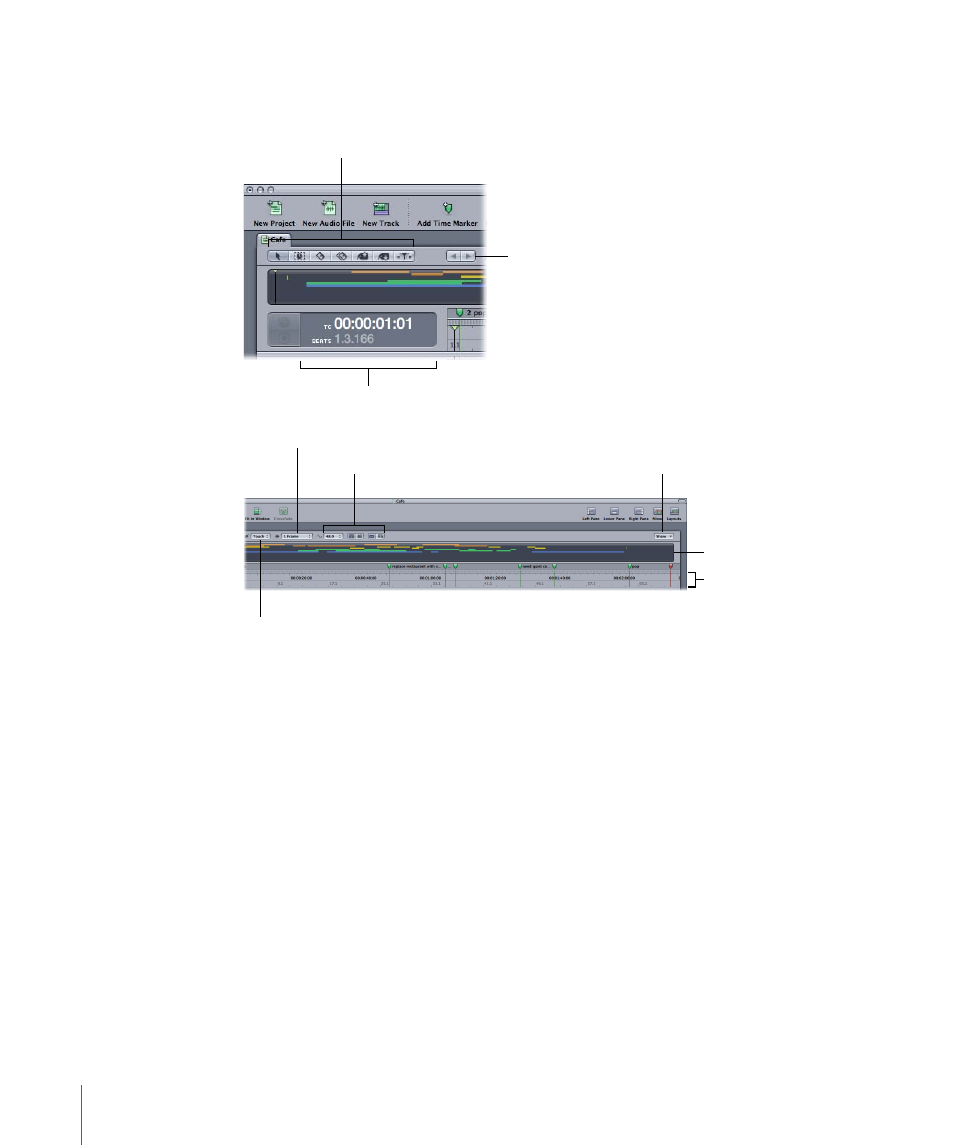
Overview of Timeline Controls
The Timeline is organized into three groups of horizontal rows called tracks, busses, and
submixes, as well as a video track, a podcast track, and a Master bus.
Time display
Previous and Next
Selection buttons
Timeline editing tools
Time ruler
Show pop-up menu
Automation Mode
pop-up menu
Project controls
Global Timeline view
Default Nudge Amount
pop-up menu
• Previous and Next Selection buttons: Move backward and forward through Timeslice
selections you’ve made in the waveform display.
• Timeline editing tools: Select items using the Selection (arrow) tool, make time-based
selections with the Timeslice tool, split audio clips using the Blade and Blade All tools,
copy and paste attributes with the Lift and Stamp tools, and scrub the Timeline with
the Scrub tool. For more information, see
Using the Timeline Editing Tools
• Automation Mode pop-up menu: Choose the mode for recording automation using
either the onscreen controls or an external control surface.
• Project controls: Set the project’s sample rate and other properties using these controls.
• Show pop-up menu: Choose whether the video track, podcast track, audio tracks, busses,
submixes, and master envelopes are visible in the Timeline.
• Global Timeline view: Shows a miniature view of the entire Timeline and the playhead
position, and lets you move quickly to different parts of a project.
• Time display: Shows the current playhead position in both Time-based and Beats-based
formats. You can set the playhead by typing a new playhead position in the time display.
38
Chapter 2
The Soundtrack Pro Interface