Network requirements, Network diagram, Configuration procedure – H3C Technologies H3C S3600 Series Switches User Manual
Page 249

1-7
Configuration Example for Auto Detect Implementation with VRRP
Network requirements
z
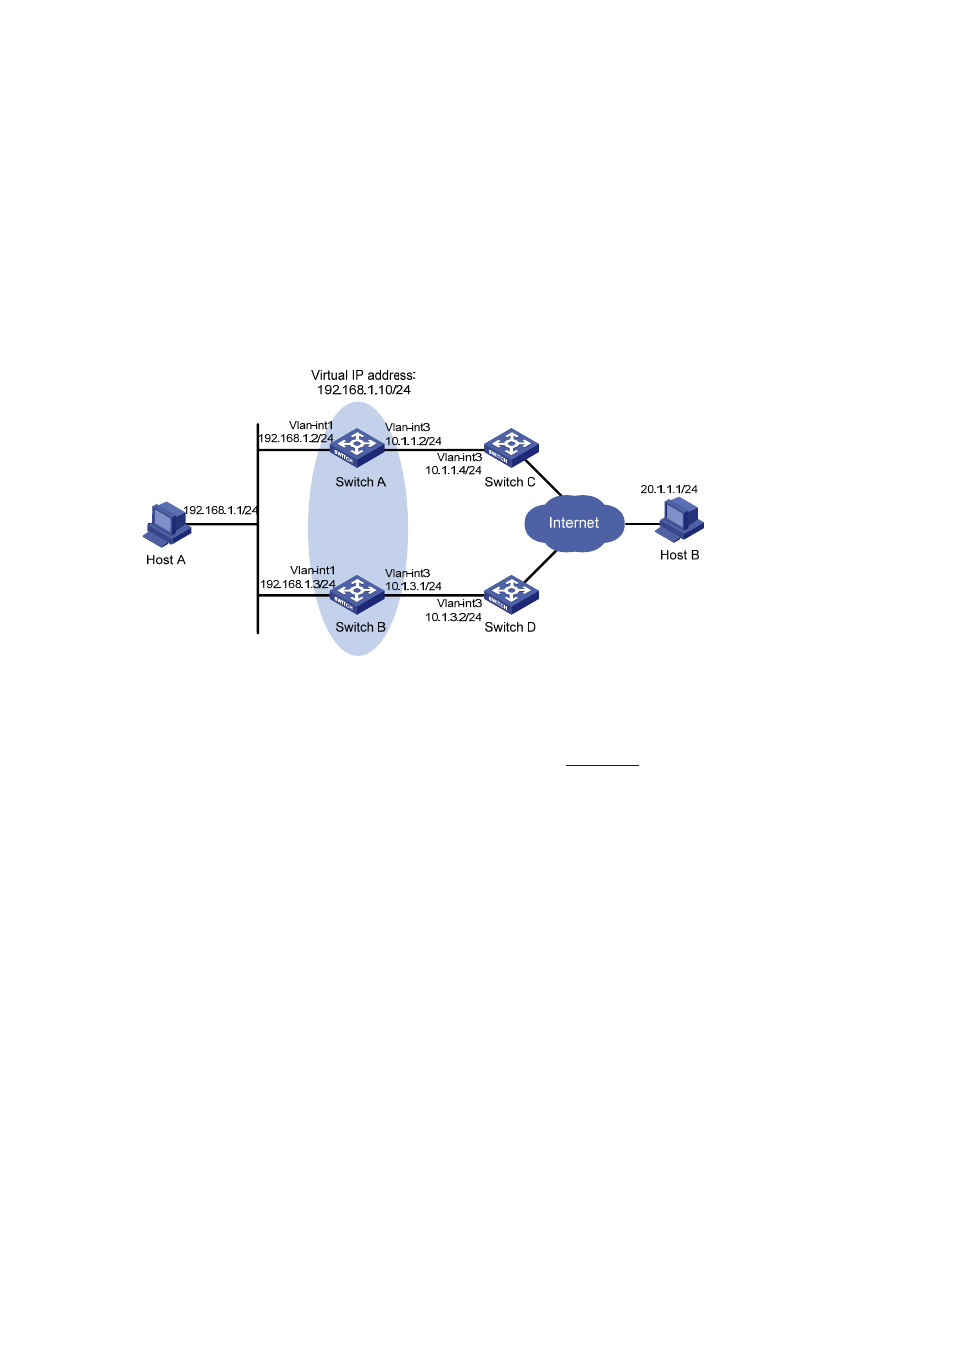
Switch A and switch B form VRRP group 1, whose virtual IP address is 192.168.1.10.
z
Packets sourced from Host A and destined for Host B is forwarded by Switch A under normal
situations.
z
When the connection between Switch A and Switch C fails, Switch B becomes the master in VRRP
group 1 automatically and the link from Switch B to Host B, the backup link, is enabled.
Network diagram
Figure 1-4 Network diagram for implementing the auto detect function in VRRP
Configuration procedure
Configure the IP addresses of all the interfaces as shown in
. The configuration procedure is
omitted.
z
Configure Switch A.
# Create detected group 9.
[SwitchA] detect-group 9
# Specify to detect the reachability of the IP address 10.1.1.4/24, setting the detect number to 1.
[SwitchA-detect-group-9] detect-list 1 ip address 10.1.1.4
[SwitchA-detect-group-9] quit
# Enable VRRP on VLAN-interface 1 and assign a virtual IP address to the VRRP group.
[SwitchA] interface vlan-interface 1
[SwitchA-Vlan-interface1] vrrp vrid 1 virtual-ip 192.168.1.10
# Set the VRRP group priority of switch A to 110, and specify to decrease the priority by 20 when the
result of detected group 9 is unreachable.
[SwitchA-Vlan-interface1] vrrp vrid 1 priority 110
[SwitchA-Vlan-interface1] vrrp vrid 1 track detect-group 9 reduced 20
z
Configure Switch B.
# Enable VRRP on VLAN-interface 1 and assign a virtual IP address to the VRRP group.
