Marks and bleeds options, Color management options – Adobe Acrobat 9 PRO Extended User Manual
Page 453
447
USING ACROBAT 9 PRO EXTENDED
Printing
Last updated 9/30/2011
Printer marks
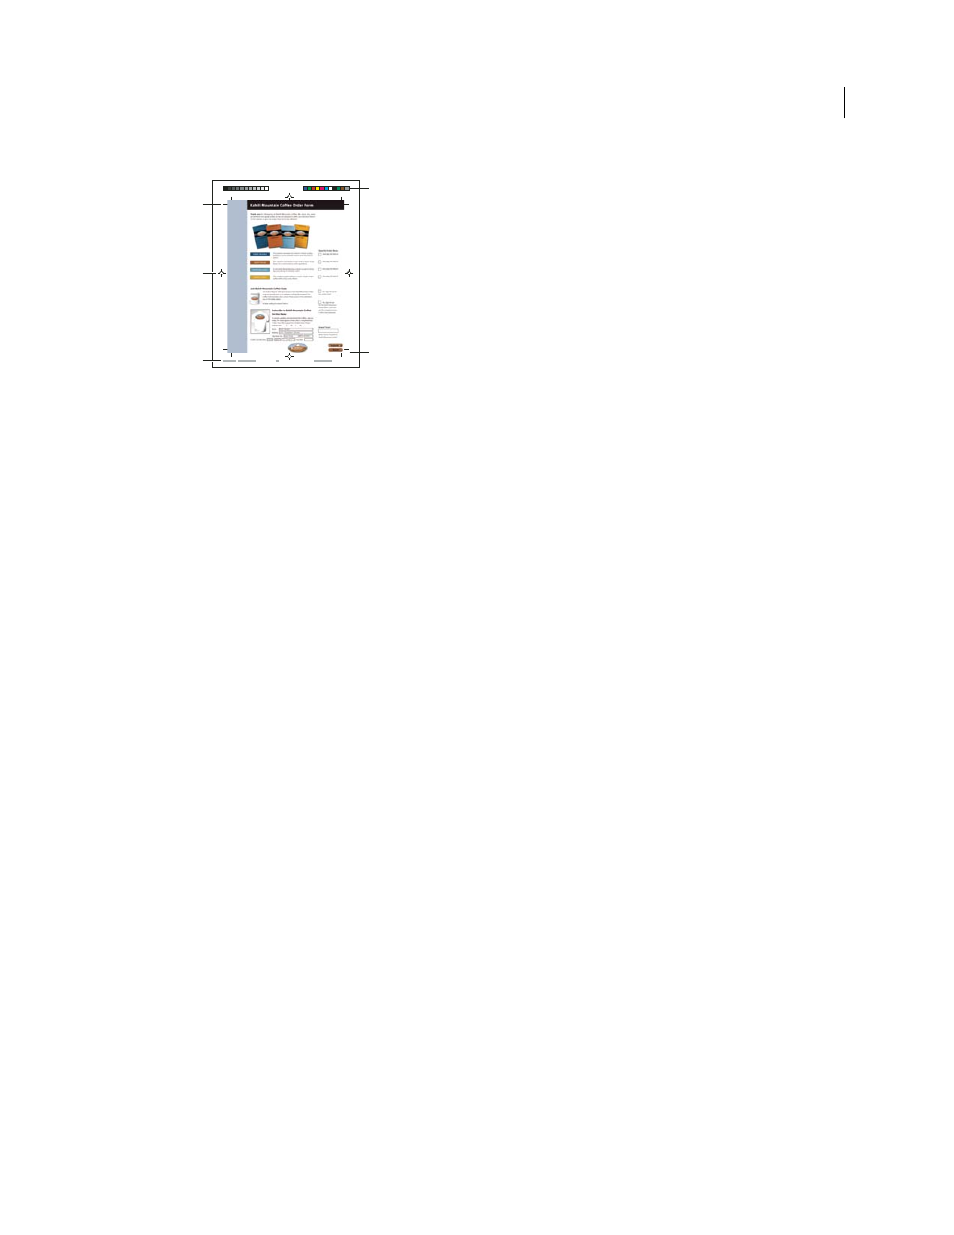
A. Trim marks B. Registration marks C. Page information D. Color bars E. Bleed marks
1 Select Marks And Bleeds on the left side of the Advanced Print Setup dialog box.
2 Choose the printer marks you want. The marks appear in the preview on the left side of the Advanced Print Setup
dialog box.
More Help topics
Marks And Bleeds options
All Marks
Creates all printer marks at once.
Line Weight
Determines the weight of the lines for trim, bleed, and registration marks.
Style
Determines the appearance of the marks. You can choose default InDesign marks, or marks from other
applications as listed.
Trim Marks
Places a mark at each corner of the trim area to indicate the PDF trim box boundaries.
Bleed Marks
Places a mark at each corner of the bleed box to indicate the PDF bleed box boundaries. A bleed box
defines the amount of extra area to image outside the defined page size.
Registration Marks
Places marks outside the crop area for aligning the different separations in a color document.
Color Bars
Adds a small square of color for each grayscale or process color. Spot colors converted to process colors are
represented using process colors. Your service provider uses these marks to adjust ink density on the printing press.
Page Information
Places page information outside the crop area of the page. Page information includes the filename,
page number, current date and time, and color separation name.
Color management options
Use the Color Management panel of the Advanced Print Setup dialog box to set options for printing color. For more
information about printing color, see “
Color Handling
Determines if color management is used and whether it happens in the application or at the printing
device.
•
Acrobat color management
Enables you to select an ICC Profile that describes the target output device.
A
D
E
C
B