Display the signatures panel, Validate a timestamp certificate – Adobe Acrobat 9 PRO Extended User Manual
Page 277
271
USING ACROBAT 9 PRO EXTENDED
Digital signatures
Last updated 9/30/2011
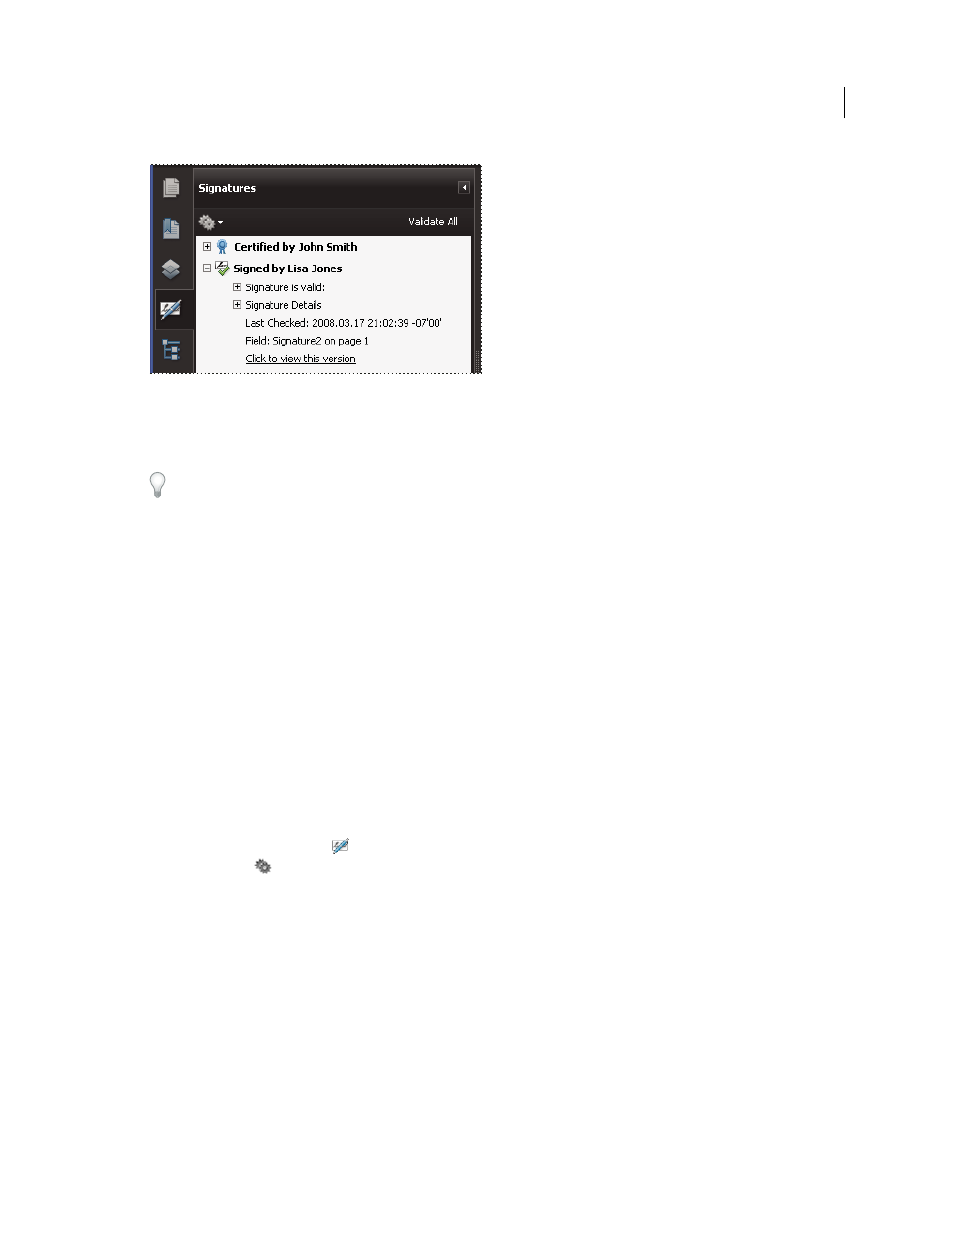
Verify signatures in the Signatures panel.
Display the Signatures panel
❖
Choose View > Navigation Panels > Signatures, or click the Signature Panel button in the document message bar.
You can right-click a signature field in the Signatures panel to do most signature-related tasks, including adding,
clearing, and validating signatures. In some cases, however, the signature field becomes locked after you sign it.
Validate a timestamp certificate
Review the Validity summary section of the Signature Properties dialog box for the validity status of a timestamp
certificate. The summary might display one of the following messages:
Signature date/time are from the clock on the signer's computer
The time is based on the local time on the signer’s
computer.
Signature is timestamped
The signer used a timestamp server and your settings indicate that you have a trust
relationship with that timestamp server.
Signature is timestamped but the timestamp could not be verified
You may need to establish a trust relationship with
the timestamp server. You can establish a trust relationship using the following instruction, but first you need to make
sure you are familiar with the timestamp server and trust it. Check with your system administrator.
To validate a signature that contains a timestamp, you must obtain the certificate for the timestamp server and add it
to your list of trusted identities. Otherwise, the timestamp appears as unverified, and you must validate the timestamp
manually.
1 Click the Signatures button
in the navigation pane, select the signature, and choose Validate Signature from the
options menu
.
2 Click the Signature Properties button in the Signature Validation Status dialog box.
3 In the Signature Properties dialog box, click the Date/Time tab to view the timestamp authority, and then click the
Show Certificate button. (This button appears in the Date/Time tab only if the signer used a timestamp server.)
4 In the Certificate Viewer, click the Trust tab to determine if the timestamp certificate is trusted. If it isn’t trusted
but you do trust it, click Add To Trusted Identities. If a certificate for the timestamp server isn’t listed, request one
from the signer.
More Help topics