Model tree overview – Adobe Acrobat 9 PRO Extended User Manual
Page 397

391
USING ACROBAT 9 PRO EXTENDED
3D models and geospatial PDFs
Last updated 9/30/2011
Model Tree overview
The Model Tree appears in the navigation pane on the left side of the work area. You can also open the Model Tree by
clicking the Toggle Model Tree button
on the 3D toolbar. Or, right-click the 3D model and choose Show Model Tree.
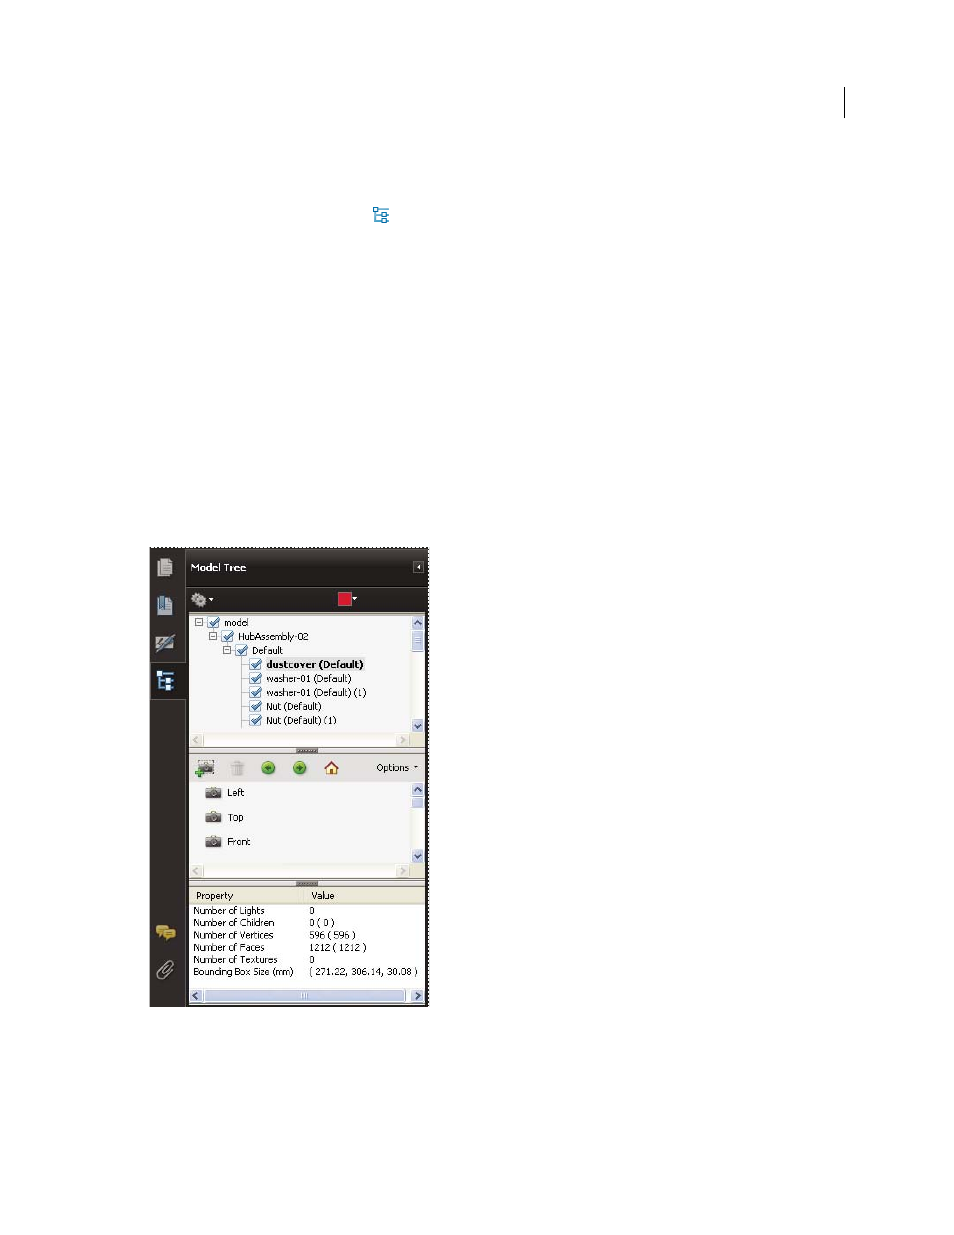
The Model Tree has three panes, each of which displays a specific type of information or controls.
Structure pane
The topmost pane shows the tree structure of the 3D object. For example, a 3D object depicting a car
has separate groups of objects (called nodes) for the chassis, engine, and wheels. In this pane, you can move through
the hierarchy and select, isolate, or hide various parts.
Product Manufacturing Information (PMI) appears as a group of items on the same hierarchical level as its related
object or assembly.
View pane
The middle pane lists the views that have been defined for the 3D object. When you change a view, click
one of the listed views to return the 3D model to a saved state. See “
You can also add to and edit views in the View pane. For example, after you isolate and rotate a part, you can save that
particular view, including the camera angle, background, lighting, and other attributes. This feature is not available for
Adobe Reader.
Object Data pane
The lower pane displays other information, including properties and metadata, if any, about the
object or part. You cannot edit this information for 3D objects in Acrobat.
Model Tree
A. 3D object hierarchy B. Saved views C. Part or object information
Note: To change the default behavior for the Model Tree, open the Preferences dialog box and under Categories, select 3D
and Multimedia. Then choose an option from the Open Model Tree On 3D Activation menu.
A
B
C
