Modifying keyframes – Apple Motion 2 User Manual
Page 433
Chapter 6
Keyframes and Curves
433
The Curve Graph
A graph appears to the right of the parameter list and displays the curves for your
selected parameters. The graph has a time ruler at the top and a zoom/scroll control at
the bottom that are identical to the corresponding controls in the Timeline. These allow
you to identify at what time keyframes appear, as well as see project markers, playback
In and Out points, and the playhead. Using the zoom controls at the bottom of the
graph, you can zoom in to obtain much more precise control over keyframe
positioning and curve shape. For more information on using the zoom/scroll controls,
see “
The body of the graph displays the keyframes and curves of active parameters. Each
parameter is a different color, though some colors are duplicated.
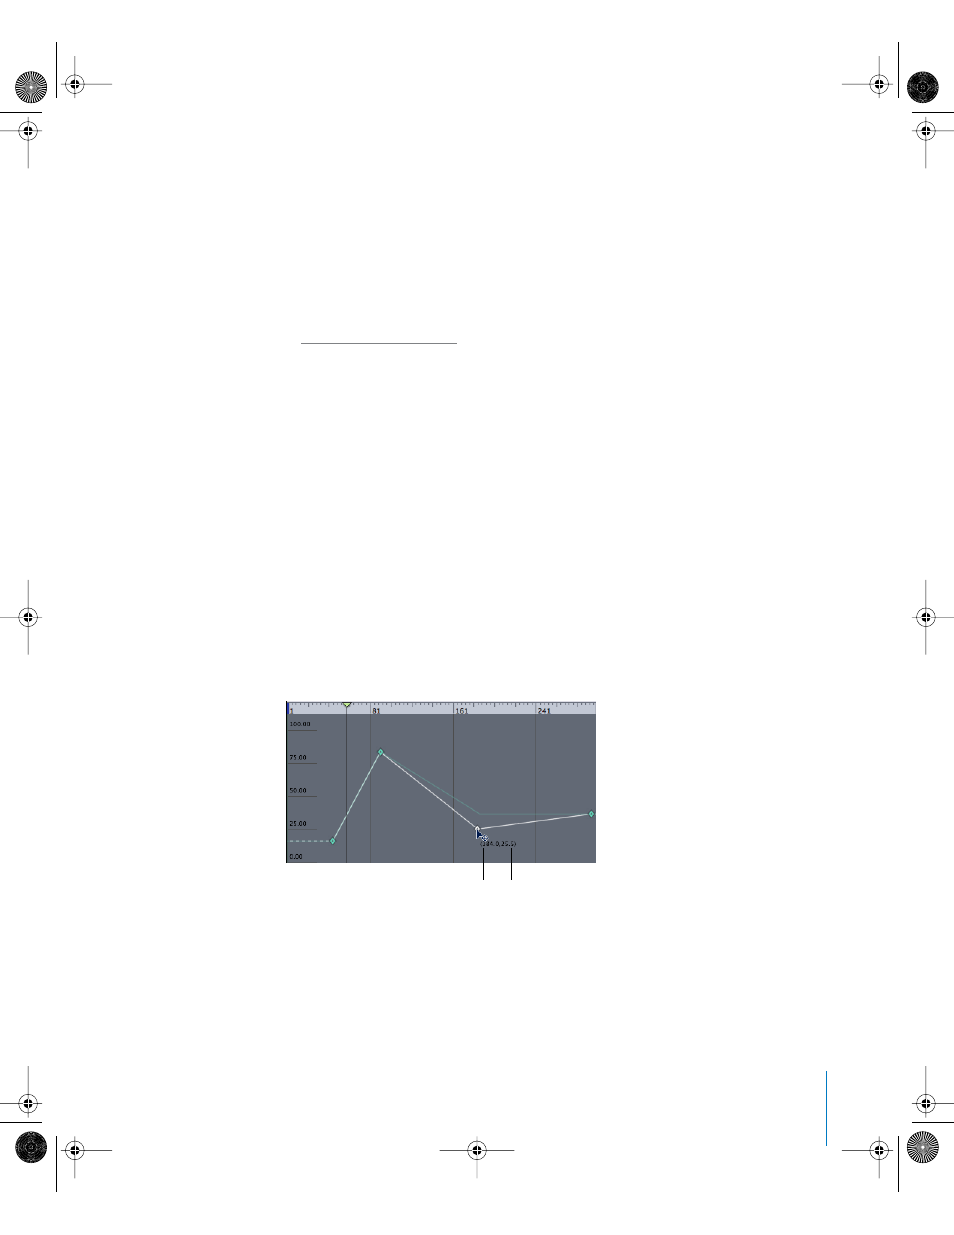
Modifying Keyframes
The Keyframe Editor provides an ideal environment for manipulating your keyframes
because you can see their values, placement in time, and how the changes you make
affect the interpolative curves surrounding your keyframes.
To change the value of a keyframe, do one of the following:
m
Click the keyframe you want to modify, and then drag the keyframe along the Y axis
(up and down) to change its value. To change its position in time, drag along the X axis
(left to right).
Press the Shift key while dragging to constrain movement to one axis.
When dragging a keyframe in the graph, numbers appear indicating the new position
and value of the keyframe. The first number is the frame number and the second
number is the value.
When you drag two keyframes closer together along the X axis, the transformation
between those values happens more quickly. When you drag keyframes farther apart
from each other, the change happens more slowly.
Value
Frame number
01112.book Page 433 Sunday, March 13, 2005 10:36 PM