Apple Motion 2 User Manual
Page 278
278
Chapter 4
Using the Timeline
Adding and Deleting Layers
Motion allows you to add and delete layers directly in the Timeline Layer list. When a
new layer is added, it always appears at the top of the list.
To add a layer:
m
Click the New Layer button (+).
You can also add a layer by dragging a new item into your project.
To delete a layer:
1
Select the layer you want to delete.
2
Click the Delete button (-).
You can use the Delete button to remove individual tracks in addition to layers. You can
also Control-click the layer, then choose Delete from the shortcut menu.
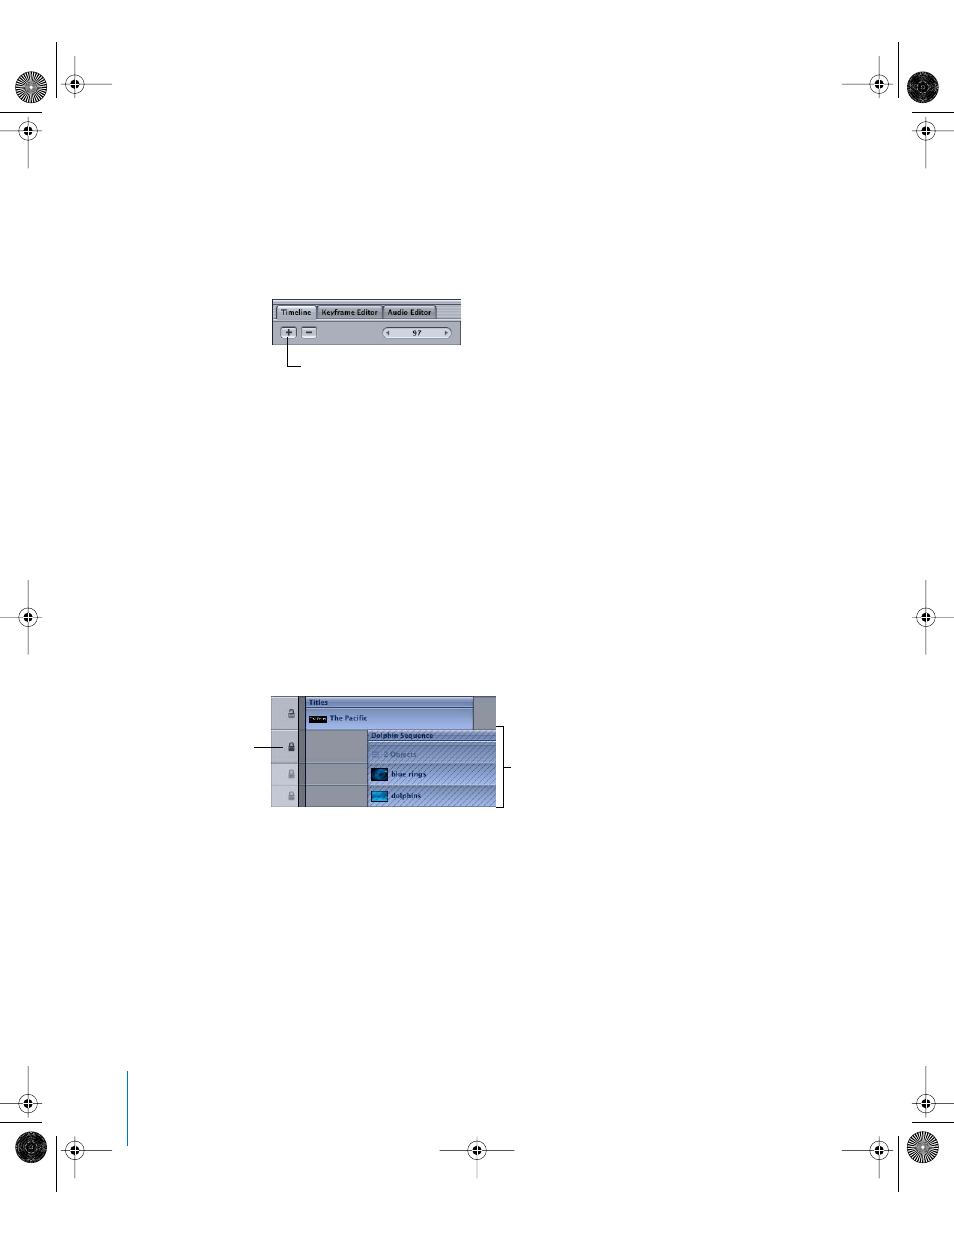
Locking Tracks
Occasionally, you may want to prevent changes to a particular item. The lock icon at
the right edge of the Timeline Layer list allows you to lock an object and prevent any
changes from affecting that object. An object that is locked in the Timeline also
appears locked in the Layers list in the Project pane. You can also lock a mask, filter, or
behavior.
When an item is locked, the bounding box in the Canvas turns from white to red. The
time bar for a locked object appears with a cross-hatched pattern in the Timeline.
Locked tracks still appear in the Canvas and are included in your final output. Although
you cannot make changes to a locked object, you can still copy or duplicate that object
or change the object’s layer order.
To lock a track:
m
Click the lock icon at the right edge of the Timeline Layer list.
Add New Layer button
Lock icon
Tracks appear locked in
the Timeline.
01112.book Page 278 Sunday, March 13, 2005 10:36 PM