Marking clip begin and end points – Grass Valley Kalypso User Manual V.15.0 User Manual
Page 306

306
Kalypso — User Manual
Section 3 — System Operation
Note
Verify that images will be grabbed (or grabbed and saved) into the correct
folder, in the directory display located below the Image Manager scrolling list,
lower-left. The image will be associated with this path in the Image Manager.
Once the image is recorded, it can be saved using the
Save
button, located
at the bottom-left of the center-bottom pane.
Marking Clip Begin and End Points
When an animation clip is recorded, there may be material at the beginning
or end that should not go to air (black, etc.). The clip can be trimmed for
playback.
1.
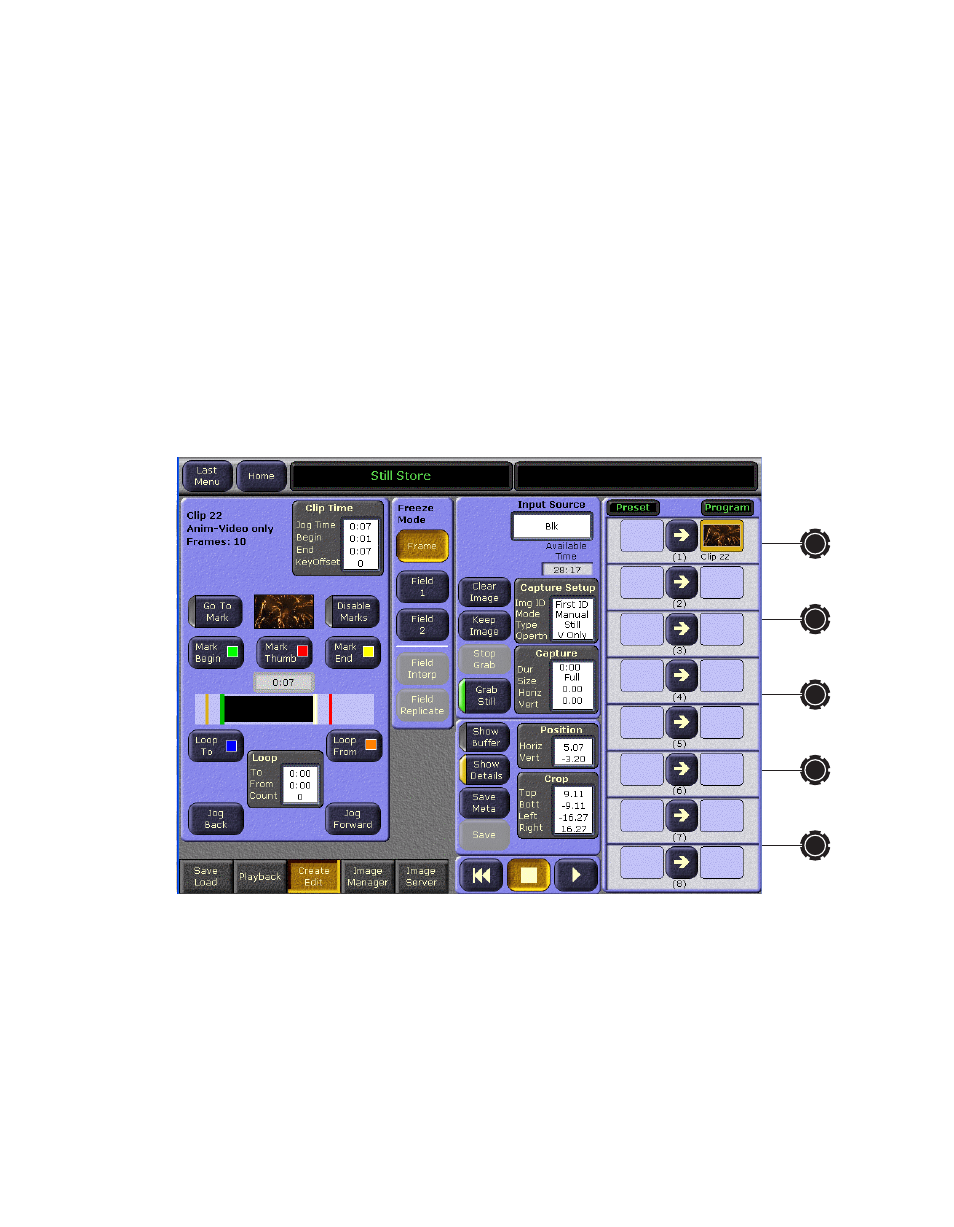
With the clip loaded to a Still Store output and that output delegated,
touch
Show Details
).
Figure 220. Still Store Create Edit Menu, Show Details
2.
Using the
Jog Time
soft knob or the
Jog Forward
and
Jog Back
buttons, go
to the first frame to be looped and press
Mark Begin
.
3.
Go to the last frame to be played and press
Mark End
.
4.
Touch
Save Meta
to save the clip with the modifications.
- Kalypso User Manual V.12.0 Apr 10 2007 Kalypso Reference Manual V.11.0 Kalypso Reference Manual V.12.0 Mar 16 2006 Kalypso Reference Manual V.12.0 Apr 10 2007 Kalypso Classic Installation V.11.0 Kalypso Classic Installation V.12.0 Mar 13 2006 Kalypso Classic Installation V.12.0 Apr 10 2007 Kalypso User Manual V.11.0 Kalypso User Manual V.12.0 Mar 16 2006 Kalypso Reference Manual V.15.1 Kalypso User Manual V.15.1 HD/Duo Kalypso Installation V.15.0 HD/Duo Kalypso Installation V.11.0 HD/Duo Kalypso Installation V.15.1 Kalypso Reference Manual V.15.0 Video Switcher
