Figure 132: snmpv3 message notification process – Allied Telesis AT-S62 User Manual
Page 381
AT-S62 Management Software Menus Interface User’s Guide
Section III: SNMPv3
381
In general, you focus on configuring security groups and then add and
delete users from the groups as needed. For example, you may want to
have two groups—one for manager privileges and a second one for
operator privileges. See Appendix B, “SNMPv3” on page 375 for an
example of manager and operator configurations.
After you configure an SNMPv3 user, you need to configure SNMPv3
message notification. This configuration is accomplished with the following
tables:
Configure SNMPv3 Notify Table
Configure SNMPv3 Target Address Table
Configure SNMPv3 Target Parameters Table
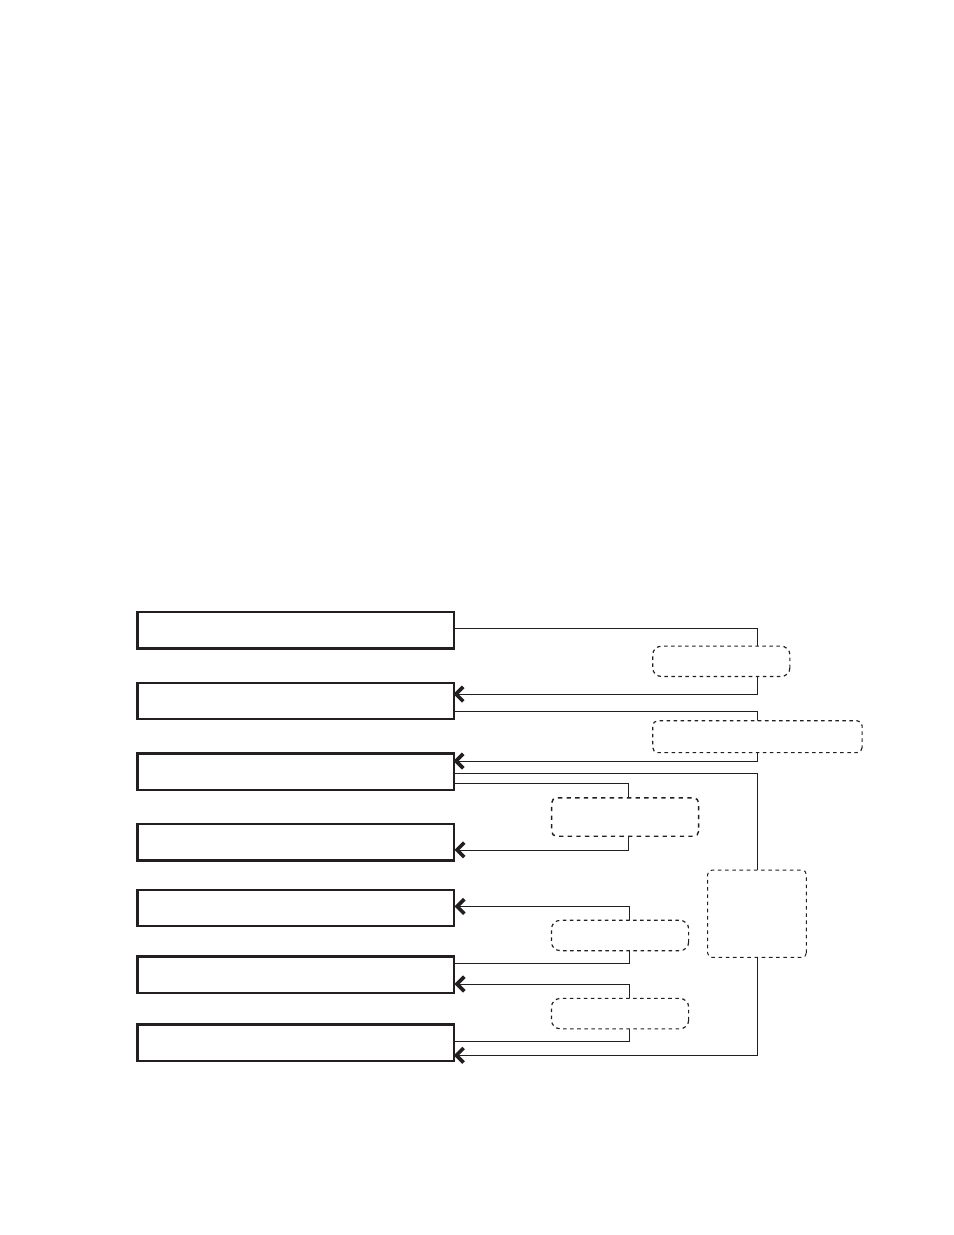
You start the message notification configuration by defining the type of
message you want to send with the SNMPv3 Notify Table. Then you
define a IP address that is used for notification in the Configure SNMPv3
Target Address Table. This is the IP address of the SNMPv3 manager.
Finally, you associate the trap information with a user by configuring the
Configure SNMPv3 Target Parameters Table.
See Figure 132 for an illustration of how the message notification tables
are linked.
Figure 132. SNMPv3 Message Notification Process
SNMPv3 Notify Table
SNMPv3 Target Address Table
SNMPv3 Target Parameter Table
SNMPv3 User Table
SNMPv3 View Table
SNMPv3 Access Table
SNMPv3 SecurityToGroup Table
Linked by View Name
Linked by Group Name
Linked by User Name
or Security Name
Linked by
Security Name
and
Security Model
Linked by Notify Tag
Linked by Target Parameter Name