Transparency, Fade in]/[fade out – Grass Valley EDIUS Pro v.7.4 Reference Manual User Manual
Page 326
Chapter 7 Applying Effects — Setting Effects
326
Transparency
You can overlay a video onto another, and transmit the upper video to display lower video, by changing the transparency of one of the
videos.
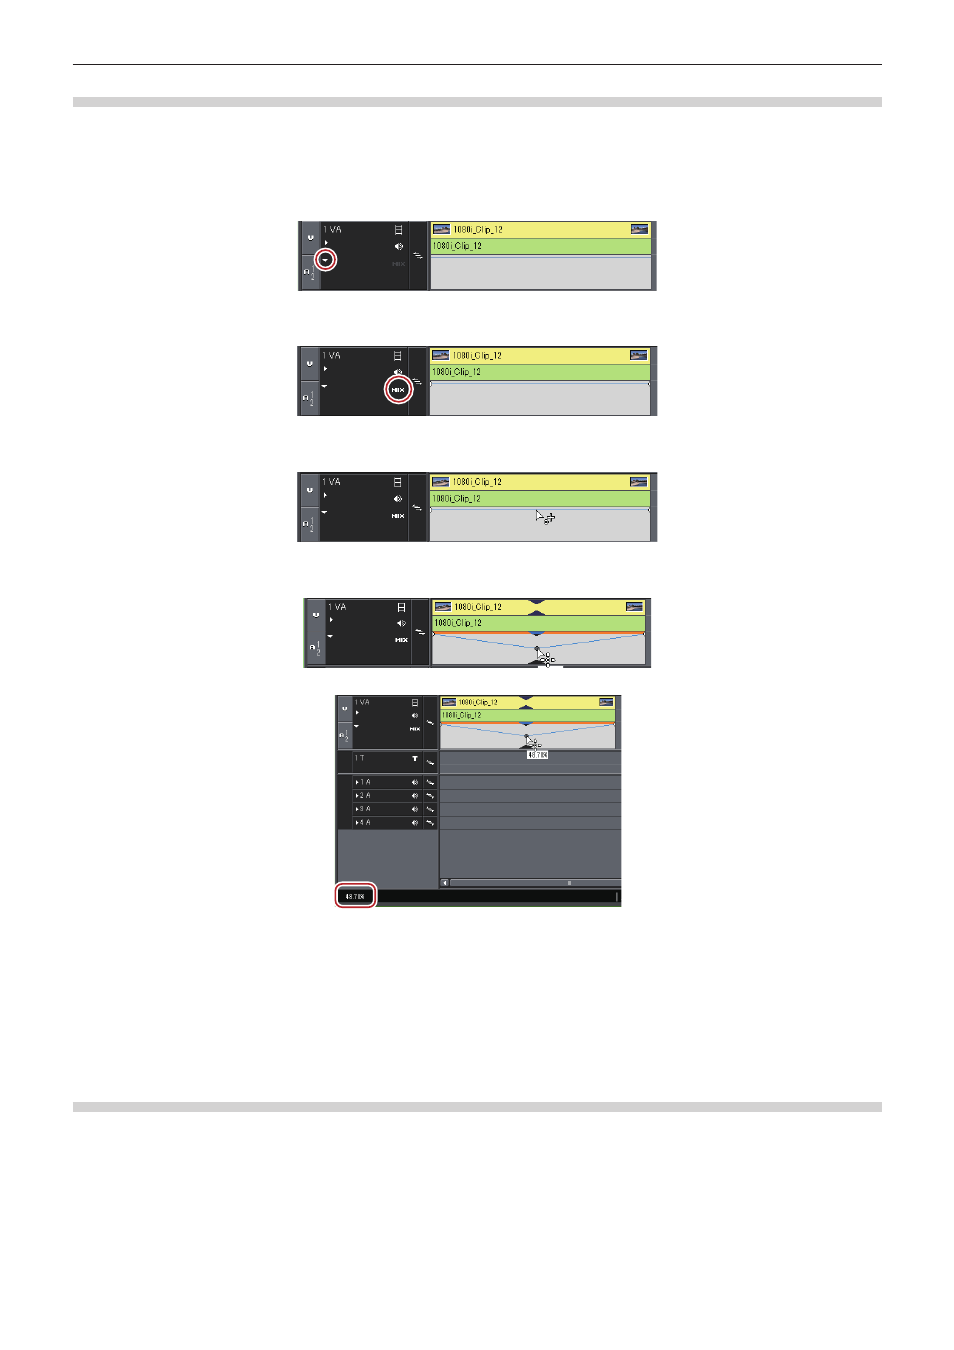
1)
Click the expand button of the mixer of the track panel where the clip whose transparency is to be
changed is placed.
2)
Click [Mixer].
3)
Click the rubber band to set the key frame.
4)
Drag up and down to adjust the transparency.
f
The transparency is displayed on lower left on the timeline. The video becomes completely transparent when the transparency is 0%.
f
Clips with transparency applied are displayed with an orange line.
2
f
To finely adjust the rubber band, drag it with [Ctrl] on the keyboard held down.
f
To change the whole rubber band, drag the line while pressing [Shift] key of the keyboard.
f
The operation procedure to adjust or delete the key frame with value entry is the same as in the audio rubber band.
“Adjusting by Entering Values” (w page 374)
“Initializing/Deleting Rubber Band Points” (w page 375)
[Fade In]/[Fade Out]
You can set [Fade In] to make the video appear gradually, or [Fade Out] to make the video disappear gradually.
1)
Select a clip to set fade in/fade out.
f
You can select multiple clips on separate tracks.
2)
Move the timeline cursor to the end position of the fade in effect (or the start position of the fade out
effect).