Trimming operation methods, Trimming on the timeline, 255 trimming operation methods – Grass Valley EDIUS Pro v.7.4 Reference Manual User Manual
Page 255
Chapter 6 Editing Timelines — Trimming Clips
255
Trimming Operation Methods
Trimming on the Timeline
You can perform trimming while still in the standard mode by selecting and dragging a cut point. The edit result of trimming is dependent on
the edit mode.
“Switching the Editing Mode” (w page 210)
The trimming type changes according to how the In and Out points are selected and keyboard combinations.
For details on respective trimming methods, see the respective page.
“In point trim/Out point trim” (w page 251)
“Ripple Trim” (w page 252)
“Split Trim” (w page 252)
“Slide Trim” (w page 253)
“Slip Trim” (w page 253)
“Rolling Trim” (w page 254)
1)
Select the cut point of the trimming clip.
f
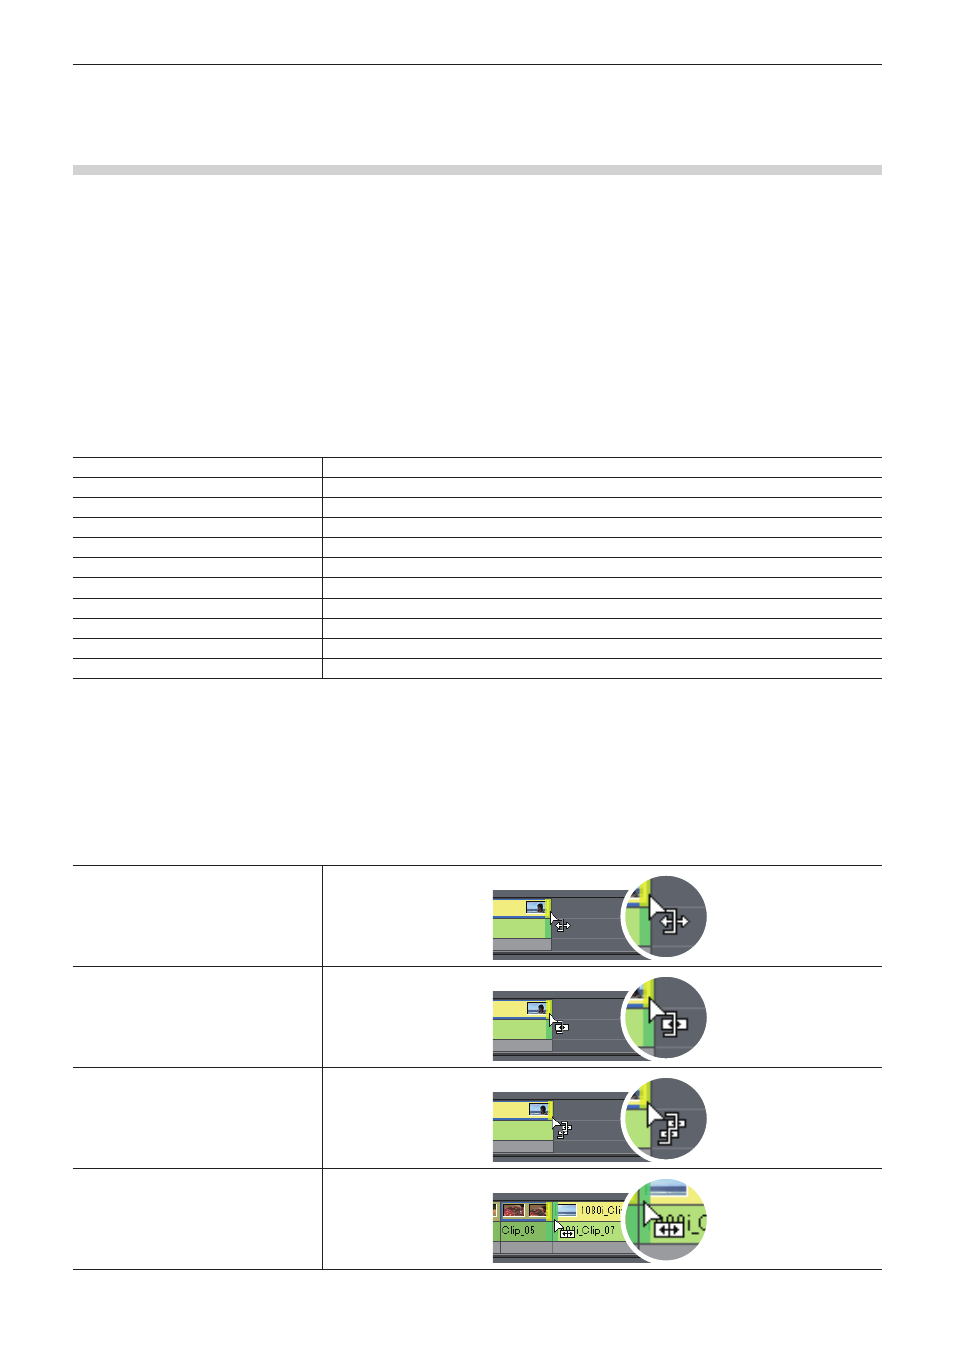
The cut point for each trimming type is selected as follows:
In point trim
Click the In point of the clip.
Out point trim
Click the Out point of the clip.
Ripple trim
Click [Shift] + In point or Out point.
Ripple trim (split)
Click [Alt] + [Shift] + In point or Out point.
Slide trim
Click [Ctrl] + [Shift] + In point or Out point.
Slide trim (split)
Click [Ctrl] + [Alt] + [Shift] + In point or Out point.
Split trim
Click [Alt] + In point or Out point.
Slip trim
Click [Ctrl] + [Alt] + center of the clip.
Rolling trim
Click [Ctrl] + [Shift] + center of the clip.
Transition trim
Click the In or Out point of transition (clip transition, track transition)/audio cross fades.
Transition trim (both edges)
Click [Shift] + clip transition/audio cross fade.
2
f
Ripple trimming is also possible with the ripple mode off.
2)
Move the mouse cursor to the cut point or clip, and drag to the left and right when the mouse cursor
changes shape.
f
Adjust the range to be used while checking the video displayed on the preview window.
f
The mouse cursor changes shape according to the trim mode.
In point trim/Out point trim
Ripple trim
Ripple trim (split)
Slide trim