O 10) i – Grass Valley EDIUS Pro v.7.4 Reference Manual User Manual
Page 146
Chapter 4 Importing Sources — Capturing and Importing
146
1
Alternative
f
Click [Add to Batch Capture List] on the Player.
f
Click the [Add to Batch Capture List] list button on the Player, and click [Video and Audio].
f
Only the video part or audio part is captured when the [Add to Batch Capture List] list button on the Player is clicked and [Video Only] or
[Audio Only] is clicked.
f
Adding to batch capture list:
[Ctrl] + [B]
7)
Repeat steps 3) to 6).
8)
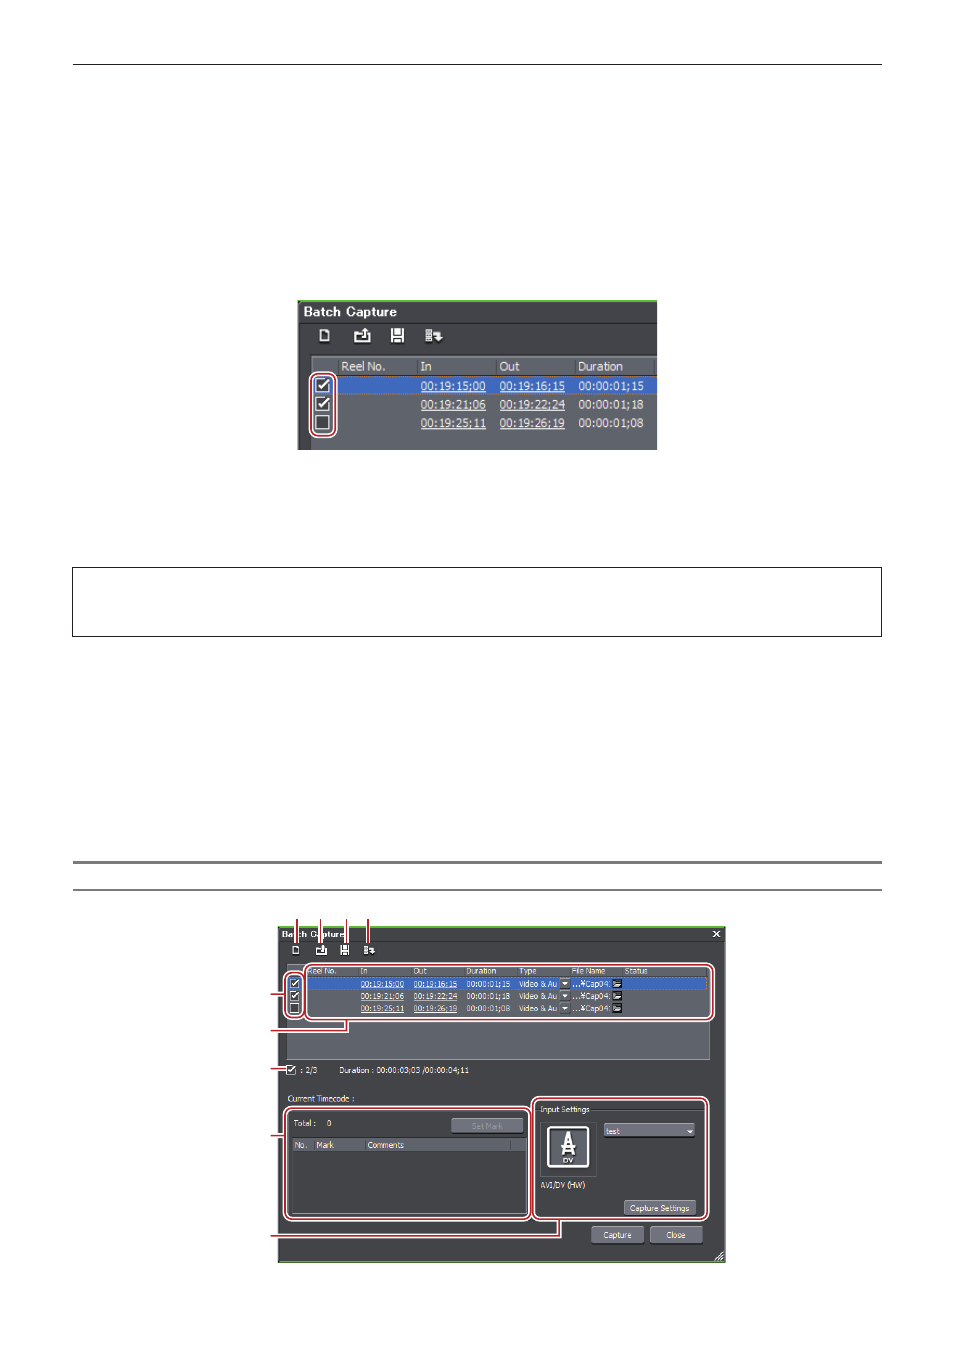
Turn on the check buttons for the sources to capture from the list in the [Batch Capture] dialog box.
f
The check buttons are turned on immediately after the sources are added to the list.
9)
Click [Capture] in the [Batch Capture] dialog box.
f
If a reel name is not set in step
4), capturing starts and the progress is displayed in [Status] of the [Batch Capture] dialog box. The
captured clip is registered to the bin.
f
If you set a reel name in step
3
Note
f
When HDV is batch-captured in “MPEG TS” format, the result of [Status] sometimes ends not as 100% but as “101%” or “102%”. This
is normal operation due to the specifications for capturing MPEG by the GOP.
10)
Insert a tape in your camera, and select the corresponding reel name from the [Please insert the
tape, and select the reel name.] list.
f
The time required for capturing is indicated next to the reel name.
11)
Click [OK].
f
Capture of the source corresponding to the selected reel name starts, and the progress is displayed in [Status] of the [Batch Capture]
dialog box. The captured clip is registered to the bin.
f
If you set multiple reel names, repeat steps
[Batch Capture] Dialog Box
(1) (2) (3)(4)
(5)
(6)(7)
(8)(9)
(10)
(11)
(12)